Easy No-Knead Buttery Dinner Rolls
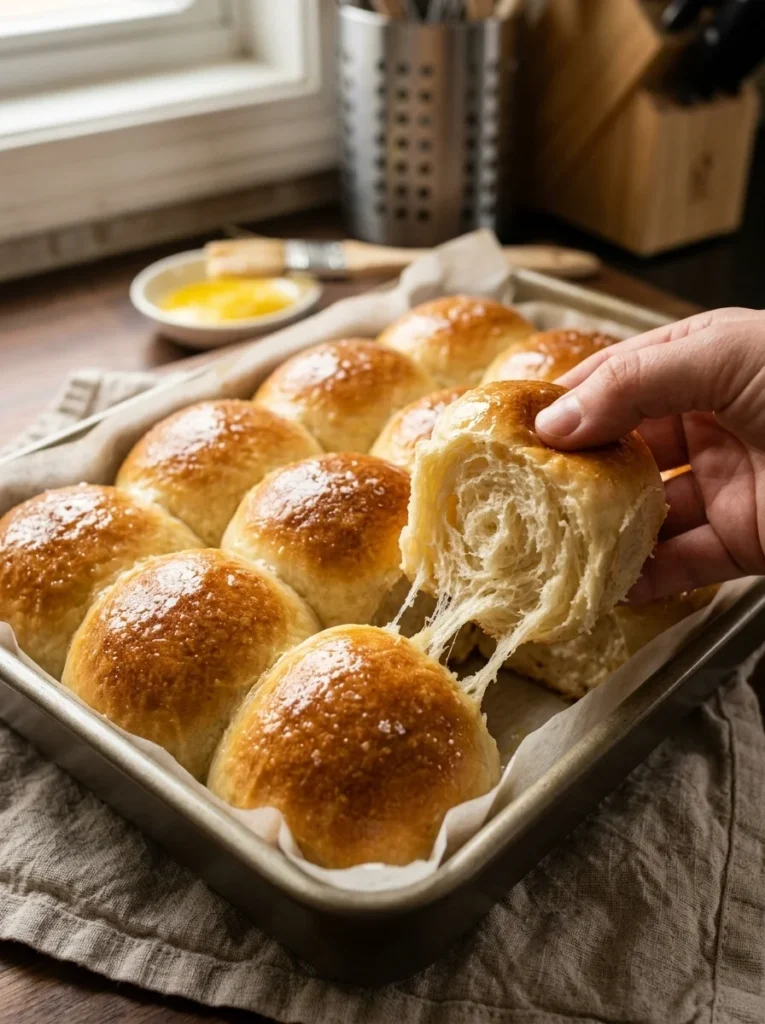
Soft, golden dinner rolls with buttery tops have a way of making the whole table feel more inviting. These rolls bake close together, creating tender sides that pull apart easily, while the tops develop just enough color to hold a generous brushing of melted butter.
If working with yeast has ever felt like too much effort, this recipe is a comfortable place to begin. There is no mixer required and no long session of kneading at the counter. A bowl, a sturdy spoon, and a little rising time do most of the work.
The dough is intentionally soft and slightly sticky. Give it time to rise, handle it gently when shaping, and resist adding too much flour. Those small details help produce the pillowy rolls that make everyone reach for one more.
Recipe at a Glance
- Prep time: Approximately 20 minutes of active work
- First rise: 60–90 minutes
- Second rise: 30–45 minutes
- Bake time: 20–25 minutes
- Cooling time: 10 minutes before serving
- Total time: Approximately 2 hours 20 minutes to 3 hours 10 minutes
- Servings: 12
- Yield: 12 dinner rolls
- Equipment: Large mixing bowl, sturdy spoon or spatula, measuring tools or kitchen scale, dough scraper or knife, and a 9×13-inch baking pan
Rising times depend on room temperature. A cool kitchen may require additional time.
Why You’ll Love These Dinner Rolls
- No kneading required: Mix the dough thoroughly, then let time develop its structure.
- No stand mixer needed: A bowl and spoon are enough.
- Soft, tender centers: Milk, butter, and an egg enrich the dough.
- Buttery finish: Melted butter brushed over the warm rolls adds flavor and softens the tops.
- Easy to share: Twelve rolls fit together in one baking pan.
- Useful for many meals: Serve them with soup, roast chicken, holiday dinners, or a simple weeknight casserole.
What Are No-Knead Buttery Dinner Rolls?
These are yeast-raised dinner rolls made from a soft dough enriched with milk, butter, and an egg. Instead of developing the dough through repeated kneading, you mix it thoroughly and allow it to rest and rise.
As the flour absorbs the liquid and the dough ferments, it gains enough structure to shape into individual rolls. The dough remains softer and stickier than a firm bread dough, which helps keep the baked centers tender.
“No-knead” still means giving the ingredients a thorough mix. There should be no dry flour hiding at the bottom of the bowl, and the dough should look cohesive before the first rise.
The rolls bake close together in a pan. As they expand, their sides meet, creating the soft edges and pull-apart texture that make them especially good for passing around the table.
Ingredients
For the Dough
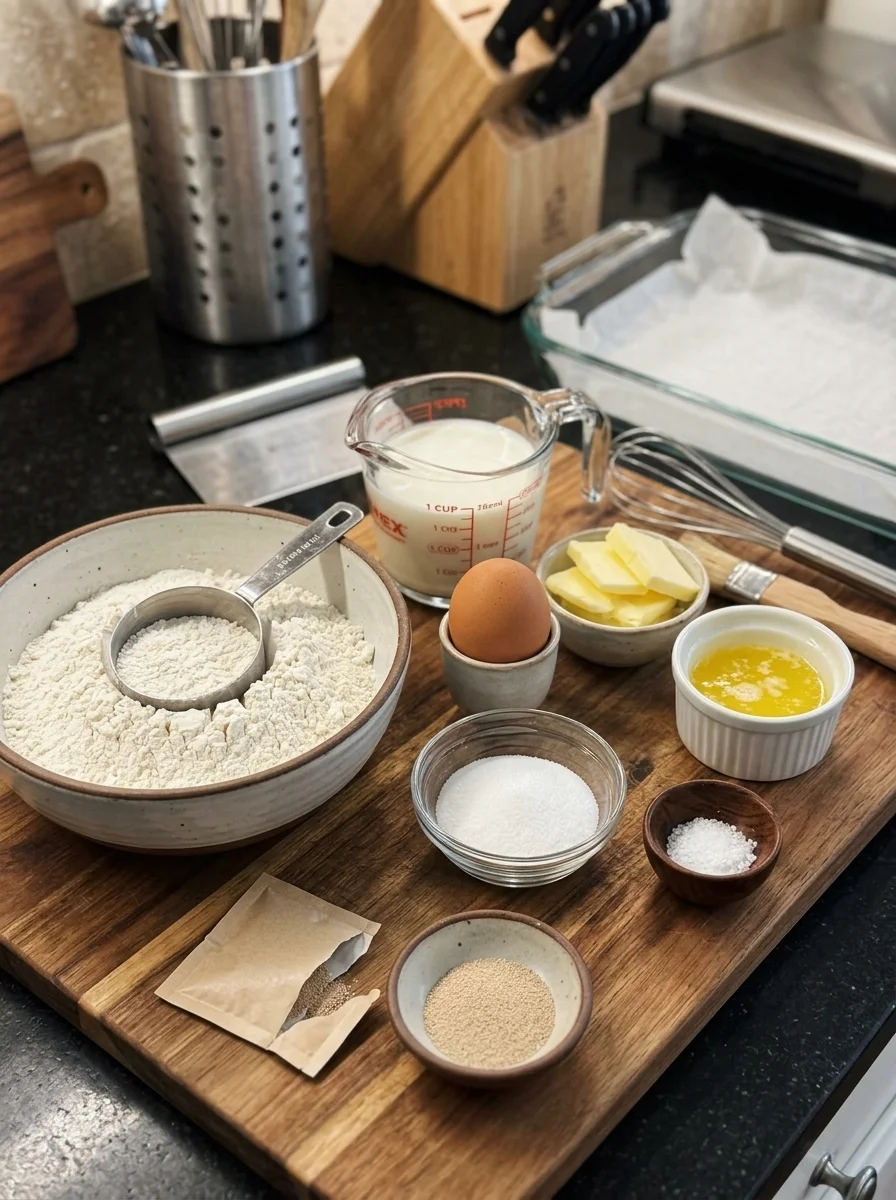
- 3 cups all-purpose flour, spooned and leveled, preferably weighed at 360 g
- 2¼ teaspoons instant yeast, 7 g, or one standard packet
- 3 tablespoons granulated sugar, approximately 38 g
- 1 teaspoon fine salt, approximately 6 g
- 1 cup whole milk, 240 ml, warmed to approximately 100–110°F / 38–43°C
- 1 large egg
- ¼ cup unsalted butter, 56 g, melted and cooled until lukewarm
For the Pan and Finishing
- Softened butter, for greasing the pan
- 2 tablespoons unsalted butter, 28 g, melted, for brushing
- A small pinch of flaky salt, optional
Ingredient Notes
All-purpose flour: This produces a tender roll with enough structure to hold its shape. Weighing the flour is the most reliable option. If measuring with cups, loosen the flour, spoon it into the cup, and level the top. Scooping directly from the bag can pack in more flour and make the rolls heavier.
Instant yeast: Instant yeast can be mixed directly into the flour. Check that it is within its usable date and has been stored according to the package instructions. Older yeast may rise slowly or fail to lift the dough.
Granulated sugar: Three tablespoons provide a gentle sweetness that suits both savory dinners and a little jam at breakfast. These rolls are lightly sweet rather than dessert-like.
Fine salt: Salt balances the sweetness and gives the bread flavor throughout. Different salts measure differently by volume, so use the weight if substituting a coarse variety.
Whole milk: Milk adds richness and helps create a soft crumb. Warm it gently; it should feel comfortably warm, not hot. Excessive heat can damage the yeast.
Egg: A large egg enriches the dough and contributes structure. Beat it lightly before combining it with the other wet ingredients so it distributes evenly.
Unsalted butter: Melt the butter, then let it cool until lukewarm. Very hot butter can overheat the other ingredients. Using unsalted butter makes the overall seasoning easier to control.
Finishing butter: Brushing the rolls immediately after baking gives them their buttery aroma and a softer top crust. Brush across the edges as well as the centers.
Flaky salt: A light sprinkle is optional. Add it while the finishing butter is still wet so it stays on the rolls.
How to Make Them
1. Prepare the Pan and Ingredients
Grease a 9×13-inch baking pan with softened butter.
Melt the butter for the dough and let it cool until lukewarm. Warm the milk separately to approximately 100–110°F.
Have the egg ready and measure the flour carefully. Accurate flour measurement makes this soft dough easier to judge.
2. Mix the Dry Ingredients
In a large bowl, whisk together the flour, instant yeast, sugar, and salt.
Use a bowl with enough room for the dough to double in volume during the first rise.
Mixing the dry ingredients first helps distribute the yeast and salt evenly throughout the dough.
3. Add the Wet Ingredients
In a separate bowl or measuring jug, whisk together the warm milk, egg, and melted, cooled butter.
Pour this mixture into the dry ingredients.
Stir firmly with a sturdy spoon or spatula for approximately 1–2 minutes, scraping the sides and bottom of the bowl. Continue until there are no dry patches and the dough forms a soft, sticky mass.
The dough should be much thicker than cake batter, but it will cling to the spoon and your fingers. Avoid adding flour simply to make it feel like a firm kneaded dough.
4. Let the Dough Rise
Cover the bowl with a lid, reusable cover, or lightly greased plastic wrap.
Place it in a comfortably warm, draft-free spot for approximately 60–90 minutes, or until doubled in volume.
Look for a noticeably expanded, airy dough. In a cooler kitchen, this may take longer. Avoid placing the bowl against a hot appliance or inside an oven that is switched on.
5. Divide the Dough
Lightly flour the work surface and your hands. Gently scrape the dough out of the bowl.
Press it down just enough to release the largest air bubbles. There is no need to knead it.
Divide into 12 similar portions using a dough scraper or knife. Each portion will weigh approximately 62 g if you want evenly sized rolls.
Use only a light dusting of flour to prevent sticking. A dough scraper helps lift the soft pieces without working extra flour into them.
6. Shape the Rolls
Take one portion and gently draw its edges toward the underside to form a rounded top.
Pinch the gathered underside lightly, then place the roll seam-side down in the prepared pan.
Repeat with the remaining dough, arranging the rolls in 3 rows of 4.
They do not need to look perfectly smooth. Aim for evenly sized rounds and handle them gently.
7. Let Them Rise Again
Cover the pan loosely with lightly greased plastic wrap.
Let the rolls rise for approximately 30–45 minutes, until noticeably puffy and beginning to touch.
A gentle press with a lightly floured fingertip should leave an indentation that slowly begins to spring back. If the dough springs back immediately, give it a little more time.
While the rolls finish rising, preheat the oven to 375°F / 190°C, using a conventional oven setting.
8. Bake
Remove the covering and place the pan on the center oven rack.
Bake for approximately 20–25 minutes, until the tops are golden brown and the center rolls are baked through.
If the tops brown before the centers are ready, loosely cover the pan with foil for the remaining baking time.
An instant-read thermometer inserted into the center of a middle roll will generally read approximately 190–195°F / 88–91°C when the rolls are baked.
9. Brush with Butter
Immediately brush the hot rolls with the 2 tablespoons of melted finishing butter.
Add a small pinch of flaky salt if desired.
Let the rolls rest for approximately 10 minutes before pulling them apart. This gives the crumb a little time to set while keeping them warm enough for serving.
Tips for Soft, Fluffy Dinner Rolls
Measure flour carefully. Too much flour is one of the easiest ways to turn a soft roll into a dense one. Start with the listed weight.
Expect some stickiness. A soft dough is part of this recipe. Lightly flour your hands and use a scraper instead of repeatedly adding flour to the bowl.
Give the first mix enough attention. Thorough stirring hydrates the flour and begins developing the dough’s structure. Stop only once everything is evenly combined.
Watch the dough more than the clock. Rising time changes with the temperature of the ingredients and your kitchen. Look for expansion and puffiness.
Keep the dough covered. An uncovered surface can dry out and form a skin, making the rolls harder to shape and limiting their expansion.
Shape gently. Repeatedly squeezing and reshaping the portions makes the dough more difficult to handle. A few gentle tucks are enough.
Check the middle rolls. The center of the pan often finishes last. Golden outer rolls do not always mean the middle ones are fully baked.
Butter while hot. Warm rolls absorb the finishing butter readily, giving the tops a soft, flavorful finish.
Troubleshooting
| Problem | Possible reason | Helpful adjustment |
|---|---|---|
| Dough is not rising | Yeast is inactive, ingredients were too hot, or the room is cold | Allow more time in a gently warm spot. If there is still no activity, start again with fresh yeast. |
| Dough is difficult to shape | Soft dough is sticking to hands and tools | Lightly flour your hands and scraper. If necessary, chill the risen dough for 15–20 minutes before dividing. |
| Dough seems unusually stiff | Too much flour was added | During the initial mixing, work in milk a teaspoon at a time until the dough is soft and sticky. |
| Rolls are dense | Excess flour, insufficient rising, or weak yeast | Measure flour by weight and allow both rises to reach the visual cues. |
| Tops are dark but centers are doughy | Oven is running hot or the pan is browning quickly | Tent loosely with foil and continue baking until the centers are done. |
| Rolls spread or collapse | Dough rose too far or lacked enough structure | Bake once puffy; avoid leaving fully risen rolls waiting for a long time. |
| Rolls are dry | Too much flour or excessive baking | Measure accurately and begin checking at the earlier end of the baking window. |
| Tops are firmer than desired | Rolls were left unbuttered or baked too long | Brush with butter immediately and avoid unnecessary extra baking. |
Flavor Variations
Garlic Butter Dinner Rolls
Keep the dough unchanged.
For the finishing butter, gently warm the 2 tablespoons of butter with 1 small finely minced garlic clove until fragrant. Avoid browning the garlic. Brush over the baked rolls and sprinkle with chopped parsley.
Honey Butter Finish
Mix the melted finishing butter with 1–2 teaspoons of honey.
Brush over the warm rolls for a slightly sweeter finish. Start with the smaller amount if serving alongside a savory meal.
Herb Dinner Rolls
Add 1 teaspoon dried Italian herbs or 1 tablespoon finely chopped fresh herbs to the dry ingredients.
Parsley, chives, and a little thyme work well. Use stronger herbs such as rosemary more sparingly.
Cheddar Dinner Rolls
Stir ½ cup finely shredded sharp cheddar into the mixed dough before the first rise.
Distribute the cheese evenly and expect the rolls to have a slightly richer, less airy crumb.
Sesame-Topped Rolls
After the second rise, brush the tops very lightly with milk and sprinkle with sesame seeds.
Bake as directed, then add the finishing butter. The milk helps the seeds adhere before baking.
Cinnamon Butter Serving Option
Bake the plain rolls as written.
Serve with softened butter mixed with cinnamon and a little powdered sugar. Keeping the cinnamon butter separate lets everyone choose how much sweetness to add.
Serving Ideas
These rolls are especially welcome beside meals with a sauce or gravy. Serve them with roast chicken, pork chops, pot roast, or a creamy casserole, and let the soft centers catch the last spoonfuls.
For soup night, bring the pan to the table while the rolls are still warm. Tomato soup, chicken soup, and hearty vegetable soups all pair comfortably with their mild buttery flavor.
At a holiday meal, arrange the rolls in a towel-lined basket shortly before serving. Keep extra butter nearby and bring out a second batch only as needed.
Leftover rolls also make small sandwiches. Split them horizontally and fill with sliced turkey, ham, cheese, or leftover roast meat. Toast the cut sides lightly if the rolls are a day old.
For breakfast, warm a roll and add jam, honey, or cinnamon butter. Their gentle sweetness works well with a cup of coffee or tea.
Make-Ahead and Storage
Overnight Dough
Mix the dough, cover the bowl with enough room for expansion, and refrigerate promptly for approximately 8–12 hours.
The next day, check the dough. If it has roughly doubled, divide and shape it while still cool. If it has barely expanded, let it continue rising at room temperature first.
After shaping, allow the rolls to become visibly puffy before baking. Cold dough may need approximately 60–90 minutes or longer for this final rise.
Room-Temperature Storage
Let the baked rolls cool completely before placing them in an airtight container or bag.
Store at room temperature for approximately 2 days for the best texture. Packing them while hot traps condensation and can leave the surfaces damp.
Freezing
Freeze completely cooled rolls in a freezer-safe bag or container for up to 2 months for best quality.
Freeze individually or separate them into meal-sized portions so you can warm only what you need.
Reheating
Wrap thawed rolls in foil and warm in a 300°F / 150°C oven for approximately 10–15 minutes, until warmed through.
For one roll, microwave briefly in 5–10-second intervals. Long microwave heating can make bread chewy.
Brush with a little extra melted butter after warming if desired.
Frequently Asked Questions
Do I really not need to knead the dough?
Correct. Thorough mixing and rising provide enough structure for these soft pan rolls.
Gently gathering the dough while shaping is fine, but there is no separate kneading stage.
Can I use active dry yeast?
Yes. Use the same amount.
Stir the active dry yeast into the warm milk with a teaspoon of the measured sugar. Let stand for approximately 5–10 minutes, until foamy, then continue with the recipe.
Keep the milk within the temperature range recommended on the yeast package. Rising may take a little longer.
Can I use bread flour?
Yes. Bread flour generally produces a slightly chewier roll and may absorb more liquid.
Use the same flour weight initially and judge the dough before making adjustments. It should remain soft and sticky.
Can I replace all the flour with whole wheat flour?
A full substitution changes the dough’s liquid needs, rise, and texture, so it is not a direct swap.
For a modest variation, replace ½ cup of the all-purpose flour with the same weight of whole wheat flour. Expect a slightly heartier texture and allow the dough time to hydrate before deciding whether it needs a little additional milk.
Can I use salted butter?
Yes. Reduce the fine salt in the dough to approximately ¾ teaspoon initially, since the butter contributes some salt.
Skip the optional flaky salt unless you want a more pronounced salty finish.
Why does my dough feel sticky?
The dough contains enough liquid and enrichment to stay soft. Some stickiness is expected.
Use lightly floured hands and a scraper. Add extra flour only if the dough is genuinely too loose to handle after rising, and work in small amounts.
Can I make larger rolls?
Yes. Divide the dough into 9 portions instead of 12.
Use a pan that gives them room to expand, allow the same visual rising cues, and expect the baking time to increase. Check the centers before removing them from the oven.
Can I double the recipe?
Yes. Double the ingredients and divide the shaped dough between two 9×13-inch pans.
If baking both pans together, leave room for air circulation and rotate their positions if needed. Check each pan separately for doneness.
Recipe Card
Easy No-Knead Buttery Dinner Rolls
Soft, fluffy dinner rolls made with milk, an egg, and melted butter. Mix by hand, let rise, shape, and bake until golden before brushing generously with butter.
Prep: 20 minutes
First rise: 60–90 minutes
Second rise: 30–45 minutes
Bake: 20–25 minutes
Cool: 10 minutes
Total: Approximately 2 hours 20 minutes to 3 hours 10 minutes
Yield: 12 rolls
Ingredients
For the dough:
- 3 cups all-purpose flour, 360 g
- 2¼ teaspoons instant yeast, 7 g
- 3 tablespoons granulated sugar, approximately 38 g
- 1 teaspoon fine salt, approximately 6 g
- 1 cup whole milk, 240 ml, warmed to 100–110°F / 38–43°C
- 1 large egg
- ¼ cup unsalted butter, 56 g, melted and cooled until lukewarm
For finishing:
- Softened butter, for greasing the pan
- 2 tablespoons unsalted butter, 28 g, melted
- Flaky salt, optional
Instructions
- Butter a 9×13-inch baking pan.
- Whisk the flour, instant yeast, sugar, and salt together in a large bowl.
- Separately whisk together the warm milk, egg, and melted, cooled butter.
- Add the wet ingredients to the dry ingredients. Stir firmly for 1–2 minutes, until no dry flour remains and a soft, sticky dough forms.
- Cover and let rise for 60–90 minutes, or until doubled.
- Turn onto a lightly floured surface, gently release the largest air bubbles, and divide into 12 portions.
- Shape into rounds by tucking the edges underneath. Arrange seam-side down in 3 rows of 4 in the prepared pan.
- Cover loosely and let rise for 30–45 minutes, until puffy. Meanwhile, preheat the oven to 375°F / 190°C.
- Bake uncovered for 20–25 minutes, until golden and baked through. Tent with foil if the tops brown too quickly.
- Brush immediately with the melted finishing butter. Add optional flaky salt and cool for 10 minutes before serving.
Notes
- Weigh the flour for the most consistent dough.
- The dough should be soft and slightly sticky.
- Rising times may be longer in a cool kitchen.
- The center rolls should reach approximately 190–195°F / 88–91°C when baked.
- Store cooled rolls airtight at room temperature for approximately 2 days.
- Freeze for up to 2 months for best quality.
- Estimated calories are approximately 190–200 per roll, including the listed finishing butter. Ingredients and portion sizes will change the estimate.
Final Thoughts
Give this dough time to become airy, keep the extra flour light, and brush the rolls while they are still hot from the oven. Bring them to the table warm, with their buttery tops shining and their soft sides ready to pull apart—the sort of little addition that makes dinner feel like a meal worth lingering over.