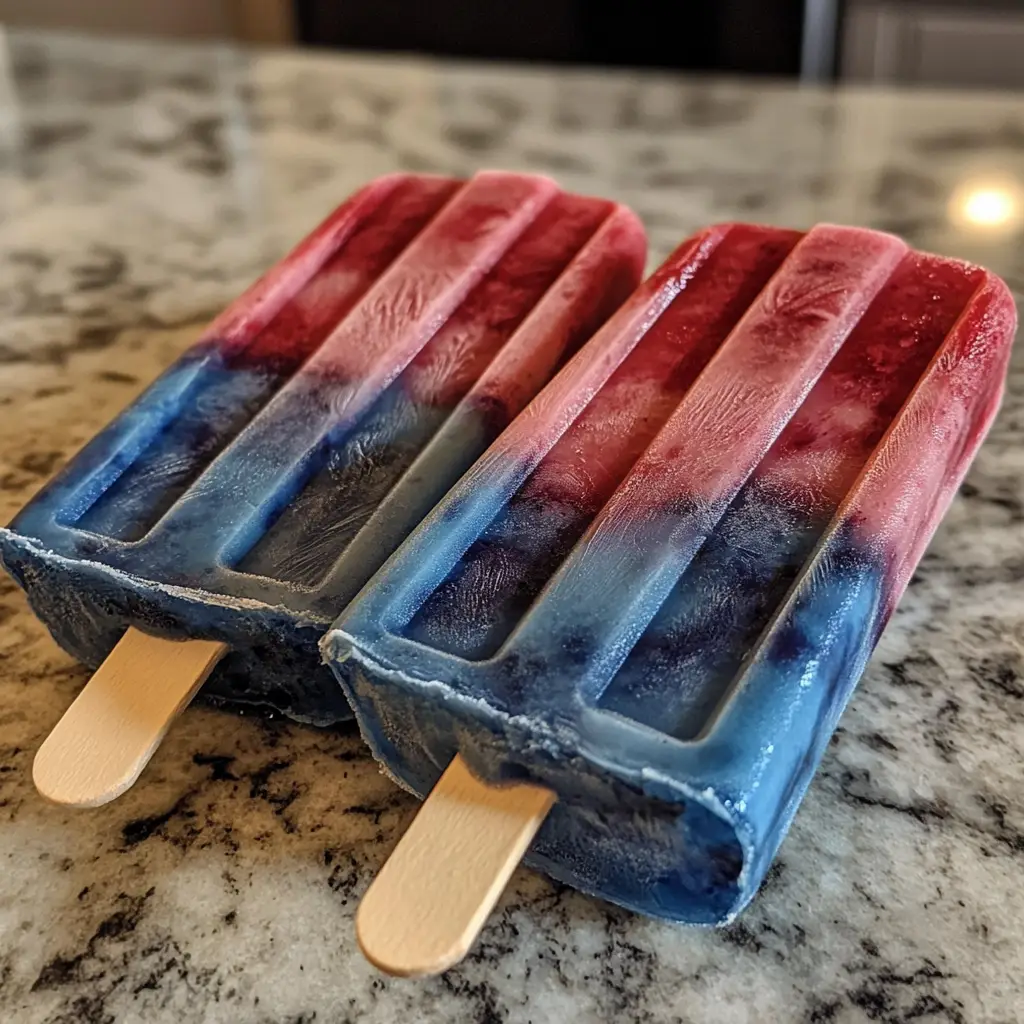
Introduction to Red White and Blue Popsicles
As a passionate home cook, I find joy in creating treats that not only taste good but also bring a splash of color and fun to any occasion. One of my favorite summer delights is the vibrant Red White and Blue Popsicles. These popsicles are not just a feast for the eyes; they are a delicious way to celebrate summer gatherings, barbecues, or even a simple afternoon in the sun.
Every time I make these popsicles, I’m reminded of the warm summer days spent with family and friends. I can still hear the laughter and see the smiles as we enjoyed these frozen delights together. The combination of sweet strawberries, creamy coconut, and tangy blueberries creates a symphony of flavors that dance on your taste buds. It’s like a mini celebration in every bite!
What I love most about these popsicles is their versatility. You can easily customize them to suit your taste or dietary preferences. Whether you want to use fresh fruit, frozen fruit, or even a splash of juice, the possibilities are endless. Plus, they are a healthier alternative to store-bought treats, making them a guilt-free indulgence.
So, grab your blender and your favorite popsicle molds, and let’s dive into the delightful world of Red White and Blue Popsicles. I promise you, once you take that first refreshing bite, you’ll be hooked!
Ingredients for Red White and Blue Popsicles
Creating the perfect Red White and Blue Popsicles starts with gathering the right ingredients. I always believe that quality matters, especially when it comes to fresh fruits. So, let’s dive into what you’ll need to whip up these colorful treats!
Main Ingredients
- 1 cup fresh strawberries (hulled and sliced) – These juicy gems provide the vibrant red layer. If strawberries are out of season, frozen ones work just as well!
- 1 cup coconut milk (canned or carton) – This creamy base creates the luscious white layer. I prefer using full-fat coconut milk for a richer taste.
- 1 cup fresh blueberries (washed) – The star of the blue layer! Fresh blueberries are best, but frozen can be a great alternative if you’re in a pinch.
- 2 tablespoons honey or maple syrup (optional) – Sweeten to your liking! I often add a drizzle of honey to the coconut milk for a touch of sweetness.
- 1 tablespoon lemon juice (optional) – A splash of lemon juice can brighten the flavors, especially in the blueberry layer.
Optional Add-ons
- Fresh mint leaves – For a refreshing twist, consider adding a few mint leaves to the blueberry layer.
- Yogurt – Swap out some coconut milk for yogurt to add a tangy flavor and creaminess.
- Other fruits – Feel free to experiment with raspberries or blackberries for different flavor profiles!
When sourcing your ingredients, I recommend visiting local farmers’ markets for the freshest produce. Not only does it support local farmers, but the flavors are often unbeatable. Plus, the vibrant colors of fresh fruits can inspire your culinary creativity!
How to Prepare Red White and Blue Popsicles
Now that we have our ingredients ready, it’s time to bring these Red White and Blue Popsicles to life! I love the process of layering these popsicles; it feels like painting a masterpiece, but with flavors instead of colors. Let’s dive into the steps!
Step 1: Prepare the Red Layer
First up is the vibrant red layer. In a blender, combine the fresh strawberries and honey (if using). Blend until smooth. You want a thick yet pourable consistency. If it’s too thick, add a splash of water to help it along.
Tips for Achieving the Perfect Red Layer
- Make sure your strawberries are ripe for the best flavor. A little sweetness goes a long way!
- For a fun twist, try adding a few mint leaves to the blender for a refreshing hint.
Step 2: Prepare the White Layer
Next, let’s create the creamy white layer. In a separate bowl, whisk together the coconut milk and honey (if using). This layer should be smooth and creamy, perfect for balancing the fruity flavors.
Tips for a Creamy White Layer
- Using full-fat coconut milk gives a richer taste, but light versions work too if you prefer.
- For a tangy kick, add a dollop of yogurt to the mix!
Step 3: Prepare the Blue Layer
Now, it’s time for the star of the show—the blue layer! Blend the fresh blueberries with lemon juice and honey (if desired) until smooth. This layer should be vibrant and bursting with flavor.
Tips for a Vibrant Blue Layer
- Fresh blueberries are ideal, but frozen ones can work just as well. Just make sure to thaw them first!
- Adding lemon juice not only brightens the flavor but also enhances the color.
Step 4: Layering the Popsicles
Now comes the fun part—layering! Start by pouring the red layer into your popsicle molds, filling them about one-third full. Then, gently add the white layer, followed by the blue layer. Repeat until the molds are full, leaving a little space at the top for expansion.
Tips for Even Layering
- To avoid mixing the layers, pour slowly and carefully. A spoon can help guide the liquid into the molds.
- If you want to create a marbled effect, use a skewer to swirl the layers together slightly.
Step 5: Freezing the Popsicles
Finally, it’s time to freeze! Insert the popsicle sticks into the molds and place them in the freezer. Let them freeze for at least 4-6 hours, or until completely solid.
Tips for Optimal Freezing Time
- For best results, freeze overnight. This ensures they are fully set and easy to remove from the molds.
- If you’re in a hurry, placing them in the coldest part of the freezer can speed up the process.
And there you have it! The steps to create your very own Red White and Blue Popsicles. I can already imagine the smiles on everyone’s faces when they take that first bite!
Equipment Needed for Red White and Blue Popsicles
Before we dive into making our Red White and Blue Popsicles, let’s gather the necessary equipment. Having the right tools makes the process smoother and more enjoyable. Here’s what you’ll need:
- Popsicle molds – These are essential for shaping your popsicles. If you don’t have traditional molds, you can use small cups or even ice cube trays. Just make sure to insert a stick or toothpick for easy handling!
- Blender – A good blender is key for achieving that smooth consistency in your fruit layers. If you don’t have a blender, a food processor can work too, though it may not get everything as silky.
- Measuring cups and spoons – Accurate measurements help ensure the perfect balance of flavors. I always keep these handy in my kitchen!
- Whisk – This is useful for mixing the coconut milk and honey together. If you don’t have a whisk, a fork can do the trick in a pinch.
- Spatula – A spatula is great for scraping down the sides of your blender and ensuring you get every last bit of that delicious mixture.
With these tools in hand, you’re all set to create your colorful popsicles! Remember, the joy of cooking comes not just from the ingredients but also from the process. So, let’s get started!
Variations of Red White and Blue Popsicles
While I adore the classic Red White and Blue Popsicles, there’s something exciting about experimenting with different flavors and ingredients. Each variation can bring a new twist to this delightful treat. Here are a few fun ideas that I’ve tried and loved!
- Berry Blast Popsicles: Swap out the strawberries for raspberries or blackberries. This adds a tangy flavor that pairs beautifully with the creamy coconut layer.
- Yogurt Swirl Popsicles: Mix in some Greek yogurt with the coconut milk for a protein boost. This variation gives a creamy texture and a slight tartness that’s simply irresistible.
- Fruit Juice Popsicles: Instead of blending fresh fruit, use 100% fruit juice for each layer. This is a quick and easy way to create popsicles with vibrant colors and flavors.
- Chocolate Drizzle Popsicles: After freezing, drizzle melted dark chocolate over the popsicles for a decadent touch. The combination of chocolate with fruity flavors is a match made in heaven!
These variations not only keep things interesting but also allow you to cater to different tastes and preferences. I love how each twist can turn a simple recipe into something uniquely yours. So, don’t hesitate to get creative and make these popsicles your own!
Cooking Notes for Red White and Blue Popsicles
As I’ve learned through my culinary adventures, a few cooking notes can make all the difference when preparing Red White and Blue Popsicles. Here are some tips that I’ve gathered along the way to ensure your popsicles turn out perfectly every time!
- Freshness is Key: Always opt for the freshest fruits you can find. The flavor of your popsicles will shine through when you use ripe strawberries and blueberries. If you can, pick them up from a local market!
- Adjust Sweetness: Everyone has different taste preferences. Feel free to adjust the sweetness of each layer to suit your liking. A little taste test during preparation can help you find that perfect balance.
- Layering Technique: When pouring each layer, do it slowly to avoid mixing. If you want to create a marbled effect, use a skewer to gently swirl the layers together. It adds a fun visual element!
- Storage Tips: Once frozen, store your popsicles in an airtight container or wrap them in plastic wrap to prevent freezer burn. They can last for up to a month, but I doubt they’ll last that long!
- Thawing for Easy Removal: If you find it tricky to remove the popsicles from the molds, run them under warm water for a few seconds. This will help loosen them without melting your delicious creation.
These cooking notes are like little nuggets of wisdom that I’ve picked up over time. They help me create popsicles that not only look stunning but also taste amazing. So, keep these tips in mind as you embark on your own popsicle-making journey!
Serving Suggestions for Red White and Blue Popsicles
Once your Red White and Blue Popsicles are frozen and ready to go, it’s time to think about how to serve them! Presentation can elevate the experience, and I love to get a little creative when it comes to serving these colorful treats. Here are some of my favorite serving suggestions:
- Garnish with Fresh Fruit: Add a few fresh strawberries or blueberries on the side for a pop of color. It not only looks beautiful but also enhances the fruity flavor.
- Serve with Whipped Cream: A dollop of whipped cream on top can add a delightful creaminess. You can even sprinkle some crushed nuts or coconut flakes for added texture.
- Pair with a Refreshing Drink: Serve these popsicles alongside a cool lemonade or iced tea. The combination is perfect for a hot summer day!
- Make it a Party: For gatherings, create a popsicle bar! Set out various toppings like sprinkles, chocolate chips, or shredded coconut, and let everyone customize their popsicles.
- Use Fun Serving Dishes: Instead of traditional plates, try serving them in colorful cups or on a wooden board. It adds a fun touch to your presentation!
These serving suggestions not only make your Red White and Blue Popsicles look appealing but also enhance the overall experience. I love how a little creativity can turn a simple treat into a festive celebration. So, gather your friends and family, and enjoy these delightful popsicles together!
Tips for Making Red White and Blue Popsicles
As I’ve dived into the world of making Red White and Blue Popsicles, I’ve gathered a treasure trove of tips that can help you create the best popsicles ever! Here are some of my favorite nuggets of wisdom to ensure your popsicles are not only beautiful but also bursting with flavor:
- Prep Ahead: If you know you want to enjoy these popsicles, prepare the layers the night before. This way, you can simply layer and freeze them the next day without any rush.
- Experiment with Sweeteners: While honey and maple syrup are my go-tos, feel free to try agave nectar or stevia for a different sweetness profile. Each sweetener can bring a unique flavor twist!
- Layer Thickness: Keep the layers relatively thin. This not only helps with freezing but also ensures that each bite has a balanced mix of flavors. Aim for about 1/3 cup per layer.
- Chill Your Molds: Before pouring in your layers, chill your popsicle molds in the freezer for about 10 minutes. This helps the layers set faster and keeps them from mixing.
- Have Fun with Colors: Don’t be afraid to play with the colors! You can add a splash of food coloring to the layers for a more vibrant look, especially if using frozen fruits that may not be as bright.
These tips have made my popsicle-making adventures even more enjoyable. I hope they inspire you to create your own stunning Red White and Blue Popsicles that will impress everyone at your next gathering!
Breakdown of Time for Red White and Blue Popsicles
When it comes to making Red White and Blue Popsicles, timing is everything! I’ve found that knowing how long each step takes can help you plan your day better. Here’s a quick breakdown of the time involved in creating these delightful treats:
- Prep Time: 20 minutes – This includes washing, hulling, and blending your fruits, as well as mixing the coconut milk. It’s a fun and quick process that gets you excited for the final product!
- Freezing Time: 4-6 hours – This is the hardest part! You’ll need to be patient while your popsicles freeze to perfection. I often make them in the evening and let them freeze overnight.
- Total Time: Approximately 4-6 hours and 20 minutes – This total time includes both the prep and freezing time. But trust me, the wait is worth it when you take that first refreshing bite!
By keeping this time breakdown in mind, you can easily fit popsicle-making into your day. Whether it’s a sunny afternoon or a weekend gathering, these Red White and Blue Popsicles are sure to be a hit!
Nutritional Information for Red White and Blue Popsicles
As a home cook, I always pay attention to the nutritional value of the treats I make. These Red White and Blue Popsicles are not only delicious but also packed with wholesome ingredients. Here’s a quick look at the nutritional information for one popsicle, assuming you make about six popsicles from the recipe:
- Calories: Approximately 80-100 calories
- Protein: 1-2 grams
- Fat: 4-6 grams (mostly from coconut milk)
- Carbohydrates: 12-15 grams
- Fiber: 1-2 grams
- Sugar: 8-10 grams (natural sugars from fruit and optional sweeteners)
These popsicles are a great way to enjoy a refreshing treat without the guilt. The fresh fruits provide vitamins and antioxidants, while the coconut milk adds healthy fats. Plus, you can easily adjust the sweetness to your liking, making them a perfect choice for a healthier dessert option. So, indulge in these colorful popsicles knowing they’re not just a treat for your taste buds but also a nutritious choice!
Frequently Asked Questions about Red White and Blue Popsicles
As I’ve shared my love for Red White and Blue Popsicles, I often get questions from fellow home cooks eager to try their hand at this colorful treat. Here are some of the most common questions I’ve encountered, along with my answers to help you on your popsicle-making journey!
Can I use frozen fruit instead of fresh?
Absolutely! Frozen fruit works wonderfully in these popsicles. Just make sure to thaw the fruit before blending to achieve that smooth consistency. It’s a great way to enjoy these popsicles year-round, even when fresh fruit isn’t in season!
How long do the popsicles last in the freezer?
When stored properly in an airtight container, your Red White and Blue Popsicles can last for up to a month in the freezer. However, I doubt they’ll stick around that long—they’re just too delicious!
Can I make these popsicles dairy-free?
Yes! The recipe is already dairy-free thanks to the coconut milk. If you want to add creaminess, you can use dairy-free yogurt or simply stick with the coconut milk. It’s a perfect option for those with dietary restrictions!
What if I don’t have popsicle molds?
No worries! You can use small cups or even ice cube trays as alternatives. Just make sure to insert a stick or toothpick into each cup to create your popsicles. It’s all about being creative with what you have!
Can I add other flavors or ingredients?
Definitely! Feel free to experiment with different fruits, sweeteners, or even add-ins like yogurt or mint. The beauty of these popsicles is their versatility, so let your imagination run wild!
How do I remove the popsicles from the molds?
If you’re having trouble getting the popsicles out, run the molds under warm water for a few seconds. This will help loosen them without melting your delicious creation. Just be careful not to let them sit too long!
These FAQs are just a glimpse into the wonderful world of Red White and Blue Popsicles. I hope they inspire you to dive into making your own colorful treats and enjoy the process as much as I do!
Conclusion on Red White and Blue Popsicles
In conclusion, Red White and Blue Popsicles are more than just a delightful summer treat; they are a canvas for creativity and a celebration of flavors. With their vibrant colors and refreshing taste, these popsicles are perfect for any occasion, whether it’s a backyard barbecue, a picnic in the park, or simply a sunny afternoon at home.
What I love most about this recipe is its versatility. You can easily customize the ingredients to suit your preferences, making it a fun activity for the whole family. Plus, knowing that you’re using fresh, wholesome ingredients makes each bite even more satisfying. These popsicles are not only a feast for the eyes but also a guilt-free indulgence that everyone can enjoy.
So, gather your ingredients, unleash your inner artist, and create your own batch of Red White and Blue Popsicles. I promise you, the smiles and laughter that follow will be the sweetest reward of all!