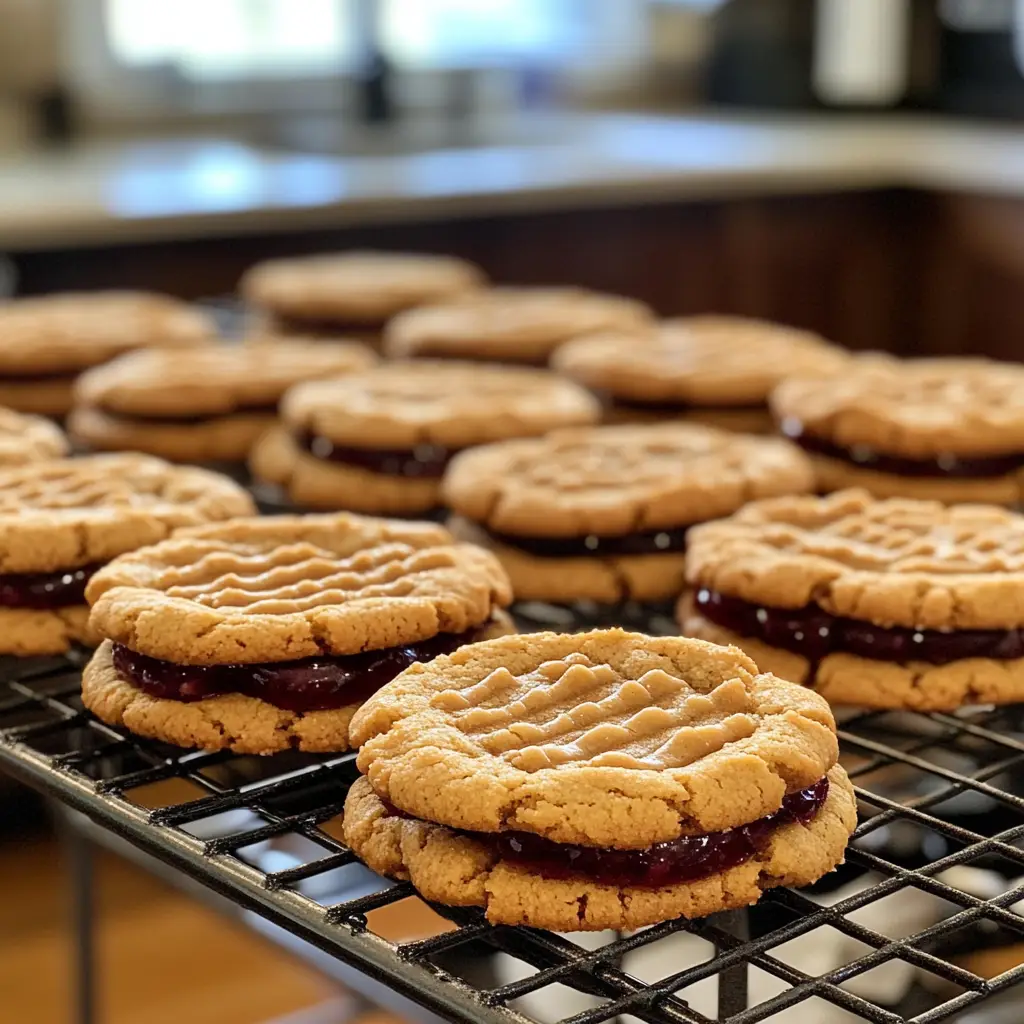
Introduction to Peanut Butter Jelly Cookies
Ah, the sweet nostalgia of childhood! When I think of my favorite snacks, peanut butter and jelly sandwiches instantly come to mind. They were my go-to lunch, packed with flavor and comfort. But what if I told you that you could transform that classic combo into something even more delightful? Enter the peanut butter jelly cookies! These cookies are like a warm hug from your childhood, bringing together the rich, nutty flavor of peanut butter and the fruity sweetness of jelly in every bite.
As a passionate home cook, I love experimenting with flavors and textures. One day, while reminiscing about those school lunches, I decided to create a cookie that captured that same joy. The result? A soft, chewy cookie with a gooey dollop of jelly right in the center. It’s a treat that not only satisfies your sweet tooth but also evokes fond memories of simpler times.
What I adore about peanut butter jelly cookies is their versatility. You can use any jelly or jam you fancy—strawberry, grape, or even raspberry! Each variation brings its own unique twist to the cookie, making it a fun adventure in the kitchen. Plus, they’re incredibly easy to whip up, making them perfect for a quick snack or a delightful dessert to share with friends and family.
So, grab your apron and let’s dive into the world of peanut butter jelly cookies! I promise you, once you take that first bite, you’ll be transported back to those carefree days of childhood, with a delicious twist that’s all grown up.
Ingredients for Peanut Butter Jelly Cookies
Before we embark on this delicious journey, let’s gather our ingredients! Having everything ready makes the cooking process smoother and more enjoyable. I always find that when I have my ingredients prepped, it feels like I’m setting the stage for a delightful performance in the kitchen. Here’s what you’ll need to create these scrumptious peanut butter jelly cookies.
Main Ingredients
- 1 cup creamy peanut butter: I prefer using natural peanut butter without added sugars or oils. It gives the cookies a rich flavor and a lovely texture.
- 1 cup granulated sugar: This sweetener is essential for that perfect cookie sweetness. You can also use brown sugar for a deeper flavor.
- 1 large egg: This binds everything together and adds moisture. Make sure it’s at room temperature for the best results!
- 1 teaspoon vanilla extract: A splash of vanilla elevates the flavor, making the cookies taste even more delightful.
- 1 cup all-purpose flour: This is the backbone of our cookies. I recommend measuring it correctly for the best texture.
- 1 teaspoon baking soda: This helps the cookies rise and gives them that lovely chewy texture.
- 1/4 teaspoon salt: A pinch of salt enhances the flavors and balances the sweetness.
Optional Add-ons
- 1/2 cup chocolate chips: If you’re a chocolate lover like me, adding chocolate chips can take these cookies to the next level!
- Chopped nuts: Walnuts or pecans can add a delightful crunch. Just be sure to chop them finely so they mix well.
- Different flavors of jelly: While grape and strawberry are classics, feel free to experiment with raspberry, apricot, or even orange marmalade for a unique twist!
When sourcing your ingredients, I always recommend looking for high-quality products. Fresh ingredients make a world of difference in flavor. Plus, supporting local farmers or markets can be a rewarding experience. Now that we have our ingredients ready, let’s move on to the fun part—preparing our peanut butter jelly cookies!
How to Prepare Peanut Butter Jelly Cookies
Now that we have our ingredients ready, it’s time to roll up our sleeves and get cooking! Making peanut butter jelly cookies is a delightful process that fills your kitchen with the warm, inviting aroma of baking. I always find that the journey of creating these cookies is just as enjoyable as eating them. So, let’s dive into the step-by-step instructions!
Step 1: Preheat the Oven
First things first, we need to preheat our oven to 350°F (175°C). This step is crucial because it ensures that our cookies bake evenly and come out perfectly golden.
Tips for Preheating
- While the oven is heating, I like to gather my baking sheets and line them with parchment paper. This prevents the cookies from sticking and makes cleanup a breeze!
- Don’t forget to check that your oven rack is in the center position. This helps the cookies bake evenly.
Step 2: Mix the Peanut Butter and Sugar
In a large mixing bowl, combine the creamy peanut butter and granulated sugar. Using a hand mixer or a sturdy spatula, mix them together until they form a smooth, creamy mixture. This is where the magic begins!
Tips for Mixing
- Make sure your peanut butter is at room temperature. It makes mixing so much easier!
- If you’re using natural peanut butter, give it a good stir before measuring to incorporate the oils.
Step 3: Add the Egg and Vanilla
Next, it’s time to add the egg and vanilla extract to our peanut butter mixture. This step adds moisture and flavor, making our cookies even more delicious.
Tips for Incorporating Ingredients
- Crack the egg into a separate bowl first to avoid any shell mishaps. Then, add it to the mixture.
- Mix until everything is well combined, but don’t overdo it! Just a few seconds will do.
Step 4: Combine Dry Ingredients
In another bowl, whisk together the all-purpose flour, baking soda, and salt. This step ensures that the leavening agent is evenly distributed throughout the flour.
Tips for Measuring Flour
- When measuring flour, I always spoon it into the measuring cup and level it off with a knife. This prevents packing and ensures the right amount.
- For a fluffier cookie, you can sift the flour before adding it to the mixture.
Step 5: Form the Cookies
Now comes the fun part! Using a cookie scoop or your hands, form small balls of dough and place them on the prepared baking sheets. Leave some space between each cookie, as they will spread while baking.
Tips for Shaping
- If the dough is too sticky, you can chill it in the fridge for about 15 minutes. This makes it easier to handle.
- For uniform cookies, try to make each ball about the size of a tablespoon.
Step 6: Add the Jelly
Using your thumb or the back of a spoon, create a small indentation in the center of each cookie ball. This is where the jelly will go, adding that delightful burst of flavor!
Tips for Jelly Placement
- Be careful not to make the indentation too deep; we want just enough space for the jelly without compromising the cookie structure.
- Feel free to mix different jellies for a fun surprise in each cookie!
Step 7: Bake the Cookies
Finally, it’s time to bake our cookies! Place the baking sheets in the preheated oven and let them bake for about 10-12 minutes, or until the edges are lightly golden.
Tips for Baking Time
- Keep an eye on the cookies as they bake. Ovens can vary, and you don’t want to overbake them!
- Once they’re done, let them cool on the baking sheet for a few minutes before transferring them to a wire rack to cool completely.
And there you have it! A simple yet delightful process to create peanut butter jelly cookies that will surely bring a smile to your face. I can already imagine the sweet aroma wafting through my kitchen, and I can’t wait for you to experience it too!
Equipment Needed for Peanut Butter Jelly Cookies
Before we dive into baking, let’s make sure we have all the right tools at our fingertips. Having the right equipment can make the process smoother and more enjoyable. Here’s a quick list of what you’ll need to whip up those delicious peanut butter jelly cookies!
- Mixing Bowls: A couple of medium-sized mixing bowls will do the trick. I love using glass bowls because they’re easy to clean and you can see the ingredients mixing!
- Measuring Cups and Spoons: Accurate measurements are key to baking success. A set of dry measuring cups and measuring spoons will ensure you get the right amounts.
- Hand Mixer or Whisk: A hand mixer makes mixing the peanut butter and sugar a breeze. If you don’t have one, a sturdy whisk will work just fine—just be prepared for a little extra arm workout!
- Cookie Scoop or Spoon: A cookie scoop helps create uniform cookie sizes, but a regular spoon works too. Just aim for about a tablespoon of dough for each cookie.
- Baking Sheets: You’ll need at least one or two baking sheets. If you don’t have non-stick sheets, line them with parchment paper to prevent sticking.
- Parchment Paper: This is optional, but I highly recommend it! It makes cleanup easier and helps the cookies bake evenly.
- Wire Rack: A wire rack is perfect for cooling your cookies. If you don’t have one, a plate will work in a pinch, but the cookies might take longer to cool.
With these tools in hand, you’re all set to create your peanut butter jelly cookies! Remember, the joy of baking comes not just from the end result, but from the process itself. So, let’s get started and have some fun in the kitchen!
Variations of Peanut Butter Jelly Cookies
One of the things I love most about peanut butter jelly cookies is their adaptability. Just like a blank canvas, these cookies can take on many flavors and styles. Here are a few fun variations that I’ve tried and absolutely adore!
- Chocolate Peanut Butter Jelly Cookies: For a decadent twist, mix in some chocolate chips into the dough. The combination of chocolate and peanut butter is simply heavenly!
- Nutty Peanut Butter Jelly Cookies: Add chopped nuts like walnuts or almonds to the dough for a delightful crunch. It adds texture and a nutty flavor that complements the peanut butter beautifully.
- Oatmeal Peanut Butter Jelly Cookies: Incorporate rolled oats into the dough for a heartier cookie. The oats add chewiness and a wholesome feel, making them perfect for breakfast or a snack.
- Spiced Peanut Butter Jelly Cookies: Add a pinch of cinnamon or nutmeg to the dough for a warm, spiced flavor. It’s like a cozy hug in cookie form!
- Fruit-Filled Peanut Butter Cookies: Instead of jelly, try using fresh fruit preserves or even a dollop of Nutella for a different flavor profile. The possibilities are endless!
These variations not only keep things exciting but also allow you to tailor the cookies to your taste preferences. I encourage you to experiment and find your favorite combination. After all, the kitchen is a playground for creativity!
Cooking Notes for Peanut Butter Jelly Cookies
As I’ve baked these delightful peanut butter jelly cookies over the years, I’ve picked up a few handy tips that can make your baking experience even better. Here are some cooking notes to keep in mind:
- Chill the Dough: If you find that your dough is too sticky to handle, don’t hesitate to pop it in the fridge for about 15-30 minutes. Chilling helps firm up the dough, making it easier to shape.
- Watch the Baking Time: Every oven is different! I recommend checking your cookies a minute or two before the suggested baking time. You want them to be lightly golden around the edges but still soft in the center.
- Storage Tips: Once your cookies are cool, store them in an airtight container at room temperature. They’ll stay fresh for about a week—if they last that long!
- Freezing Cookies: If you want to save some for later, these cookies freeze beautifully. Just place them in a single layer on a baking sheet, freeze until solid, then transfer to a freezer bag. They’ll be ready to enjoy whenever you need a sweet treat!
With these cooking notes in your back pocket, you’ll be well on your way to baking the perfect peanut butter jelly cookies. Remember, the joy of baking comes from both the process and the delicious results. Happy baking!
Serving Suggestions for Peanut Butter Jelly Cookies
Once your peanut butter jelly cookies are baked to perfection, it’s time to think about how to serve them! I love to get a little creative when it comes to presentation. Here are some delightful serving suggestions that will make your cookies shine:
- With a Glass of Milk: There’s nothing quite like pairing these cookies with a cold glass of milk. The creamy texture of the milk complements the rich peanut butter and sweet jelly beautifully.
- On a Dessert Platter: Arrange your cookies on a colorful dessert platter. Add some fresh fruit or a sprinkle of powdered sugar for an elegant touch. It’s perfect for parties or family gatherings!
- As an Ice Cream Sandwich: For a fun twist, sandwich a scoop of your favorite ice cream between two cookies. It’s a delightful treat that’s sure to impress!
- With a Cup of Tea or Coffee: Enjoy these cookies with a warm cup of tea or coffee. The flavors meld together, creating a cozy afternoon snack that feels like a warm hug.
- Gift Them: Package a few cookies in a cute box or jar and gift them to friends or neighbors. It’s a sweet gesture that spreads joy and deliciousness!
These serving suggestions not only enhance the experience of enjoying peanut butter jelly cookies but also make them a versatile treat for any occasion. So, whether you’re indulging solo or sharing with loved ones, these cookies are sure to bring smiles all around!
Tips for Perfect Peanut Butter Jelly Cookies
As I’ve baked these delightful peanut butter jelly cookies time and time again, I’ve gathered a few golden tips that can elevate your cookie game. Trust me, these little nuggets of wisdom can make all the difference!
- Use Room Temperature Ingredients: Make sure your egg and peanut butter are at room temperature. This helps them blend together smoothly, creating a better cookie texture.
- Don’t Overmix: When combining your ingredients, mix just until everything is incorporated. Overmixing can lead to tough cookies, and we want them soft and chewy!
- Experiment with Jellies: Don’t be afraid to try different flavors of jelly. Each one brings a unique twist, so have fun with it! You might discover a new favorite.
- Cool on a Wire Rack: Allow your cookies to cool on a wire rack after baking. This prevents them from becoming soggy and helps maintain that perfect chewy texture.
- Store Properly: Keep your cookies in an airtight container to maintain freshness. If you want to keep them longer, consider freezing them for a later treat!
With these tips in your back pocket, you’re well on your way to baking the perfect peanut butter jelly cookies. Remember, the joy of baking is in the journey, so enjoy every moment!
Breakdown of Time for Peanut Butter Jelly Cookies
When it comes to baking, timing is everything! I always find it helpful to have a clear idea of how long each step will take. Here’s a quick breakdown of the time you’ll need to whip up these delightful peanut butter jelly cookies:
- Prep Time: Approximately 15 minutes. This includes gathering your ingredients, mixing the dough, and shaping the cookies. It’s a great time to let your excitement build!
- Cooking Time: About 10-12 minutes. Keep an eye on them as they bake, and you’ll be rewarded with perfectly golden edges.
- Total Time: Roughly 25-30 minutes. In less than half an hour, you can have a batch of warm, gooey peanut butter jelly cookies ready to enjoy!
With this time breakdown, you can easily plan your baking session. Whether you’re making these cookies for a special occasion or just a cozy night in, you’ll be amazed at how quickly they come together. Happy baking!
Nutritional Information for Peanut Butter Jelly Cookies
As a passionate home cook, I always find it helpful to know the nutritional content of the treats I bake. Peanut butter jelly cookies are not only delicious but can also be a satisfying snack. Here’s a quick overview of the nutritional information for one cookie, assuming you make about 24 cookies from the recipe:
- Calories: Approximately 120 calories
- Protein: 3 grams
- Carbohydrates: 15 grams
- Fat: 6 grams
- Sugar: 5 grams
- Fiber: 1 gram
Keep in mind that these values can vary based on the specific ingredients you use, especially if you opt for different types of jelly or add-ins like chocolate chips or nuts. While these cookies are a treat, they also provide a bit of protein from the peanut butter, making them a more balanced option than many other sweets. Enjoy them in moderation, and they can be a delightful part of your snack rotation!
Frequently Asked Questions about Peanut Butter Jelly Cookies
As I’ve shared my love for peanut butter jelly cookies, I’ve often received questions from fellow bakers and cookie enthusiasts. It’s always a joy to connect with others who share the same passion for baking! Here are some of the most frequently asked questions I encounter, along with my answers to help you on your cookie-making journey.
Can I use crunchy peanut butter instead of creamy?
Absolutely! Using crunchy peanut butter will give your cookies a delightful texture. The little peanut pieces add a nice crunch that complements the soft cookie. Just keep in mind that the flavor will be slightly different, but still delicious!
What type of jelly works best for these cookies?
While classic grape and strawberry jellies are popular choices, feel free to experiment! Raspberry, apricot, or even homemade fruit preserves can add a unique twist. The key is to choose a jelly that you love, as it will shine through in the final cookie.
Can I make these cookies gluten-free?
Yes, you can! Simply substitute the all-purpose flour with a gluten-free flour blend. I recommend using a blend that includes xanthan gum for the best texture. Just be sure to check that all your other ingredients are gluten-free as well.
How do I store leftover cookies?
To keep your cookies fresh, store them in an airtight container at room temperature. They should stay delicious for about a week. If you want to keep them longer, consider freezing them. Just make sure to separate layers with parchment paper to prevent sticking!
Can I add chocolate chips to the dough?
Definitely! Adding chocolate chips is one of my favorite variations. They melt beautifully and create a rich, gooey center that pairs perfectly with the peanut butter and jelly. Just fold them into the dough before forming the cookies.
What if my dough is too sticky?
If you find your dough is too sticky to handle, don’t worry! Just pop it in the fridge for about 15-30 minutes. Chilling the dough will make it easier to shape and help the cookies hold their form while baking.
These questions reflect the curiosity and creativity that come with baking peanut butter jelly cookies. I hope my answers inspire you to dive into the kitchen and create your own batch of these delightful treats. Remember, baking is all about having fun and enjoying the process!
Conclusion on Peanut Butter Jelly Cookies
As I wrap up this delightful journey into the world of peanut butter jelly cookies, I can’t help but feel a sense of joy. These cookies are more than just a sweet treat; they are a nostalgic reminder of childhood, a canvas for creativity, and a simple way to bring smiles to those around you. The combination of creamy peanut butter and fruity jelly creates a flavor explosion that is both comforting and exciting.
What I love most about this recipe is its versatility. Whether you stick to the classic flavors or venture into exciting variations, each batch is a new adventure. Plus, they’re quick and easy to make, making them perfect for any occasion—be it a cozy night in or a festive gathering with friends.
So, the next time you’re in the mood for something sweet, I encourage you to whip up a batch of these peanut butter jelly cookies. They’re sure to fill your kitchen with warmth and happiness, just like they do for me. Happy baking, and may your cookies always be soft, chewy, and full of love!