Introduction to Mini Lemon Tarts Recipe
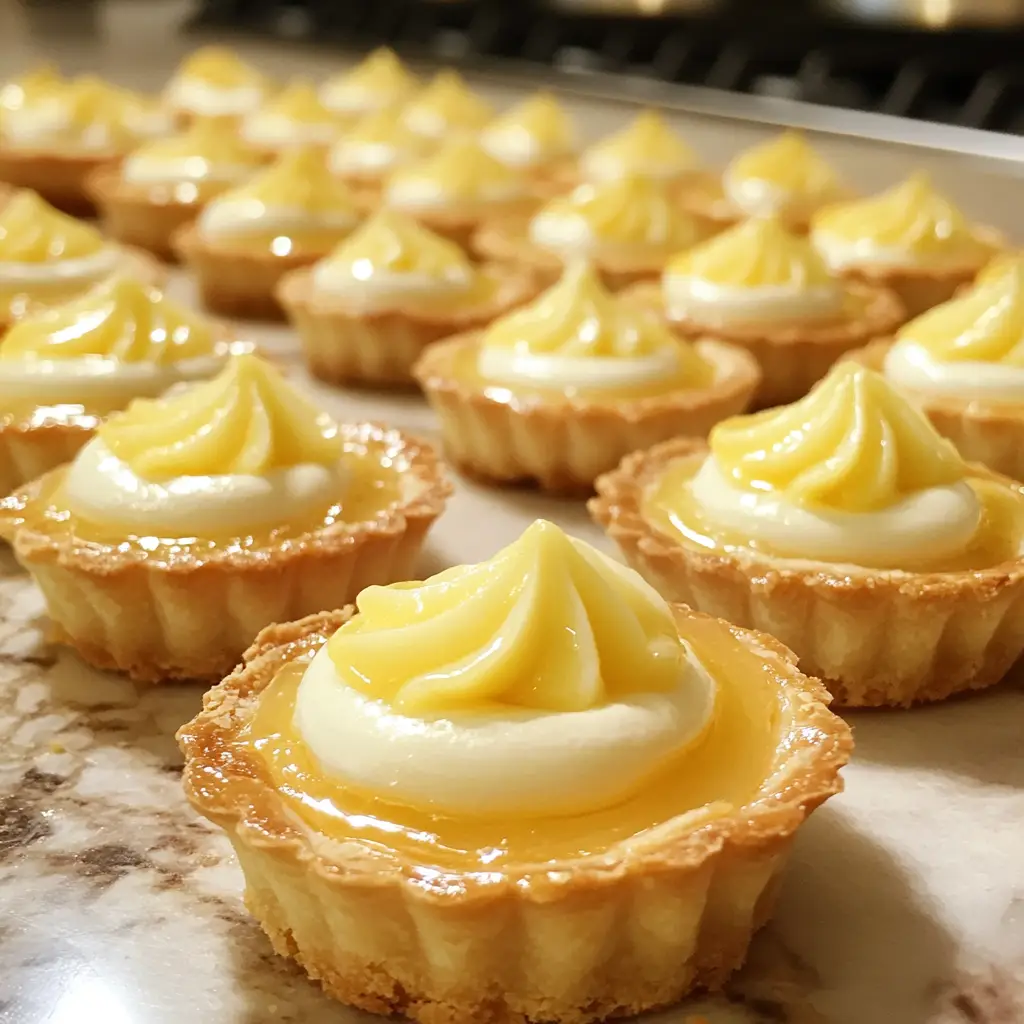
Ah, the delightful world of desserts! As a passionate home cook, I find that nothing quite captures the essence of sunshine like a mini lemon tart. The moment I take a bite, I’m transported to a sun-drenched afternoon, where the sweet and tangy flavors dance on my palate like a joyful summer breeze. These little gems are not just treats; they are a celebration of life’s simple pleasures.
My love for lemon tarts began during a family gathering. My grandmother, with her flour-dusted apron and twinkling eyes, would whip up a batch that filled our home with a zesty aroma. I remember watching her, mesmerized by how she transformed simple ingredients into something magical. It was in those moments that I learned the power of cooking—how it brings people together and creates lasting memories.
Fast forward to today, and I’ve put my own spin on her classic recipe. My mini lemon tarts are perfect for any occasion, whether it’s a cozy family dinner or a festive gathering with friends. They are bite-sized bursts of joy, and I can’t wait to share this recipe with you. Trust me, once you try them, you’ll be hooked!
In this article, I’ll guide you through the process of making these delightful treats, from the buttery tart shells to the luscious lemon filling. So, roll up your sleeves, and let’s embark on this culinary adventure together. Get ready to impress your loved ones with a dessert that’s as beautiful as it is delicious!
Ingredients for Mini Lemon Tarts Recipe
Before we dive into the delightful process of making mini lemon tarts, let’s gather our ingredients. Having everything ready is like setting the stage for a beautiful performance. Each ingredient plays a vital role in creating that perfect balance of sweet and tangy. Here’s what you’ll need:
Main Ingredients
- For the Tart Shells:
- 1 cup all-purpose flour
- 1/4 cup powdered sugar
- 1/2 cup unsalted butter, softened
- 1/4 teaspoon salt
- 1 egg yolk
- For the Lemon Filling:
- 1/2 cup granulated sugar
- 2 large eggs
- 1/2 cup fresh lemon juice (about 2-3 lemons)
- 1 tablespoon lemon zest
- 1/4 cup heavy cream
When selecting your ingredients, I always recommend using fresh lemons for the best flavor. The zest adds a lovely aromatic touch that elevates the tarts. And don’t skimp on the butter; it’s the secret to a flaky, melt-in-your-mouth tart shell!
Optional Add-ons
- Fresh berries (like raspberries or blueberries) for garnish
- Whipped cream for a creamy topping
- Mint leaves for a pop of color and freshness
These optional add-ons can take your mini lemon tarts to the next level. I love adding a few fresh berries on top for a burst of color and flavor. It’s like dressing up your tarts for a special occasion!
Now that we have our ingredients ready, let’s move on to the fun part—preparing these delightful mini lemon tarts!
How to Prepare Mini Lemon Tarts Recipe
Now that we have our ingredients ready, it’s time to roll up our sleeves and dive into the delightful process of making mini lemon tarts! I promise, each step is a joy, and the end result is worth every moment spent in the kitchen. Let’s get started!
Step 1: Prepare the Tart Shells
First things first, we need to create those buttery tart shells that will cradle our luscious lemon filling. In a mixing bowl, combine the flour, powdered sugar, and salt. Then, add the softened butter and mix until the mixture resembles coarse crumbs. Finally, stir in the egg yolk until the dough comes together.
Tips for Making Perfect Tart Shells
- Make sure your butter is softened but not melted. This helps create a flaky texture.
- Chill the dough for about 30 minutes before rolling it out. This makes it easier to handle and prevents shrinking during baking.
- Use a tart pan with removable bottoms for easy removal. It’s like giving your tarts a grand exit!
Step 2: Make the Lemon Filling
While the tart shells are chilling, let’s whip up that zesty lemon filling! In a separate bowl, whisk together the granulated sugar and eggs until smooth. Then, add the fresh lemon juice, lemon zest, and heavy cream. Mix until everything is well combined. The aroma of fresh lemons will fill your kitchen, and trust me, it’s heavenly!
Tips for Achieving the Right Consistency
- Make sure to strain the lemon juice to remove any seeds or pulp. We want a silky smooth filling!
- Don’t overmix the filling; just combine until smooth. Overmixing can introduce air bubbles, which we want to avoid.
Step 3: Assemble the Tarts
Now comes the fun part—assembling our mini lemon tarts! Preheat your oven to 350°F (175°C). Once the tart shells are chilled, roll out the dough and press it into the tart pans. Pour the lemon filling into each shell, filling them about three-quarters full. This allows room for the filling to puff up a bit while baking.
Tips for Even Distribution of Filling
- Use a measuring cup or a small ladle to pour the filling. This helps ensure each tart gets the same amount.
- Gently tap the tart pans on the counter to release any air bubbles. It’s like giving them a little shake to settle!
Step 4: Bake the Mini Lemon Tarts
It’s time to bake our mini lemon tarts! Place them in the preheated oven and bake for about 20-25 minutes, or until the filling is set and the edges of the tart shells are golden brown. The smell wafting through your kitchen will be absolutely irresistible!
Tips for Proper Baking Time
- Keep an eye on the tarts as they bake. Ovens can vary, and you don’t want them to overbake.
- Let the tarts cool in the pans for a few minutes before transferring them to a wire rack. This helps them hold their shape.
And there you have it! The process of preparing mini lemon tarts is not only simple but also incredibly rewarding. I can already imagine the smiles on your loved ones’ faces when they take that first bite. Let’s move on to the next steps and make these tarts shine!
Equipment Needed for Mini Lemon Tarts Recipe
Before we dive into the kitchen, let’s gather the essential tools for our mini lemon tarts. Having the right equipment makes the process smoother and more enjoyable. Here’s what you’ll need:
- Tart Pans: A set of mini tart pans or a muffin tin works perfectly. If you don’t have tart pans, you can use a regular pie dish, but the tarts may be larger.
- Mixing Bowls: A couple of medium-sized mixing bowls will help you combine the ingredients easily. I love using glass bowls because I can see the colors and textures as I mix!
- Whisk: A whisk is essential for blending the filling smoothly. If you don’t have one, a fork can do the trick, though it may take a bit more elbow grease.
- Rolling Pin: This is key for rolling out the tart dough. If you don’t have a rolling pin, a clean wine bottle can work in a pinch!
- Measuring Cups and Spoons: Accurate measurements are crucial for baking. I always keep a set handy to ensure my ingredients are just right.
- Fine Mesh Strainer: This is optional but highly recommended for straining the lemon juice. It helps achieve that silky smooth filling we all love.
- Cooling Rack: After baking, a cooling rack allows the tarts to cool evenly. If you don’t have one, a plate will suffice, but the cooling process may take a bit longer.
With these tools at your side, you’re all set to create your mini lemon tarts! Each piece of equipment plays a role in crafting these delightful treats, making your baking experience a breeze. Now, let’s move on to the variations of this recipe that can add a twist to your tarts!
Variations of Mini Lemon Tarts Recipe
While the classic mini lemon tarts are a delightful treat on their own, I love experimenting with different flavors and ingredients to create unique variations. It’s like giving your tarts a new personality! Here are a few fun twists you can try:
- Berry Lemon Tarts: Add a layer of fresh berries, like strawberries or blueberries, to the bottom of the tart shells before pouring in the lemon filling. The burst of fruitiness complements the tartness beautifully!
- Coconut Lemon Tarts: Mix shredded coconut into the lemon filling for a tropical twist. You can also sprinkle some toasted coconut on top for added texture and flavor.
- Chocolate Lemon Tarts: For the chocolate lovers, try drizzling melted dark chocolate over the cooled tarts. The rich chocolate pairs surprisingly well with the zesty lemon.
- Lavender Lemon Tarts: Infuse the lemon filling with a hint of culinary lavender. Just a small amount can add a lovely floral note that elevates the tarts to a whole new level.
These variations not only keep things exciting but also allow you to cater to different tastes and preferences. I often find that my friends and family love trying out these twists, and it sparks fun conversations about flavor combinations. So, don’t hesitate to get creative and make these mini lemon tarts your own!
Cooking Notes for Mini Lemon Tarts Recipe
As I’ve journeyed through the delightful process of making mini lemon tarts, I’ve gathered a few cooking notes that can help you achieve the best results. These little nuggets of wisdom can make a big difference in your baking adventure!
- Room Temperature Ingredients: For the best texture, ensure your butter and eggs are at room temperature. This helps them blend more easily, creating a smooth filling and a tender crust.
- Chill Time: Don’t skip the chilling step for the tart dough! It’s crucial for preventing shrinkage during baking. A well-chilled dough will hold its shape beautifully.
- Watch the Baking Time: Every oven is different, so keep an eye on your tarts as they bake. You want the filling to be set but still slightly jiggly in the center. It will firm up as it cools.
- Cooling Completely: Allow the tarts to cool completely before serving. This helps the filling set properly and makes for a cleaner cut when you slice into them.
- Storage Tips: If you have leftovers (which is rare in my house!), store the tarts in an airtight container in the fridge. They’re best enjoyed within a couple of days, but I doubt they’ll last that long!
These cooking notes are like little guiding stars, helping you navigate the world of mini lemon tarts. With these tips in your back pocket, you’ll be well on your way to creating a dessert that’s not only delicious but also a joy to share with others. Now, let’s move on to serving suggestions that will make your tarts shine even brighter!
Serving Suggestions for Mini Lemon Tarts Recipe
Now that our mini lemon tarts are baked to perfection, it’s time to think about how to present them! Serving is just as important as making, and I love to get a little creative here. After all, we eat with our eyes first, right?
One of my favorite ways to serve these tarts is on a beautiful platter, garnished with fresh mint leaves. The vibrant green adds a lovely contrast to the sunny yellow of the lemon filling. You can also sprinkle a dusting of powdered sugar on top for a touch of elegance. It’s like giving your tarts a little snow-kissed charm!
If you want to elevate the experience even further, consider pairing the tarts with a dollop of freshly whipped cream. The creamy texture complements the tartness beautifully, creating a delightful balance. You can even add a hint of vanilla to the whipped cream for an extra layer of flavor.
For a fun twist, serve the mini lemon tarts alongside a scoop of lemon sorbet. This refreshing addition not only enhances the lemony goodness but also adds a cool contrast that’s perfect for warm days. It’s like a mini dessert party on a plate!
Lastly, don’t forget about the power of presentation. Using colorful plates or adding edible flowers can make your dessert table pop. Remember, the goal is to create a feast for the senses, and these little touches can make all the difference. So, get creative and let your mini lemon tarts shine!
Tips for Perfecting Mini Lemon Tarts Recipe
As I’ve baked my fair share of mini lemon tarts, I’ve gathered a treasure trove of tips that can help you elevate your tarts to a whole new level. These little nuggets of wisdom are like secret ingredients that can make a big difference in your baking journey. Let’s dive into them!
- Use Fresh Ingredients: Always opt for fresh lemons and high-quality butter. The flavor of your tarts will shine through when you use the best ingredients. Trust me, it’s worth it!
- Don’t Rush the Chilling: Allow your tart dough to chill properly. This step is crucial for achieving that perfect flaky texture. Patience is key!
- Experiment with Sweetness: If you prefer a sweeter filling, feel free to adjust the sugar in the lemon filling. Just remember to taste as you go. It’s all about finding your perfect balance!
- Garnish Creatively: Get playful with your garnishes! Fresh berries, edible flowers, or a sprinkle of zest can add a beautiful touch to your tarts. It’s like giving them a stylish outfit!
- Practice Makes Perfect: Don’t be discouraged if your first batch isn’t perfect. Baking is a learning experience, and each attempt brings you closer to mastering the art of mini lemon tarts.
With these tips in your back pocket, you’re well on your way to creating mini lemon tarts that will impress everyone at the table. Remember, cooking is all about joy and creativity, so have fun with it! Now, let’s move on to the breakdown of time for our mini lemon tarts recipe.
Breakdown of Time for Mini Lemon Tarts Recipe
As a passionate home cook, I know that time management is key in the kitchen. Understanding how long each step takes can help you plan your baking adventure more effectively. Here’s a quick breakdown of the time you’ll need for making these delightful mini lemon tarts:
- Prep Time: Approximately 30 minutes. This includes gathering your ingredients, preparing the tart shells, and making the lemon filling. It’s a great time to enjoy some music or a podcast while you work!
- Cooking Time: About 25 minutes. This is the time your tarts will spend in the oven, filling your kitchen with that irresistible lemony aroma. Trust me, it’s worth the wait!
- Total Time: Roughly 55 minutes. In just under an hour, you’ll have a batch of mini lemon tarts ready to impress your family and friends.
With this time breakdown, you can easily fit these mini lemon tarts into your day. Whether you’re preparing for a special occasion or just treating yourself, knowing how long each step takes makes the process smoother and more enjoyable. Now, let’s move on to the nutritional information for our delightful tarts!
Nutritional Information for Mini Lemon Tarts Recipe
As a passionate home cook, I believe that enjoying delicious desserts doesn’t have to come with guilt. Understanding the nutritional content of our mini lemon tarts can help us appreciate them even more. Here’s a quick overview of the nutritional information for one mini lemon tart:
- Calories: Approximately 150 calories
- Fat: 8 grams (mostly from the butter in the tart shell)
- Carbohydrates: 18 grams (including sugars from the filling)
- Protein: 2 grams
- Sugar: 6 grams (natural sugars from the lemon and added sugar)
- Fiber: 0.5 grams
These mini lemon tarts are a delightful treat that can fit into a balanced diet. They’re perfect for special occasions or simply to brighten up your day. Just remember, moderation is key! Enjoying one or two of these zesty delights can bring a smile to your face without overindulging. So, go ahead and savor every bite!
Frequently Asked Questions about Mini Lemon Tarts Recipe
As I’ve shared my mini lemon tarts recipe with friends and family, I’ve noticed a few common questions pop up. It’s always great to clarify any doubts, especially when it comes to baking. So, let’s dive into some frequently asked questions about these delightful treats!
Can I make the tart shells ahead of time?
Absolutely! You can prepare the tart shells a day in advance. Just store them in an airtight container at room temperature. This way, you can save time on the day you plan to serve them. It’s like having a little head start in your baking adventure!
What if I don’t have fresh lemons?
If fresh lemons are not available, you can use bottled lemon juice as a substitute. However, I always recommend fresh lemons for the best flavor. The zest and juice from fresh lemons add a brightness that bottled juice just can’t match. But in a pinch, bottled juice will work!
How do I know when the tarts are done baking?
Great question! The tarts are done when the filling is set but still slightly jiggly in the center. The edges of the tart shells should be golden brown. If you’re unsure, you can gently shake the pan; if the filling wobbles slightly, it’s ready to come out!
Can I freeze mini lemon tarts?
Yes, you can freeze mini lemon tarts! Just make sure they are completely cooled before wrapping them tightly in plastic wrap and placing them in an airtight container. They can be frozen for up to a month. When you’re ready to enjoy them, simply thaw them in the fridge overnight. It’s like having a little lemony surprise waiting for you!
What can I use instead of heavy cream?
If you’re looking for a lighter option, you can substitute heavy cream with half-and-half or whole milk. Keep in mind that the texture may be slightly different, but it will still taste delicious. You can also use coconut cream for a dairy-free alternative, adding a lovely tropical twist!
These FAQs should help clear up any uncertainties you might have about making mini lemon tarts. Remember, baking is all about experimenting and having fun, so don’t hesitate to ask questions and make the recipe your own. Now, let’s wrap up our delightful journey with a conclusion on these zesty treats!
Conclusion on Mini Lemon Tarts Recipe
As we wrap up our delightful journey through the world of mini lemon tarts, I can’t help but feel a sense of joy and accomplishment. These little treats are more than just a dessert; they are a celebration of flavors, memories, and creativity. The combination of a buttery, flaky shell and a zesty lemon filling creates a perfect harmony that dances on your taste buds.
What I love most about this mini lemon tarts recipe is its versatility. Whether you’re hosting a fancy dinner party or simply enjoying a quiet afternoon at home, these tarts fit any occasion. They are easy to make, yet they look and taste like a gourmet treat. Plus, with the option to customize them with various toppings and flavors, you can truly make them your own.
So, I encourage you to gather your ingredients, roll up your sleeves, and dive into this culinary adventure. Share these mini lemon tarts with your loved ones, and watch as their faces light up with delight. After all, cooking is about creating connections and memories, and these tarts are sure to bring smiles all around. Happy baking!