The air fills with the sweet aroma of melting sugar as you step into the kitchen, igniting a wave of nostalgia that washes over you. You prepare yourself to embark on an enchanting adventure, one that turns ordinary ingredients into a delightful experience. As the sugar transforms into a velvety liquid and begins to bubble, anticipation dances in the air. This isn’t just candy; it’s magic, a creation that brings joy, whether you’re making it for a special occasion, a party, or simply to satisfy that craving for something sweet and whimsical.
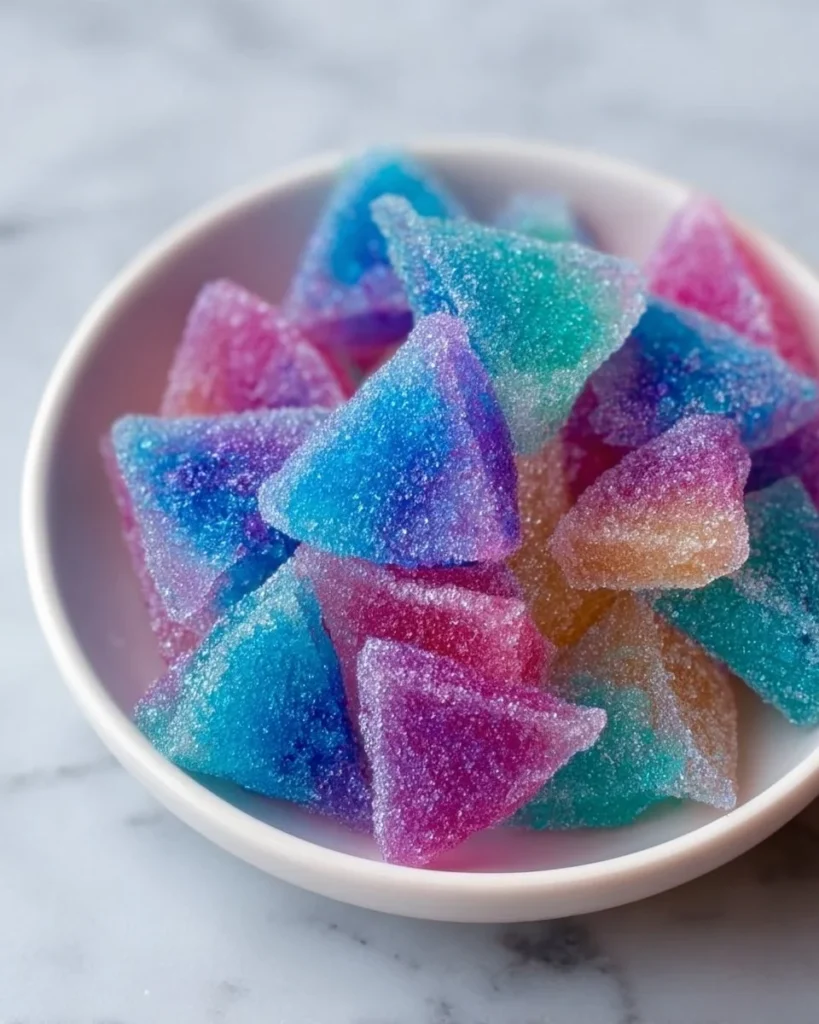
With vibrant colors swirling into your freshly concocted mixture, you can already envision the final pieces—each one glinting with a sugary sheen, promising a flavor explosion that tantalizes the taste buds. Imagine the first crunch as you break into these sweet morsels; the initial crack gives way to a chewy, sugary bliss. Your senses awaken at the thought of the fruity flavors intertwining with the comforting warmth of vanilla or mint, making each bite an experience that transports you back to carefree childhood days filled with laughter and warmth.
Why You’ll Love This Magic Candy
Magic Candy stands out for many reasons, each one a testament to its pure indulgence. First and foremost, the beauty of this recipe lies in its versatility. It allows you to customize flavors and colors to your heart’s content, making it perfect for any celebration—birthdays, holidays, or just a random Tuesday when you crave something sweet. The crunch of every bite, coupled with the vibrant colors, elicits smiles and ignites joy, making it a delightful treat that captivates both the young and the young-at-heart.
This candy isn’t just about taste; it’s about experience. It beckons you to get creative, allowing you to experiment with different flavor extracts—perhaps raspberry for a summer picnic or peppermint for holiday gatherings. Furthermore, it’s incredibly satisfying to watch as liquid turns into tangible, edible art. Each piece will not only satisfy your sweet tooth but will also become a conversation starter, showcasing your culinary creativity. Best of all, you can whip up a batch in about an hour, delighting your friends and family with minimal effort and maximum impact.
Preparation Phase & Tools to Use
Creating magic candy requires some essential tools that elevate your candy-making process and ensure your success:
- Medium Saucepan: A sturdy saucepan is crucial for even cooking of the sugar. It distributes heat uniformly, preventing any scorching.
- Candy Thermometer: This invaluable tool ensures precision in achieving the perfect temperature for candy, preventing too-soft or overly hard results.
- Silicone Baking Mat or Greased Baking Sheet: A non-stick surface allows for easy candy removal, crucial for shaping your sweet delights.
- Wooden Spoon or Heat-Resistant Spatula: These will help stir your mixture without the risk of melting or deforming, maintaining the integrity of the concoction.
Preparation Tips: Always measure your ingredients accurately to ensure the perfect texture and flavor. Have all your ingredients ready before you start, as timing is critical in the candy-making process.
Ingredients for Magic Candy
Gather the following ingredients to create your masterpiece:
- 2 cups granulated sugar: This forms the base and creates that satisfying sweetness. Consider substituting with a sugar alternative for a healthier spin.
- 1/2 cup light corn syrup: This provides stability and helps prevent crystallization, ensuring a smooth and glossy finish. You may use agave syrup as a possible alternative.
- 1/2 cup water: Acts as a binding agent during the initial heating process.
- Food coloring: Add joy and vibrancy, transforming your candy into a visual feast. Natural food dyes or powders are excellent substitutes.
- Flavoring extracts (e.g., vanilla, mint, or fruit flavors): These lend your candy a character that can be tailored to preference. Try experimenting with essential oils as creative alternatives.
- 1 tbsp butter (optional): While not necessary, a touch of butter can add richness and depth to your candy’s texture.
How to Make Magic Candy
Creating your Magic Candy is a straightforward yet enchanting process. Follow these step-by-step instructions to bring your sweet creation to life:
-
Combine Ingredients: In a medium saucepan, combine the sugar, corn syrup, and water. Cook over medium heat, stirring gently until the sugar completely dissolves—watch your mixture transform!
-
Bring to a Boil: Allow the mixture to come to a boil without stirring. The bubbling symphony marks the pivotal moment in candy-making—continue boiling until you reach the hard crack stage, around 300°F (150°C). This is where the magic happens!
-
Add Coloring and Flavor: As soon as it reaches the desired temperature, remove from heat and carefully pour in your chosen food coloring and flavoring extracts. Stir vigorously but cautiously; the mixture will be extremely hot!
-
Mold the Candy: Pour your colorful concoction onto a greased baking sheet or into a silicone candy mold. Spread it evenly and watch as it forms a shiny, eye-catching surface.
-
Cool Completely: Allow your candy to sit undisturbed until it cools and hardens completely. This usually takes about 30 minutes but seems to stretch into eternity with the delightful anticipation!
-
Break and Enjoy: Once cooled, break your candy into pieces. Revel in the satisfying crunch as you taste your creation—each bite bursts with flavor, cradling the sweetness that only homemade candy can deliver!
Chef’s Notes & Helpful Tips
- Make-Ahead Tips: Magic Candy stays fresh for about two weeks when stored properly. Consider making a double batch for special occasions, gifting them in decorative bags!
- Cooking Alternatives: If you have an air fryer, it can be useful for warming up any leftovers, giving them a delicious crunchy edge. Alternatively, your oven can also help warm them up softly.
- Customization Ideas: Vary the flavors and colors for different events. Think citrusy lemon for summer, pumpkin spice for fall, or even matcha for an earthy twist.
Common Mistakes to Avoid
- Don’t Stir Too Much: Stirring while the candy boils can lead to unintended crystallization. Let it bubble freely to achieve that smooth texture.
- Watch the Temperature: Not using a candy thermometer can lead to overcooked or undercooked candy. Always keep an eye on that crucial temperature!
- Cooling Time: Patience is key! Don’t rush the cooling process; cutting too early can make the candy sticky and difficult to manage.
What to Serve With Magic Candy
Elevate your Magic Candy experience by pairing it with these delightful options:
- Hot Cocoa: A warming mug of cocoa transforms your sweet treat into the perfect cozy indulgence during cold evenings.
- Ice Cream: Break your Magic Candy into pieces and sprinkle them atop a scoop of velvety vanilla ice cream for a sweet contrast in temperature and texture.
- Fruit Platter: The bright flavors of berries or citrus naturally complement the sweetness of the candy, creating a balanced treat.
- Cheese Board: Pairing the sugary candy with sharp cheeses invites a delightful contrast that excites the palate.
- Nut Mixes: The crunch of roasted nuts serves as a satisfying accompaniment, adding a layer of earthiness to each bite.
- Coffee or Tea: The warm, slightly bitter notes of coffee or tea will balance the sweetness of the candy, making for a refined pairing experience.
Storage & Reheating Instructions
For best results, store your Magic Candy in an airtight container at room temperature. It will remain delightful for about two weeks. Although refrigeration is an option, it can lead to moisture issues. If you ever need to reheat for some crunchy goodness, place your pieces in a microwave for just a few seconds or back in a low-temperature oven—not too long, just enough to revitalize that crunchy texture!
Estimated Nutrition Information
This recipe yields roughly 12 servings with approximately:
- Calories per serving: 150
- Carbohydrates: 38g
- Sugars: 36g
- Fat: 0g
Values are approximate and may vary based on exact ingredients and portion sizes.
FAQs
1. Can I make this candy without corn syrup?
Absolutely! If you’re looking for alternatives, you can substitute with agave syrup or honey, though the texture might vary slightly.
2. How do I know when my candy has reached the hard crack stage?
Using a candy thermometer is key for precision. It will read about 300°F (150°C). If you don’t have one, you can drop a small amount in cold water—if it hardens instantly, you’ve reached the right stage.
3. Can I use flavored oils instead of extracts?
Yes! Just make sure to adjust the amount, as flavored oils are often more concentrated than extracts. Start with a smaller quantity and adjust to taste.
4. What types of molds work best?
Silicone molds are ideal for candy-making as they allow easy removal without damaging the pieces. They come in various shapes and sizes for fun variety!
5. How can I prevent crystallization in my candy?
To avoid unwanted crystals, be sure to use clean equipment and avoid stirring the mixture once it begins to boil. Also, a little corn syrup helps reduce the chances of crystallizing.
As you carefully orchestrate your journey of candy-making, let the sweetness of the experience unfold. Embrace the colors, aromas, and delightful flavors as they transform your kitchen into a sanctuary of joy. Your Magic Candy promises not only to be a treat but a memory in the making—one that invites you and your loved ones back time and again. So roll up your sleeves, let the magic take over, and indulge in this sweet adventure!
Print
Magic Candy
- Total Time: 45 minutes
- Yield: 12 servings 1x
- Diet: Vegetarian
Description
A delightful, customizable candy experience that brings joy and nostalgia, perfect for any occasion.
Ingredients
- 2 cups granulated sugar
- 1/2 cup light corn syrup
- 1/2 cup water
- Food coloring
- Flavoring extracts (e.g., vanilla, mint, or fruit flavors)
- 1 tbsp butter (optional)
Instructions
- Combine Ingredients: In a medium saucepan, combine the sugar, corn syrup, and water. Cook over medium heat, stirring gently until the sugar completely dissolves.
- Bring to a Boil: Allow the mixture to come to a boil without stirring. Continue boiling until you reach the hard crack stage, around 300°F (150°C).
- Add Coloring and Flavor: Remove from heat and carefully pour in your chosen food coloring and flavoring extracts. Stir vigorously.
- Mold the Candy: Pour your mixture onto a greased baking sheet or into a silicone candy mold.
- Cool Completely: Allow to cool and harden completely, usually about 30 minutes.
- Break and Enjoy: Once cooled, break your candy into pieces and savor each bite.
Notes
Magic Candy stays fresh for about two weeks when stored in an airtight container at room temperature.
- Prep Time: 15 minutes
- Cook Time: 30 minutes
- Category: Candy
- Method: Cooking
- Cuisine: American
Nutrition
- Serving Size: 1 serving
- Calories: 150
- Sugar: 36g
- Sodium: 0mg
- Fat: 0g
- Saturated Fat: 0g
- Unsaturated Fat: 0g
- Trans Fat: 0g
- Carbohydrates: 38g
- Fiber: 0g
- Protein: 0g
- Cholesterol: 0mg
Keywords: candy, sweet, dessert, homemade, magic candy