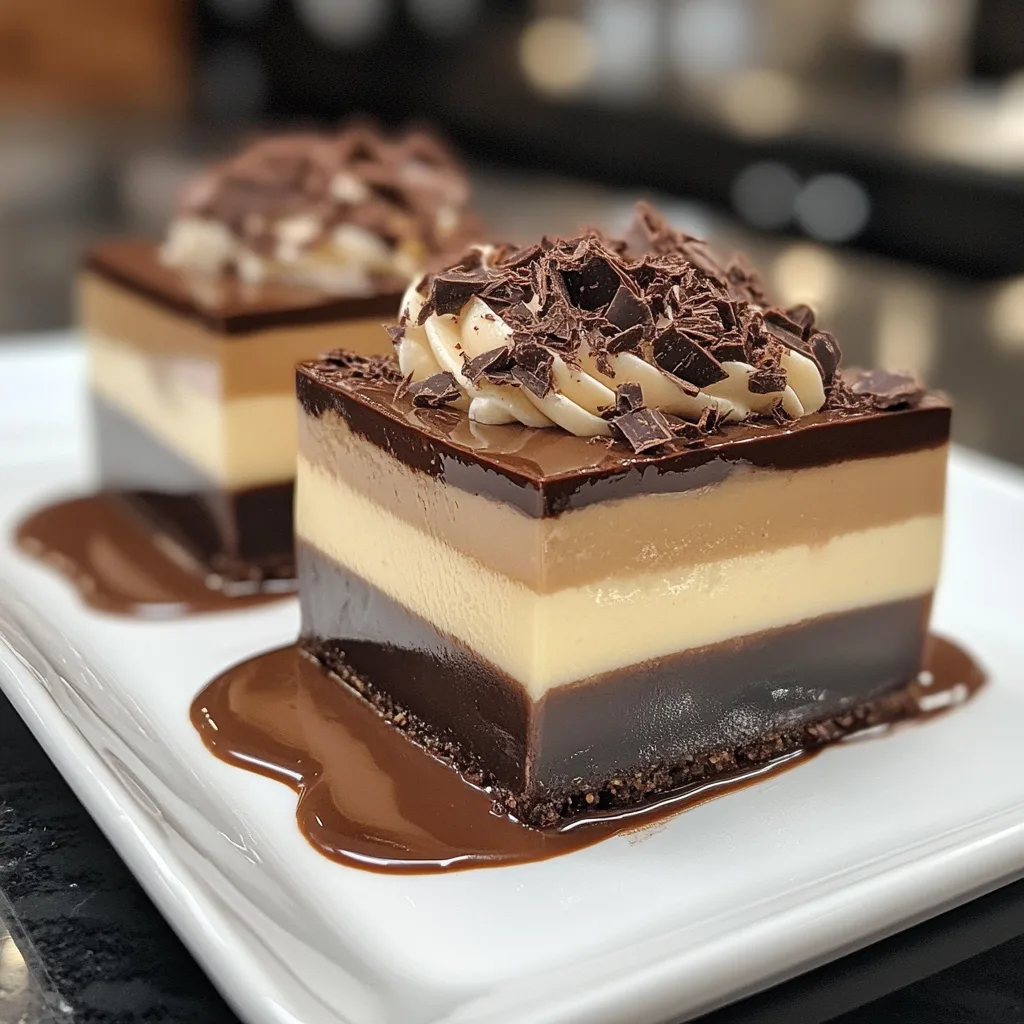
Introduction to Layered Chocolate & Custard Dessert Cup
As a busy mom, I know how precious time can be, especially when it comes to whipping up something sweet. That’s why I adore this Layered Chocolate & Custard Dessert Cup! It’s a delightful treat that comes together in just 30 minutes, making it perfect for those hectic days when you want to impress your loved ones without spending hours in the kitchen. The rich chocolate and creamy custard create a heavenly combination that will have everyone asking for seconds. Trust me, this dessert is not just a treat; it’s a moment of joy in a cup!
Why You’ll Love This Layered Chocolate & Custard Dessert Cup
This Layered Chocolate & Custard Dessert Cup is a dream come true for busy moms and professionals alike. It’s incredibly easy to make, requiring minimal effort while delivering maximum flavor. In just 30 minutes, you can create a stunning dessert that looks as good as it tastes. Plus, the combination of rich chocolate and smooth custard is simply irresistible, making it a guaranteed crowd-pleaser for any occasion!
Ingredients for Layered Chocolate & Custard Dessert Cup
Gathering the right ingredients is the first step to creating this delightful Layered Chocolate & Custard Dessert Cup. Here’s what you’ll need:
- Chocolate pudding: This is the star of the show! Use instant or cooked pudding for a rich chocolate flavor.
- Vanilla custard: Creamy and smooth, it balances the richness of the chocolate. You can use store-bought or homemade custard.
- Whipped cream: Light and fluffy, it adds a lovely texture. Feel free to use a dairy-free alternative if needed.
- Chocolate shavings: These add a touch of elegance and extra chocolatey goodness. You can easily make them by shaving a chocolate bar.
- Crushed cookies: For a delightful crunch, use your favorite cookies. Oreos or graham crackers work wonderfully!
- Fresh berries: Berries like strawberries or raspberries not only look beautiful but also add a burst of freshness.
For exact quantities, check the bottom of the article where you can find everything listed for easy printing. Enjoy the process of gathering these ingredients, as each one plays a role in creating a dessert that’s sure to impress!

How to Make Layered Chocolate & Custard Dessert Cup
Now that you have all your ingredients ready, let’s dive into the fun part—making this Layered Chocolate & Custard Dessert Cup! Follow these simple steps, and you’ll have a stunning dessert that’s sure to impress.
Step 1: Prepare the Chocolate Pudding
Start by preparing the chocolate pudding according to the package instructions. It’s usually as simple as mixing the pudding mix with milk and whisking until it thickens. Once it’s ready, let it cool for a few minutes. This step is crucial because warm pudding can melt your layers!
Step 2: Prepare the Vanilla Custard
Next, it’s time for the vanilla custard. Just like the pudding, follow the package instructions. Whisk it until it’s smooth and creamy. Allow it to cool as well. The contrast between the chocolate and vanilla will make your dessert pop!
Step 3: Layer the Chocolate Pudding
Grab your serving cups and start with a generous layer of chocolate pudding at the bottom. Use a spoon or a piping bag for a neat presentation. This layer is the foundation of your dessert, so make it count!
Step 4: Add Vanilla Custard Layer
Now, gently spoon the vanilla custard on top of the chocolate pudding. Be careful not to mix the layers. The goal is to create a beautiful contrast between the rich chocolate and the creamy custard. It’s like a delicious little surprise waiting to be discovered!
Step 5: Top with Whipped Cream
Next up, add a fluffy layer of whipped cream on top of the custard. You can use a spatula or pipe it on for a fancy touch. This layer adds a lightness that balances the richness of the chocolate and custard.
Step 6: Add Toppings
Now for the fun part—toppings! Sprinkle chocolate shavings and crushed cookies on top of the whipped cream. This adds texture and a delightful crunch. Don’t forget to finish with fresh berries for a pop of color and freshness!
Step 7: Chill Before Serving
Finally, place your dessert cups in the refrigerator for at least 30 minutes. Chilling allows the flavors to meld together beautifully. Plus, it makes for a refreshing treat when you’re ready to serve!
Tips for Success
- Make sure all layers are cool before assembling to prevent melting.
- Use a piping bag for whipped cream for a professional look.
- Experiment with different cookie types for unique flavors.
- Chill the dessert longer for a firmer texture if desired.
- Double the recipe for larger gatherings; it’s a hit!
Equipment Needed
- Mixing bowls: Essential for combining your pudding and custard. Any size will do!
- Whisk: Perfect for mixing ingredients smoothly. A fork can work in a pinch.
- Serving cups: Use clear cups for a beautiful presentation. Mason jars are a fun alternative!
- Spatula: Great for layering and spreading whipped cream evenly.
- Piping bag (optional): For a fancy whipped cream finish. A zip-top bag with a corner cut works too!
Variations
- Dark Chocolate Delight: Swap the chocolate pudding for dark chocolate pudding for a richer flavor.
- Fruit Fusion: Add layers of fresh fruit like bananas or peaches between the chocolate and custard for a fruity twist.
- Nutty Crunch: Incorporate chopped nuts, like almonds or hazelnuts, for an added crunch and flavor.
- Vegan Version: Use plant-based chocolate pudding and coconut whipped cream for a delicious dairy-free dessert.
- Minty Fresh: Add a few drops of peppermint extract to the whipped cream for a refreshing minty flavor.
Serving Suggestions
- Pair with a hot cup of coffee or a chilled glass of milk for a delightful contrast.
- Serve alongside a light fruit salad for a refreshing balance.
- Garnish with a sprig of mint for an elegant touch.
- Present in clear glasses to showcase the beautiful layers.
- Consider adding a drizzle of chocolate sauce for extra indulgence!
FAQs about Layered Chocolate & Custard Dessert Cup
Can I make the Layered Chocolate & Custard Dessert Cup in advance?
Absolutely! This dessert can be made a day in advance. Just layer everything and keep it covered in the fridge. It allows the flavors to meld beautifully, making it even more delicious!
What can I substitute for whipped cream?
If you’re looking for a dairy-free option, coconut whipped cream works wonderfully. You can also use store-bought whipped topping for a quick alternative.
How can I make this dessert healthier?
To lighten it up, consider using sugar-free pudding and custard. You can also reduce the amount of whipped cream or use a lighter version. Fresh fruit can add natural sweetness!
Can I use homemade pudding and custard?
Of course! Homemade pudding and custard will elevate your Layered Chocolate & Custard Dessert Cup. Just ensure they are cooled before layering to maintain the structure.
What’s the best way to store leftovers?
Store any leftovers in an airtight container in the fridge. Enjoy them within a couple of days for the best taste and texture!
Final Thoughts
Creating this Layered Chocolate & Custard Dessert Cup is more than just making a sweet treat; it’s about bringing joy to your table. Each layer tells a story of rich flavors and delightful textures, making it a perfect dessert for any occasion. Whether you’re celebrating a special moment or simply treating yourself after a long day, this dessert is sure to bring smiles. Plus, it’s so easy to make that you’ll find yourself whipping it up again and again. So, gather your loved ones, dig in, and savor every delicious bite together!
Print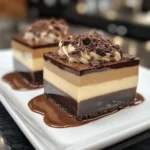
Layered Chocolate & Custard Dessert Cup That Delights!
- Total Time: 30 minutes
- Yield: 4 servings 1x
- Diet: Vegetarian
Description
A delicious layered dessert featuring rich chocolate and creamy custard, perfect for any occasion.
Ingredients
- 1 cup chocolate pudding
- 1 cup vanilla custard
- 1 cup whipped cream
- 1/2 cup chocolate shavings
- 1/4 cup crushed cookies
- Fresh berries for garnish
Instructions
- Prepare the chocolate pudding according to package instructions and let it cool.
- Prepare the vanilla custard according to package instructions and let it cool.
- In serving cups, layer the chocolate pudding at the bottom.
- Add a layer of vanilla custard on top of the chocolate pudding.
- Top with a layer of whipped cream.
- Sprinkle chocolate shavings and crushed cookies on top.
- Garnish with fresh berries.
- Chill in the refrigerator for at least 30 minutes before serving.
Notes
- For a richer flavor, use dark chocolate pudding.
- Feel free to substitute the whipped cream with a dairy-free alternative for a vegan option.
- Can be made a day in advance for convenience.
- Prep Time: 20 minutes
- Cook Time: 0 minutes
- Category: Dessert
- Method: Layering
- Cuisine: American
Nutrition
- Serving Size: 1 cup
- Calories: 350
- Sugar: 25g
- Sodium: 150mg
- Fat: 15g
- Saturated Fat: 8g
- Unsaturated Fat: 5g
- Trans Fat: 0g
- Carbohydrates: 45g
- Fiber: 2g
- Protein: 5g
- Cholesterol: 30mg
Keywords: Layered Chocolate & Custard Dessert Cup, chocolate dessert, custard dessert, layered dessert