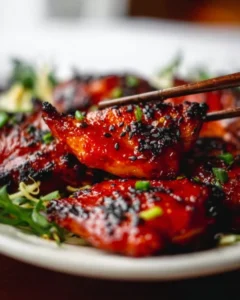
Introduction to Korean Baked Cauliflower
As a busy mom, I know how challenging it can be to whip up something delicious and healthy on a hectic day. That’s why I absolutely adore this Korean Baked Cauliflower recipe! It’s not just a side dish; it’s a flavor explosion that can brighten up any meal. With its vibrant taste and crispy texture, this dish is sure to impress your loved ones. Plus, it’s quick to prepare, making it the perfect solution for those nights when time is tight but you still want to serve something special.
Why You’ll Love This Korean Baked Cauliflower
This Korean Baked Cauliflower is a game-changer for busy families. It’s incredibly easy to make, taking just 40 minutes from start to finish. The combination of sweet and spicy flavors will tantalize your taste buds, making it a hit with both kids and adults. Plus, it’s a healthy option that doesn’t skimp on taste, so you can feel good about serving it at your dinner table.
Ingredients for Korean Baked Cauliflower
Gathering the right ingredients is key to making this Korean Baked Cauliflower shine. Here’s what you’ll need:
- Cauliflower: The star of the show! Fresh cauliflower florets provide a satisfying crunch and absorb all those delicious flavors.
- Olive Oil: This adds richness and helps the cauliflower crisp up beautifully in the oven.
- Gochujang: A staple in Korean cuisine, this spicy chili paste brings a unique depth of flavor. It’s sweet, spicy, and utterly addictive!
- Honey or Maple Syrup: A touch of sweetness balances the heat from the gochujang. Use honey for a classic taste or maple syrup for a vegan option.
- Soy Sauce: This adds umami and saltiness, enhancing the overall flavor profile of the dish.
- Sesame Oil: A drizzle of this fragrant oil gives the dish a nutty aroma that’s simply irresistible.
- Garlic: Minced garlic adds a punch of flavor that complements the other ingredients perfectly.
- Sesame Seeds: These little seeds add a delightful crunch and a nutty flavor when sprinkled on top before serving.
- Green Onions: Chopped green onions provide a fresh, vibrant finish to the dish, adding color and a mild onion flavor.
For those who like it spicy, feel free to add more gochujang to the sauce. If you’re looking for a twist, try adding some chopped bell peppers or carrots for extra color and nutrition. You can find all the exact measurements at the bottom of the article, ready for printing!
How to Make Korean Baked Cauliflower
Now that you have all your ingredients ready, let’s dive into the steps to create this mouthwatering Korean Baked Cauliflower. Trust me, it’s easier than you think!
Step 1: Preheat the Oven
First things first, preheat your oven to 425°F (220°C). Preheating is crucial because it ensures that the cauliflower cooks evenly and gets that lovely crispy texture. No one wants soggy cauliflower, right?
Step 2: Prepare the Sauce
In a large bowl, combine the olive oil, gochujang, honey or maple syrup, soy sauce, sesame oil, and minced garlic. Whisk it all together until it’s smooth and well-blended. The gochujang adds a spicy kick, while the sesame oil brings a nutty aroma that will make your kitchen smell heavenly!
Step 3: Coat the Cauliflower
Now, it’s time to add the cauliflower florets to the bowl. Toss them gently in the sauce until they’re fully coated. Make sure every floret gets a good amount of that delicious sauce. This is where the magic happens, so don’t rush it!
Step 4: Arrange on Baking Sheet
Spread the coated cauliflower florets on a baking sheet lined with parchment paper. Be sure to space them out evenly. This allows the hot air to circulate around each piece, ensuring they cook perfectly and get that delightful crispiness.
Step 5: Bake to Perfection
Pop the baking sheet into the preheated oven and bake for 25-30 minutes. You’ll know the cauliflower is done when it’s tender and has a beautiful golden-brown color. A little crispiness on the edges is a sign of perfection!
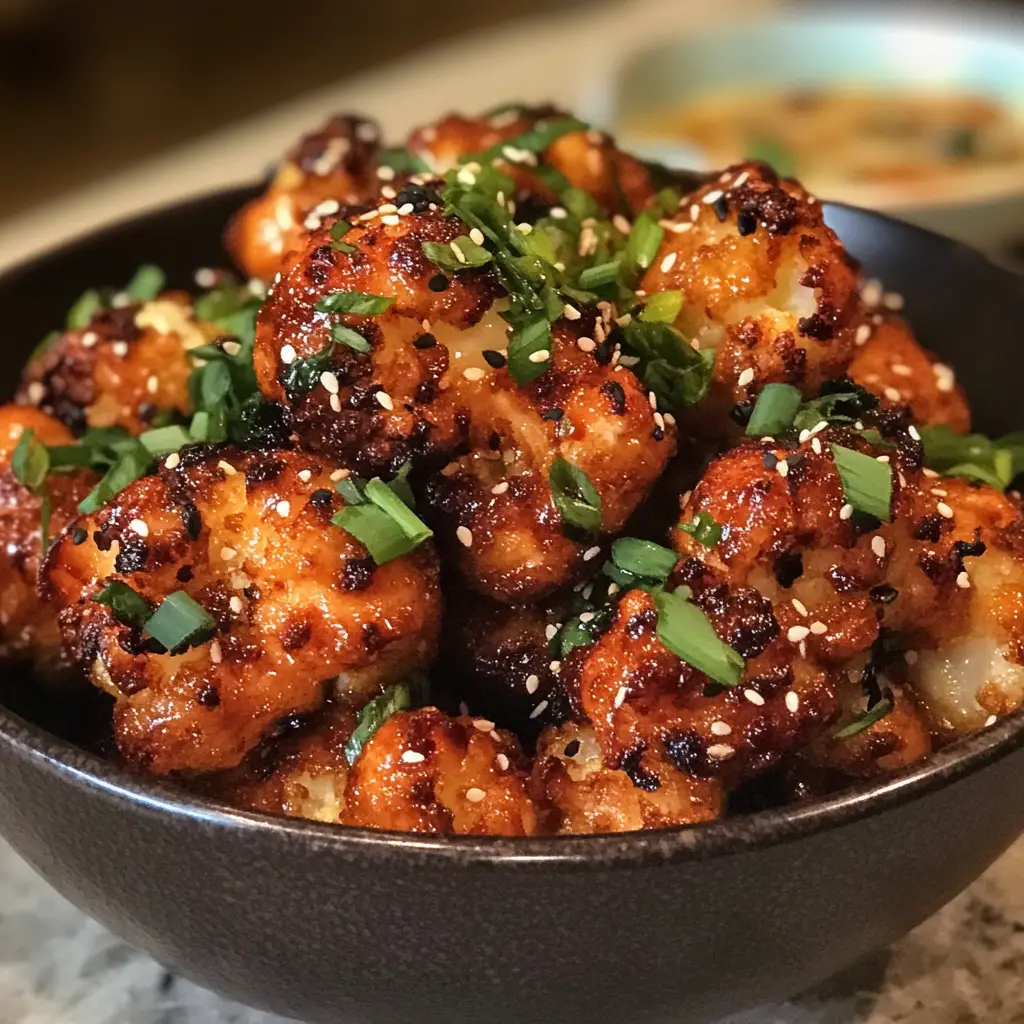
Step 6: Garnish and Serve
Once out of the oven, sprinkle the baked cauliflower with sesame seeds and chopped green onions. This adds a lovely crunch and a pop of color. Serve it warm as a side dish or snack, and watch your family devour it!
Tips for Success
- Make sure to cut the cauliflower into even-sized florets for consistent cooking.
- Don’t skip the parchment paper; it prevents sticking and makes cleanup a breeze.
- For extra crispiness, broil the cauliflower for the last 2-3 minutes of baking.
- Feel free to adjust the sweetness or spice level to suit your taste.
- Serve immediately for the best texture; leftovers can be reheated but may lose some crispiness.
Equipment Needed
- Baking Sheet: A standard baking sheet works perfectly. If you don’t have one, a large oven-safe dish will do.
- Parchment Paper: This helps prevent sticking. If you’re out, a silicone baking mat is a great alternative.
- Mixing Bowl: Any large bowl will suffice for mixing the sauce and coating the cauliflower.
- Whisk or Spoon: Use a whisk for smooth sauce mixing, or a spoon if that’s what you have on hand.
Variations of Korean Baked Cauliflower
- Spicy Garlic Cauliflower: Add extra minced garlic and a dash of red pepper flakes for a fiery kick.
- Buffalo Style: Toss the baked cauliflower in buffalo sauce after baking for a tangy twist.
- Cheesy Cauliflower: Sprinkle nutritional yeast or your favorite vegan cheese on top before baking for a cheesy flavor.
- Asian-Inspired Medley: Mix in other vegetables like bell peppers, broccoli, or snap peas for a colorful veggie dish.
- Maple-Mustard Glaze: Swap honey for a mix of maple syrup and Dijon mustard for a sweet and tangy flavor.
Serving Suggestions for Korean Baked Cauliflower
- Pair it with steamed rice or quinoa for a complete meal.
- Serve alongside grilled chicken or tofu for a protein boost.
- Drizzle with extra sesame oil for added flavor before serving.
- Enjoy with a refreshing cucumber salad to balance the spice.
- For drinks, try a light iced tea or sparkling water to complement the dish.
FAQs about Korean Baked Cauliflower
As you embark on your culinary adventure with Korean Baked Cauliflower, you might have a few questions. Here are some common queries I’ve encountered, along with helpful answers!
Can I make Korean Baked Cauliflower ahead of time?
Absolutely! You can prepare the cauliflower and coat it with the sauce a few hours in advance. Just store it in the fridge until you’re ready to bake. This makes it a fantastic option for meal prep!
What can I serve with Korean Baked Cauliflower?
This dish pairs wonderfully with rice, quinoa, or even as a topping for salads. It’s versatile enough to complement grilled meats or tofu, making it a great addition to any meal.
Is Korean Baked Cauliflower suitable for meal prep?
Yes! It stores well in an airtight container in the fridge for up to three days. Just reheat in the oven or microwave, but keep in mind it may lose some crispiness.
Can I use frozen cauliflower for this recipe?
While fresh cauliflower is best for texture, you can use frozen if that’s what you have on hand. Just make sure to thaw and drain it well before coating it with the sauce.
How can I adjust the spice level?
If you prefer a milder flavor, reduce the amount of gochujang in the sauce. You can also add a bit of extra honey or maple syrup to balance the heat. For those who love spice, feel free to add more gochujang or even some chili flakes!
Final Thoughts
Making Korean Baked Cauliflower is more than just cooking; it’s about creating a joyful experience for you and your family. The vibrant flavors and delightful crunch will have everyone coming back for seconds. I love how this dish transforms a simple vegetable into a star on the dinner table. Plus, it’s a fantastic way to introduce your loved ones to the exciting world of Korean cuisine. Whether you’re serving it as a side or a snack, this recipe is sure to bring smiles and satisfaction. Trust me, once you try it, you’ll want to make it again and again!
Print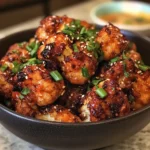
Korean Baked Cauliflower: A Must-Try Flavor Explosion!
- Total Time: 40 minutes
- Yield: 4 servings 1x
- Diet: Vegan
Description
Korean Baked Cauliflower is a delicious and healthy dish that combines the flavors of Korean cuisine with the nutritious benefits of cauliflower. It’s a perfect side dish or snack that is both satisfying and packed with flavor.
Ingredients
- 1 head of cauliflower, cut into florets
- 2 tablespoons olive oil
- 1/4 cup gochujang (Korean chili paste)
- 2 tablespoons honey or maple syrup
- 2 tablespoons soy sauce
- 1 tablespoon sesame oil
- 2 cloves garlic, minced
- 1 tablespoon sesame seeds
- 2 green onions, chopped
Instructions
- Preheat the oven to 425°F (220°C).
- In a large bowl, combine olive oil, gochujang, honey, soy sauce, sesame oil, and minced garlic.
- Add the cauliflower florets to the bowl and toss until they are well coated with the sauce.
- Spread the cauliflower on a baking sheet lined with parchment paper.
- Bake for 25-30 minutes, or until the cauliflower is tender and slightly crispy.
- Remove from the oven and sprinkle with sesame seeds and chopped green onions before serving.
Notes
- For a spicier version, add more gochujang to the sauce.
- This dish can be served as a side or a main dish.
- Leftovers can be stored in an airtight container in the refrigerator for up to 3 days.
- Prep Time: 10 minutes
- Cook Time: 30 minutes
- Category: Side Dish
- Method: Baking
- Cuisine: Korean
Nutrition
- Serving Size: 1 serving
- Calories: 150
- Sugar: 5g
- Sodium: 300mg
- Fat: 7g
- Saturated Fat: 1g
- Unsaturated Fat: 6g
- Trans Fat: 0g
- Carbohydrates: 20g
- Fiber: 5g
- Protein: 4g
- Cholesterol: 0mg
Keywords: Korean Baked Cauliflower, Cauliflower Recipes, Vegan Side Dish, Healthy Recipes