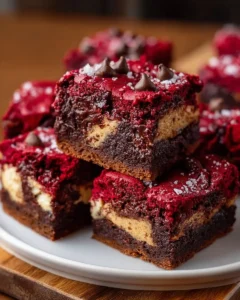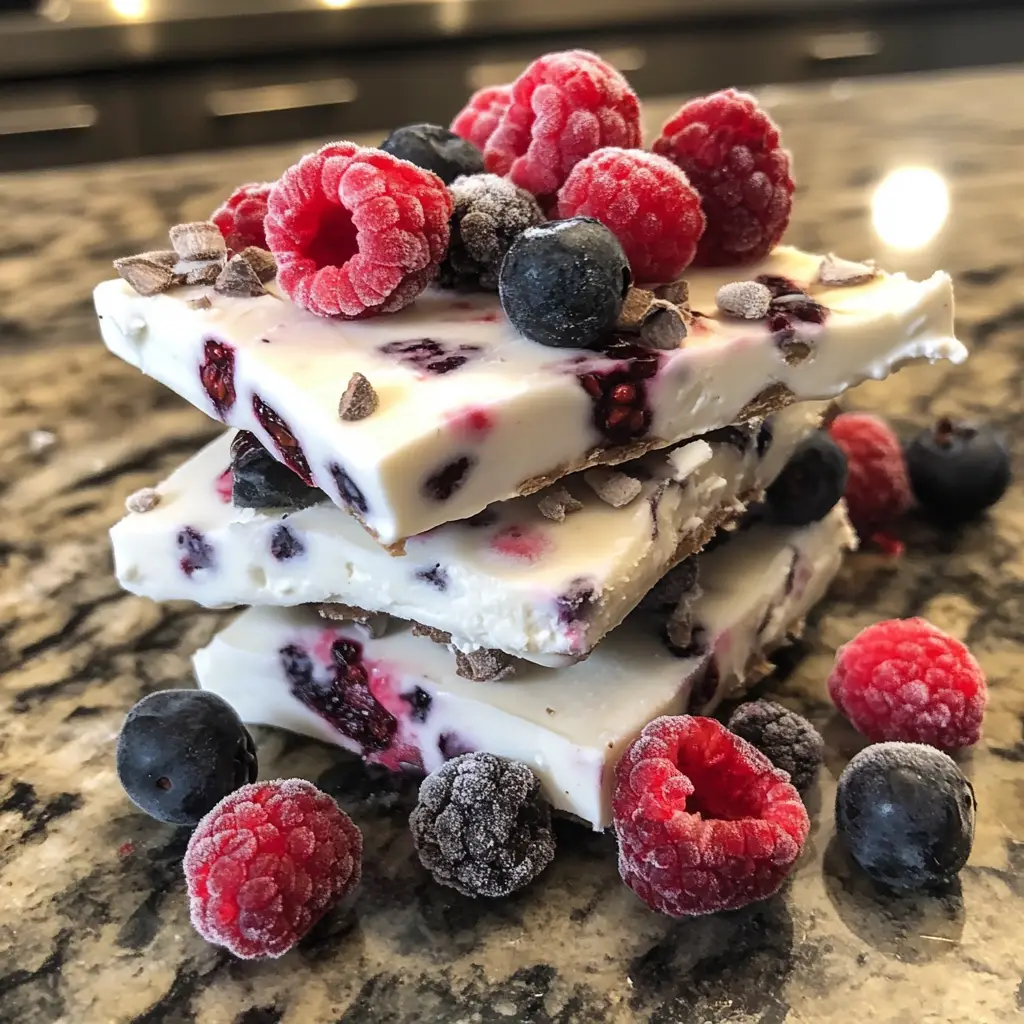
Introduction to Frozen Yogurt Bark with Berries Recipe
As a passionate home cook, I find joy in creating delightful treats that not only satisfy my sweet tooth but also keep things healthy. One of my all-time favorite recipes is Frozen Yogurt Bark with Berries. This simple yet scrumptious dessert has become a staple in my kitchen, especially during the warm summer months when I crave something refreshing.
Let me take you back to the first time I made this delightful treat. It was a sunny afternoon, and I was looking for a way to cool down after a long day. I rummaged through my fridge and found some yogurt and a handful of berries. With a sprinkle of creativity and a dash of excitement, I whipped up my first batch of frozen yogurt bark. The moment I took that first bite, I was hooked! The creamy yogurt paired with the burst of juicy berries was like a party in my mouth.
What I love most about this recipe is its versatility. You can customize it with your favorite fruits, nuts, or even a drizzle of honey. Plus, it’s a fantastic way to get kids involved in the kitchen. They can help sprinkle the toppings and create their own unique versions. It’s a fun activity that brings everyone together, and the best part? You get to enjoy a delicious, guilt-free treat afterward!
So, if you’re ready to embark on a culinary adventure with me, let’s dive into the world of Frozen Yogurt Bark with Berries. I promise you’ll love it as much as I do!
Ingredients for Frozen Yogurt Bark with Berries Recipe
Before we dive into the fun of making Frozen Yogurt Bark with Berries, let’s gather our ingredients. This recipe is not only simple but also allows for a bit of creativity. Here’s what you’ll need to whip up this delightful treat!
Main Ingredients
- 2 cups of Greek yogurt – I prefer using plain Greek yogurt for its creamy texture and tangy flavor. You can also use regular yogurt if you like it sweeter.
- 1 tablespoon of honey or maple syrup – This is optional, but it adds a lovely sweetness. Adjust the amount based on your taste!
- 1 cup of mixed berries – Fresh or frozen, I love using strawberries, blueberries, and raspberries. They add vibrant color and flavor!
- 1 teaspoon of vanilla extract – This enhances the flavor of the yogurt and makes it even more delicious.
Optional Add-ons
- Chopped nuts – Almonds or walnuts add a nice crunch. Just sprinkle them on top before freezing!
- Chocolate chips – For a touch of indulgence, dark or milk chocolate chips can be a delightful addition.
- Granola – A sprinkle of granola gives a lovely texture and makes it feel like a breakfast treat.
- Other fruits – Feel free to experiment with bananas, kiwi, or even mango for a tropical twist!
When selecting your ingredients, I always recommend going for the freshest berries you can find. If you’re using frozen berries, make sure they’re unsweetened to keep the bark healthy. The quality of your yogurt also matters; choose a brand that you love, as it will shine through in the final product. Now that we have our ingredients ready, let’s move on to the fun part—preparing our frozen yogurt bark!
How to Prepare Frozen Yogurt Bark with Berries Recipe
Now that we have our ingredients all set, it’s time to roll up our sleeves and get to the fun part—making the Frozen Yogurt Bark with Berries! This process is as easy as pie, and I promise you’ll be amazed at how quickly it comes together. Let’s dive into the steps!
Step 1: Prepare the Yogurt Base
First things first, we need to create a creamy yogurt base. In a mixing bowl, combine the Greek yogurt, honey (or maple syrup), and vanilla extract. Stir it all together until it’s smooth and well-blended. The yogurt should be thick and luscious, like a cloud of deliciousness!
Tips for Step 1
- For a sweeter yogurt base, taste as you go! You can always add a little more honey or syrup if you like it sweeter.
- If you want to add a twist, try mixing in a pinch of cinnamon or a splash of almond extract for extra flavor.
- Using a whisk can help achieve a smoother consistency, but a spatula works just fine too!
Step 2: Add the Berries
Once your yogurt base is ready, it’s time to add the stars of the show—our beautiful berries! Gently fold in the mixed berries, making sure they’re evenly distributed throughout the yogurt. I love seeing the vibrant colors swirl together; it’s like a work of art!
Tips for Step 2
- Be gentle when folding in the berries to avoid smashing them. We want those juicy bursts of flavor intact!
- If you’re using frozen berries, let them thaw slightly before adding them to the yogurt. This helps them mix in better.
- Feel free to reserve a few berries to sprinkle on top for a beautiful presentation!
Step 3: Spread and Freeze
Now comes the fun part—spreading the mixture onto a baking sheet! Line a baking sheet with parchment paper for easy removal later. Pour the yogurt and berry mixture onto the sheet and spread it out evenly, about half an inch thick. Then, pop it in the freezer for at least 4 hours or until it’s completely frozen.
Tips for Step 3
- For a more uniform bark, use an offset spatula to spread the mixture evenly across the baking sheet.
- If you want to add any optional toppings like nuts or chocolate chips, sprinkle them on top before freezing!
- Once frozen, you can break the bark into pieces or cut it into squares for easy serving.
And there you have it! Three simple steps to create your very own Frozen Yogurt Bark with Berries. I can already imagine the delightful crunch and creamy texture as you take that first bite. Let’s keep the momentum going and explore the equipment you’ll need for this recipe!
Equipment Needed for Frozen Yogurt Bark with Berries Recipe
Before we dive into the delicious world of Frozen Yogurt Bark with Berries, let’s make sure we have the right tools at our disposal. Don’t worry; you won’t need any fancy gadgets to whip up this treat! Here’s a quick list of what you’ll need:
- Mixing Bowl: A medium-sized mixing bowl is perfect for combining your yogurt and ingredients. If you don’t have one, any large bowl will do!
- Spatula or Whisk: Use a spatula to fold in the berries and spread the mixture. A whisk can help mix the yogurt smoothly, but it’s not a must-have.
- Baking Sheet: A standard baking sheet is essential for spreading out the yogurt mixture. If you don’t have one, a shallow dish or tray can work as an alternative.
- Parchment Paper: Lining your baking sheet with parchment paper makes it easy to remove the frozen bark later. If you’re out of parchment paper, a silicone baking mat is a great substitute!
- Freezer: Of course, you’ll need a freezer to freeze your yogurt bark. Make sure you have enough space to fit your baking sheet!
With these simple tools, you’re all set to create your own frozen masterpiece. I love how accessible this recipe is; it’s all about enjoying the process and having fun in the kitchen. Now, let’s move on to the exciting variations you can try with your Frozen Yogurt Bark with Berries!
Variations of Frozen Yogurt Bark with Berries Recipe
One of the best things about Frozen Yogurt Bark with Berries is its incredible versatility! You can easily switch things up to suit your taste or to use what you have on hand. Here are a few fun variations that I’ve tried and absolutely loved:
- Tropical Twist: Swap out the berries for tropical fruits like diced mango, pineapple, and shredded coconut. It’s like a mini vacation in every bite!
- Nutty Delight: Add a mix of chopped nuts like pecans, almonds, or pistachios for a crunchy texture. You can even drizzle some nut butter on top for an extra layer of flavor.
- Chocolate Lovers: Incorporate cocoa powder into the yogurt base for a chocolatey treat. Top it with chocolate chips and sliced strawberries for a decadent dessert.
- Herbal Infusion: For a unique twist, try adding fresh mint or basil to the yogurt. It adds a refreshing flavor that pairs beautifully with the sweetness of the berries.
These variations not only keep things exciting but also allow you to experiment with different flavors and textures. I love how each version brings its own personality to the table. So, don’t be afraid to get creative and make this recipe your own!
Cooking Notes for Frozen Yogurt Bark with Berries Recipe
As I’ve experimented with my Frozen Yogurt Bark with Berries, I’ve picked up a few handy cooking notes that can make your experience even smoother. Here are some tips to keep in mind while you whip up this delightful treat:
- Texture Matters: The thickness of your yogurt layer can affect the final texture. Aim for about half an inch thick for the perfect balance of creaminess and crunch.
- Freezing Time: Make sure to freeze the bark for at least 4 hours. If you’re in a hurry, you can freeze it for a shorter time, but the bark may be too soft to break into pieces.
- Storage: Once frozen, store your bark in an airtight container or wrap it in plastic wrap. This keeps it fresh and prevents freezer burn.
- Serving Size: I like to break the bark into bite-sized pieces for easy snacking. It’s perfect for sharing or enjoying on your own!
- Experiment with Flavors: Don’t hesitate to try different yogurt flavors or add-ins. Greek yogurt with fruit flavors can add a fun twist to your bark!
These little notes can make a big difference in your cooking journey. I love how simple adjustments can elevate the experience, making it even more enjoyable. Now that we’ve covered the cooking notes, let’s explore some serving suggestions for your delicious Frozen Yogurt Bark with Berries!
Serving Suggestions for Frozen Yogurt Bark with Berries Recipe
Now that your Frozen Yogurt Bark with Berries is ready to be enjoyed, let’s talk about some fun ways to serve it! Presentation can make a simple treat feel extra special, and I love to get creative when it comes to serving. Here are a few ideas that I’ve tried and absolutely adore:
- Snack Time Treat: Break the bark into bite-sized pieces and serve it in a colorful bowl. It’s perfect for a quick snack or a healthy dessert option!
- Garnish with Fresh Berries: Add a few fresh berries on top of the bark when serving. It not only looks beautiful but also enhances the berry flavor!
- Pair with Yogurt: Serve a piece of the bark alongside a small bowl of yogurt for dipping. It adds a fun twist and makes for a delightful combination.
- Ice Cream Sandwich: For a more indulgent treat, sandwich a piece of the bark between two cookies or serve it with a scoop of your favorite ice cream.
- Breakfast Delight: Crumble the bark over a bowl of oatmeal or yogurt for a crunchy topping. It’s a delicious way to start your day!
These serving suggestions not only elevate the experience but also allow you to enjoy your Frozen Yogurt Bark with Berries in different ways. I love how versatile this treat is, making it suitable for any occasion. Whether it’s a casual snack or a fancy dessert, you can’t go wrong with this delightful creation!
Tips for Making Frozen Yogurt Bark with Berries Recipe
As I’ve whipped up my fair share of Frozen Yogurt Bark with Berries, I’ve gathered some handy tips that can help you create the perfect batch every time. These little nuggets of wisdom can make your experience smoother and more enjoyable. Let’s dive in!
- Choose Quality Ingredients: The better the ingredients, the tastier your bark will be! Opt for fresh, ripe berries and high-quality yogurt for the best flavor.
- Don’t Overmix: When folding in the berries, be gentle! Overmixing can break them apart, and we want those juicy bursts intact.
- Layering is Key: If you’re adding multiple toppings, consider layering them. Start with the yogurt base, then sprinkle some toppings, and finish with a final layer of yogurt before freezing.
- Experiment with Sweetness: Taste your yogurt mixture before freezing. Adjust the sweetness to your liking, whether you prefer it more or less sweet.
- Use a Sharp Knife: When it’s time to cut the frozen bark, use a sharp knife for clean edges. This makes for a more appealing presentation!
These tips can help you navigate the process with ease and confidence. I love how a few simple adjustments can elevate the experience, making it even more delightful. Now that you’re armed with these tips, let’s keep the momentum going and check out the breakdown of time for our Frozen Yogurt Bark with Berries recipe!
Breakdown of Time for Frozen Yogurt Bark with Berries Recipe
Now that we’ve covered all the delicious details of making Frozen Yogurt Bark with Berries, let’s take a moment to break down the time involved in this delightful recipe. Knowing how long each step takes can help you plan your cooking adventure better. Here’s a quick overview:
- Prep Time: 15 minutes – This includes gathering your ingredients, mixing the yogurt base, and folding in the berries. It’s a quick and fun process!
- Freezing Time: 4 hours – This is the time it takes for your yogurt bark to freeze completely. Patience is key here, but it’s worth the wait!
- Total Time: 4 hours and 15 minutes – In just a little over four hours, you’ll have a delicious treat ready to enjoy!
With this breakdown, you can easily fit making Frozen Yogurt Bark with Berries into your day. I love how it’s a simple recipe that doesn’t require hours in the kitchen, yet delivers a refreshing and satisfying dessert. So, gather your ingredients, and let’s get started on this tasty journey!
Nutritional Information for Frozen Yogurt Bark with Berries Recipe
As a home cook, I always find it important to know what I’m putting into my body, especially when it comes to sweet treats like Frozen Yogurt Bark with Berries. This delightful dessert not only satisfies your cravings but also packs a nutritional punch! Here’s a quick look at the nutritional information for a serving of this delicious bark:
- Calories: Approximately 150 calories per serving (1/4 of the bark)
- Protein: 8 grams – Thanks to the Greek yogurt, this treat is a great source of protein!
- Fat: 3 grams – The healthy fats from any added nuts or yogurt keep it satisfying.
- Carbohydrates: 25 grams – Mostly from the natural sugars in the berries and yogurt.
- Fiber: 3 grams – The berries contribute fiber, which is great for digestion.
- Vitamins and Minerals: Rich in vitamin C from the berries and calcium from the yogurt, making it a nutritious choice!
These numbers can vary based on the specific ingredients you choose, especially if you add optional toppings. I love how this recipe allows for flexibility while still being a healthy option. It’s a guilt-free treat that you can enjoy without any worries! So, go ahead and indulge in your Frozen Yogurt Bark with Berries—your taste buds and body will thank you!
Frequently Asked Questions about Frozen Yogurt Bark with Berries Recipe
As I’ve shared my love for Frozen Yogurt Bark with Berries, I often get questions from fellow home cooks eager to try this delightful treat. I love answering these queries because it shows how excited everyone is to dive into this delicious adventure! Here are some of the most frequently asked questions I receive, along with my personal insights:
Can I use non-dairy yogurt for this recipe?
Absolutely! If you’re looking for a dairy-free option, non-dairy yogurt works wonderfully. I’ve tried coconut yogurt, and it adds a lovely tropical flavor to the bark. Just make sure to choose a thick variety for the best texture!
How long does the frozen yogurt bark last in the freezer?
When stored properly in an airtight container, your Frozen Yogurt Bark with Berries can last up to two weeks in the freezer. However, I doubt it will last that long because it’s just too delicious to resist!
Can I add other toppings besides berries?
Definitely! The beauty of this recipe is its versatility. You can add nuts, seeds, granola, or even a drizzle of chocolate. I love experimenting with different toppings to keep things exciting!
What’s the best way to cut the frozen bark?
To cut the frozen bark, I recommend using a sharp knife. This helps create clean edges and makes for a beautiful presentation. If it’s too hard to cut, let it sit at room temperature for a few minutes to soften slightly.
Can I make this recipe ahead of time for a party?
Absolutely! This recipe is perfect for prepping ahead of time. You can make it a day or two in advance and keep it frozen until you’re ready to serve. It’s a fantastic make-ahead treat for gatherings!
These questions reflect the curiosity and excitement that comes with making Frozen Yogurt Bark with Berries. I love how this recipe brings people together, whether it’s in the kitchen or around the table. If you have more questions, feel free to reach out—I’m always here to help you on your culinary journey!
Conclusion on Frozen Yogurt Bark with Berries Recipe
In conclusion, Frozen Yogurt Bark with Berries is not just a treat; it’s a delightful experience that combines health and indulgence in every bite. This recipe is incredibly easy to make, allowing you to whip up a refreshing dessert in no time. The creamy yogurt paired with the vibrant burst of berries creates a symphony of flavors that dance on your palate.
What I love most about this recipe is its versatility. You can customize it to suit your taste, whether you prefer a tropical twist or a nutty delight. Plus, it’s a fantastic way to get kids involved in the kitchen, making it a fun family activity. With its nutritious ingredients, you can enjoy this guilt-free treat without any worries.
So, whether you’re looking for a quick snack, a healthy dessert, or a fun way to cool down on a hot day, Frozen Yogurt Bark with Berries is the perfect solution. I encourage you to give it a try and let your creativity shine. I promise you’ll fall in love with this delightful treat just as I have!