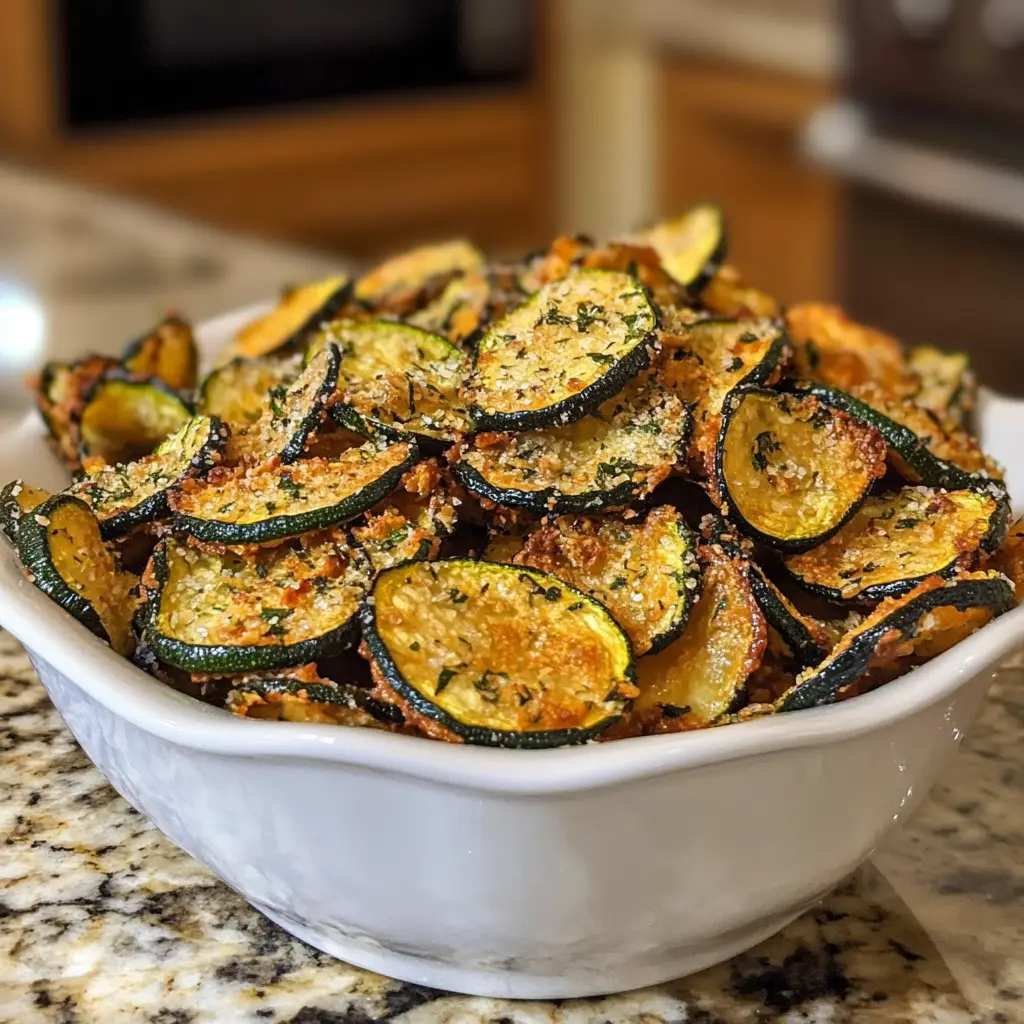
Introduction to Crispy Baked Zucchini Chips Recipe
As a passionate home cook, I find joy in transforming simple ingredients into delightful snacks. One of my favorite creations is the crispy baked zucchini chips recipe. It’s a dish that not only satisfies my cravings for something crunchy but also allows me to sneak in some veggies. Who knew that zucchini could be so fun and delicious?
Let me take you back to the first time I made these chips. It was a sunny afternoon, and I had just returned from the farmer’s market, my bag brimming with fresh produce. The zucchini caught my eye, their vibrant green skin glistening in the sunlight. I thought, “What if I could turn these into a crispy snack?” With a sprinkle of seasoning and a dash of creativity, I set out on my culinary adventure.
As I sliced the zucchini into thin rounds, I could already imagine the satisfying crunch they would bring. The aroma of the spices filled my kitchen, and I felt a wave of excitement. When I pulled the chips out of the oven, golden and crisp, I knew I had struck gold. The first bite was pure bliss! The chips were light, crispy, and bursting with flavor. I couldn’t help but share them with my family, who devoured them in minutes.
This crispy baked zucchini chips recipe is not just a snack; it’s a celebration of fresh ingredients and a reminder that healthy eating can be enjoyable. Whether you’re looking for a guilt-free treat or a fun way to get your kids to eat their veggies, these chips are the answer. So, let’s dive into the ingredients and get started on this delicious journey together!
Ingredients for Crispy Baked Zucchini Chips Recipe
Before we embark on our crispy adventure, let’s gather our ingredients. I always believe that the quality of ingredients can make or break a dish. So, let’s make sure we have the best zucchini and seasonings on hand!
Main Ingredients
- 2 medium-sized zucchinis (about 1 pound) – Look for firm, shiny zucchinis without blemishes.
- 1 tablespoon olive oil – Extra virgin olive oil adds a rich flavor.
- 1 teaspoon sea salt – This enhances the natural taste of the zucchini.
- 1/2 teaspoon garlic powder – For that extra kick of flavor.
- 1/2 teaspoon onion powder – It adds a subtle sweetness.
- 1/4 teaspoon black pepper – A little spice goes a long way!
Optional Add-ons
Sometimes, I like to get a bit creative with my zucchini chips. Here are some optional ingredients you can add to customize your chips:
- 1/4 teaspoon smoked paprika – This gives a lovely smoky flavor.
- 1/4 teaspoon cayenne pepper – For those who enjoy a bit of heat!
- 1/4 cup grated Parmesan cheese – A cheesy twist that’s hard to resist.
- Fresh herbs (like thyme or rosemary) – Chopped finely for a fresh touch.
Feel free to mix and match these ingredients based on your taste preferences. The beauty of this crispy baked zucchini chips recipe is that it’s versatile! You can even experiment with different spices or herbs you have in your pantry. Just remember, the fresher the ingredients, the better the chips will taste!
How to Prepare Crispy Baked Zucchini Chips Recipe
Now that we have our ingredients ready, it’s time to dive into the fun part—preparing our crispy baked zucchini chips! I love this part because it’s where the magic happens. Follow these simple steps, and you’ll be on your way to a crunchy, flavorful snack that will impress everyone!
Step 1: Preheat the Oven
First things first, let’s get that oven warmed up! Preheating is crucial for achieving that perfect crispiness.
Tips for Preheating
- Set your oven to 225°F (about 110°C). This low temperature helps to dehydrate the zucchini, making them crispy.
- While the oven heats, you can prepare the zucchini. This way, everything will be ready to go when the oven is hot!
Step 2: Slice the Zucchini
Next, it’s time to slice those beautiful zucchinis. The thickness of your slices can make a big difference in the final product.
Tips for Slicing
- Use a sharp knife or a mandoline slicer for even slices. Aim for about 1/8 inch thick. This ensures they cook evenly.
- Don’t worry if they aren’t perfect! Each chip will have its own character, and that’s part of the charm.
Step 3: Season the Zucchini
Now comes the fun part—seasoning! This is where you can let your creativity shine.
Tips for Seasoning
- In a large bowl, toss the zucchini slices with olive oil and your chosen seasonings. Make sure each slice is coated evenly.
- Don’t be shy with the spices! A little extra garlic powder or a sprinkle of smoked paprika can elevate the flavor.
Step 4: Arrange on Baking Sheet
With the zucchini seasoned, it’s time to arrange them on the baking sheet. This step is key to achieving that crispy texture.
Tips for Arrangement
- Line a baking sheet with parchment paper for easy cleanup and to prevent sticking.
- Lay the zucchini slices in a single layer, making sure they don’t overlap. This allows hot air to circulate around each chip.
Step 5: Bake the Zucchini Chips
Finally, it’s time to bake! This is where the anticipation builds as the aroma fills your kitchen.
Tips for Baking
- Bake the zucchini chips for about 1.5 to 2 hours, flipping them halfway through. Keep an eye on them towards the end to prevent burning.
- When they’re golden and crispy, take them out and let them cool for a few minutes. They’ll crisp up even more as they cool!
And there you have it! Following these steps will lead you to a batch of delicious, crispy baked zucchini chips. I can already hear the crunch as I take a bite. Let’s move on to the equipment needed for this delightful recipe!
Equipment Needed for Crispy Baked Zucchini Chips Recipe
Before we dive into the kitchen, let’s gather the essential tools for our crispy baked zucchini chips. Having the right equipment can make the process smoother and more enjoyable. Here’s what you’ll need:
- Baking Sheet: A standard baking sheet will do the trick. If you have a cooling rack, you can place it on top of the baking sheet to allow air circulation for even crispiness.
- Parchment Paper: This is optional, but I highly recommend it! It prevents sticking and makes cleanup a breeze.
- Sharp Knife or Mandoline Slicer: A sharp knife is essential for slicing the zucchini evenly. If you have a mandoline slicer, it can help achieve perfectly uniform slices.
- Large Mixing Bowl: You’ll need this for tossing the zucchini with olive oil and seasonings. A bowl with a lid can also be handy for shaking the zucchini to coat them evenly.
- Measuring Spoons: Accurate measurements ensure the right balance of flavors, so don’t skip these!
If you don’t have a mandoline slicer, don’t worry! A sharp knife works just as well. The key is to slice the zucchini as evenly as possible to ensure they bake uniformly. With these tools in hand, you’re all set to create your crispy baked zucchini chips. Let’s keep the momentum going and explore the variations you can try!
Variations of Crispy Baked Zucchini Chips Recipe
One of the things I love most about my crispy baked zucchini chips recipe is its versatility. You can easily switch things up to keep your taste buds excited! Here are a few fun variations that I’ve tried and absolutely adored:
- Spicy Zucchini Chips: Add a pinch of cayenne pepper or chili powder to the seasoning mix for a fiery kick. These chips are perfect for those who love a little heat!
- Herbed Zucchini Chips: Instead of just garlic and onion powder, try adding dried herbs like oregano, basil, or dill. The fresh aroma will transport you to a sunny herb garden!
- Cheesy Zucchini Chips: For a cheesy delight, sprinkle some nutritional yeast or grated Parmesan cheese on top before baking. It adds a savory depth that’s hard to resist.
- Sweet Zucchini Chips: If you’re feeling adventurous, try a sprinkle of cinnamon and a touch of sugar for a sweet twist. These make for a unique snack that’s perfect for dessert!
Feel free to mix and match these ideas based on what you have in your pantry. The beauty of this recipe is that it encourages creativity. Each variation brings its own charm, making every batch a new adventure. So, grab your zucchini and let’s get experimenting!
Cooking Notes for Crispy Baked Zucchini Chips Recipe
As I’ve experimented with my crispy baked zucchini chips recipe, I’ve gathered a few cooking notes that can help you achieve the best results. These little tips can make a big difference in your final product!
- Choose the Right Zucchini: Opt for medium-sized zucchinis. They have the perfect balance of moisture and flavor. Larger zucchinis can be watery and may not crisp up as well.
- Pat Dry: After slicing, I like to pat the zucchini slices dry with a paper towel. This removes excess moisture, helping them become even crispier in the oven.
- Watch the Time: Every oven is different! Keep an eye on your chips as they bake. If they start to brown too quickly, lower the temperature slightly.
- Store Properly: If you have leftovers (which is rare in my house!), store them in an airtight container at room temperature. They’ll stay crispy for a day or two, but I recommend enjoying them fresh!
These cooking notes are like little nuggets of wisdom I’ve picked up along the way. They help ensure that each batch of zucchini chips is a crunchy delight. Now that we’ve covered the cooking notes, let’s move on to serving suggestions that will elevate your snacking experience!
Serving Suggestions for Crispy Baked Zucchini Chips Recipe
Now that we have our delicious crispy baked zucchini chips ready, it’s time to think about how to serve them! I love to get creative with my presentation, and these chips are perfect for sharing. Here are some of my favorite serving suggestions:
- Dip Delight: Pair your zucchini chips with a variety of dips. Hummus, ranch dressing, or a zesty salsa can add an extra layer of flavor. I often set up a little dip station for family gatherings, and it’s always a hit!
- Snack Platter: Create a colorful snack platter by combining your zucchini chips with other crunchy veggies, nuts, and cheese. It’s a great way to impress guests and make healthy snacking fun!
- Garnish with Fresh Herbs: For a touch of elegance, sprinkle some fresh herbs like parsley or cilantro over the chips just before serving. It adds a pop of color and freshness that’s hard to resist.
- On Top of Salads: Crumble the chips over a fresh salad for a delightful crunch. They add texture and flavor, making your greens even more exciting!
These serving suggestions not only enhance the experience but also make the chips more versatile. Whether you’re enjoying them as a snack or incorporating them into a meal, these crispy baked zucchini chips are sure to be a crowd-pleaser. Now, let’s keep the momentum going and explore some tips for perfecting this recipe!
Tips for Perfecting Crispy Baked Zucchini Chips Recipe
As I’ve perfected my crispy baked zucchini chips recipe, I’ve gathered a treasure trove of tips that can help you achieve that ultimate crunch. These little nuggets of wisdom can make all the difference in your snacking experience!
- Slice Evenly: Consistency is key! Aim for uniform slices to ensure even cooking. If you have a mandoline slicer, it’s a game-changer for achieving that perfect thickness.
- Don’t Overcrowd: Give your zucchini chips some space! Overcrowding the baking sheet can trap moisture, leading to soggy chips. Bake in batches if necessary.
- Experiment with Seasonings: Don’t be afraid to get creative! Try different spice blends or even a sprinkle of lemon zest for a refreshing twist. The flavor possibilities are endless!
- Cool Before Storing: If you have any leftovers (which is rare in my house!), let the chips cool completely before storing them in an airtight container. This helps maintain their crispiness.
These tips are like little secrets I’ve learned through trial and error. They help ensure that every batch of zucchini chips is a crunchy delight. With these tricks up your sleeve, you’re well on your way to mastering the art of crispy baked zucchini chips. Now, let’s take a look at the time breakdown for this delicious recipe!
Breakdown of Time for Crispy Baked Zucchini Chips Recipe
Time is of the essence in the kitchen, and knowing how long each step takes can help you plan your cooking adventure. Here’s a quick breakdown of the time needed for my crispy baked zucchini chips recipe:
- Prep Time: Approximately 15 minutes. This includes washing, slicing, and seasoning the zucchini. It’s a great time to get your hands a little messy and have fun!
- Cooking Time: About 1.5 to 2 hours. Yes, it sounds like a long time, but trust me, the wait is worth it! The low and slow baking allows the zucchini to dehydrate and become perfectly crispy.
- Total Time: Roughly 2 to 2.5 hours. This includes both prep and cooking time. You can use this time to tidy up your kitchen or prepare a dip to enjoy with your chips!
With this time breakdown, you can easily fit this recipe into your day. Whether you’re making them for a snack or a party, knowing how long it takes helps you plan ahead. Now that we have the timing down, let’s move on to the nutritional information for these delightful chips!
Nutritional Information for Crispy Baked Zucchini Chips Recipe
As a passionate home cook, I always keep an eye on the nutritional value of my creations. My crispy baked zucchini chips recipe not only satisfies cravings but also packs a healthy punch! Here’s a quick look at the nutritional information for a serving of these delightful chips:
- Calories: Approximately 100 calories per serving (about 1 ounce or 28 grams).
- Fat: 5 grams (mostly from olive oil, which is a healthy fat).
- Carbohydrates: 10 grams, including 2 grams of fiber, making them a great option for digestion.
- Protein: 2 grams, which is a nice bonus for a veggie snack!
- Sodium: 200 mg, depending on how much salt you choose to add.
These chips are not only low in calories but also a great way to sneak in some veggies into your diet. Plus, they’re gluten-free and can easily be made vegan by skipping the cheese. I love knowing that I can indulge in a crunchy snack without the guilt. So, let’s keep the momentum going and address some frequently asked questions about this delicious recipe!
Frequently Asked Questions about Crispy Baked Zucchini Chips Recipe
As I’ve shared my crispy baked zucchini chips recipe with friends and family, I’ve noticed a few common questions pop up. It’s always great to clarify any doubts, so let’s dive into some of the most frequently asked questions about this delightful snack!
Can I use other vegetables instead of zucchini?
Absolutely! While zucchini is my favorite, you can experiment with other vegetables like sweet potatoes, carrots, or even kale. Just keep in mind that different veggies may require slight adjustments in cooking time. For instance, sweet potatoes might need a bit longer to bake until they’re crispy.
How do I store leftover zucchini chips?
If you happen to have any leftovers (which is rare in my house!), store them in an airtight container at room temperature. They’ll stay crispy for a day or two. However, I recommend enjoying them fresh for the best crunch!
Why are my zucchini chips not crispy?
There are a few reasons this might happen. First, make sure you’re slicing the zucchini evenly. If the slices are too thick, they may not crisp up properly. Also, ensure you’re not overcrowding the baking sheet, as this can trap moisture. Lastly, if your oven temperature is too high, the chips might brown too quickly without drying out completely.
Can I make these chips in an air fryer?
Yes, you can! An air fryer is a fantastic alternative for making crispy zucchini chips. Just toss the zucchini slices with oil and seasonings, then arrange them in a single layer in the air fryer basket. Cook at 350°F (about 175°C) for about 15-20 minutes, shaking the basket halfway through. Keep an eye on them to achieve your desired crispiness!
What dips pair well with zucchini chips?
Oh, the possibilities are endless! I love pairing my zucchini chips with hummus, ranch dressing, or a zesty salsa. You can also try guacamole or a creamy yogurt dip for a refreshing contrast. Set up a little dip station for gatherings, and watch everyone enjoy the variety!
These questions reflect the curiosity and excitement that come with trying out a new recipe. I hope my answers help you feel more confident in making your own crispy baked zucchini chips. Now, let’s wrap up this delicious journey with a conclusion that highlights the appeal of this recipe!
Conclusion on Crispy Baked Zucchini Chips Recipe
As I reflect on my journey with the crispy baked zucchini chips recipe, I can’t help but smile. This delightful snack has become a staple in my kitchen, and for good reason! Not only are these chips a fantastic way to enjoy fresh zucchini, but they also offer a guilt-free crunch that satisfies my cravings.
What I love most is their versatility. Whether you’re hosting a gathering, looking for a healthy snack, or simply wanting to add a bit of fun to your meals, these chips fit the bill perfectly. With endless seasoning options and serving suggestions, you can easily customize them to suit your taste. Plus, they’re a great way to sneak in some veggies, making them a hit with both kids and adults alike!
So, if you’re ready to embark on your own culinary adventure, grab those zucchinis and let your creativity flow. I promise you’ll be rewarded with a batch of crispy, flavorful chips that will have everyone coming back for more. Happy cooking!