Introduction to Christmas Tree Brownies
As the holiday season approaches, I find myself dreaming of festive treats that bring joy to my family. That’s where these delightful Christmas Tree Brownies come in! They’re not just a dessert; they’re a fun way to celebrate the season with your loved ones. Perfect for busy moms like us, this recipe is quick and easy, making it a go-to for holiday gatherings or cozy nights at home. Plus, who can resist a brownie shaped like a Christmas tree? Let’s dive into this delicious adventure together!
Why You’ll Love This Christmas Tree Brownies
These Christmas Tree Brownies are a holiday miracle for busy schedules! They come together in just about 50 minutes, making them a quick solution for last-minute gatherings. The rich, fudgy texture is a crowd-pleaser, and the festive decorations bring smiles to everyone’s faces. Plus, they’re a fun activity to do with the kids, creating sweet memories while baking. Trust me, these brownies will become a cherished holiday tradition!
Ingredients for Christmas Tree Brownies
Gathering the right ingredients is the first step to creating these festive Christmas Tree Brownies. Here’s what you’ll need:
- Unsalted butter: This adds richness and moisture to the brownies. You can substitute with margarine if needed.
- Granulated sugar: Sweetness is key! It helps create that delightful fudgy texture.
- Large eggs: Eggs bind the ingredients together and provide structure. For a vegan option, try using flax eggs.
- Vanilla extract: A splash of vanilla enhances the flavor, making the brownies even more delicious.
- All-purpose flour: This gives the brownies their body. You can use gluten-free flour for a gluten-free version.
- Cocoa powder: The star of the show! It provides that rich chocolate flavor we all love.
- Salt: Just a pinch balances the sweetness and enhances the chocolate taste.
- Baking powder: This helps the brownies rise slightly, giving them a nice texture.
- Green icing: This is what transforms your brownies into festive Christmas trees! You can make your own or buy it pre-made.
- Colorful sprinkles: These add a fun, festive touch. Feel free to use any sprinkles you have on hand!
For exact measurements, check the bottom of the article where you can find everything listed for easy printing. Happy baking!
How to Make Christmas Tree Brownies
Step 1: Preheat and Prepare
First things first, let’s get that oven preheating to 350°F (175°C). This step is crucial for baking those fudgy brownies to perfection. While the oven warms up, grab a baking pan and grease it well. You can use butter or cooking spray to ensure the brownies don’t stick. Trust me, you want to avoid the heartbreak of losing any delicious brownie bits!
Step 2: Mix the Wet Ingredients
Now, let’s melt that unsalted butter in a large bowl. I usually do this in the microwave for about 30 seconds. Once melted, stir in the granulated sugar until it’s well combined. Next, add the eggs one at a time, mixing thoroughly after each addition. Finally, pour in the vanilla extract. This mixture should be smooth and creamy, setting the stage for our rich brownies!
Step 3: Combine the Dry Ingredients
In another bowl, whisk together the all-purpose flour, cocoa powder, salt, and baking powder. This step is essential for evenly distributing the dry ingredients. Make sure there are no lumps in the cocoa powder; we want a smooth brownie batter. The aroma of cocoa will start to fill your kitchen, and trust me, it’s a delightful preview of what’s to come!
Step 4: Combine Wet and Dry Mixtures
Now, it’s time to bring the wet and dry ingredients together. Gradually add the dry mixture to the wet ingredients, stirring gently. Be careful not to overmix; we want to keep that fudgy texture. Just mix until everything is combined, and you’ll see a rich, chocolatey batter forming. This is where the magic begins!
Step 5: Bake the Brownies
Pour the brownie batter into your prepared baking pan, spreading it evenly. This ensures that every bite is just as delicious as the last. Pop the pan into the preheated oven and bake for 25-30 minutes. To check for doneness, insert a toothpick in the center. If it comes out clean, your brownies are ready to shine!
Step 6: Cool and Cut
Once baked, remove the brownies from the oven and let them cool completely in the pan. This step is important; cutting them too soon can lead to a gooey mess. After they’ve cooled, use a sharp knife to cut them into tree shapes. I like to use a cookie cutter for a fun touch, but a knife works just as well!
Step 7: Decorate
Now comes the fun part—decorating! Grab your green icing and pipe it onto the brownie trees. Let your creativity flow! Add colorful sprinkles to resemble ornaments and lights. This is where you can really make these Christmas Tree Brownies shine. Your kids will love helping with this step, and the results will be as festive as they are delicious!
Tips for Success
- Make sure your butter is fully melted for a smooth batter.
- Use room temperature eggs for better mixing.
- Don’t overmix the batter; it should be just combined.
- Let the brownies cool completely before cutting for clean edges.
- Experiment with different sprinkles for a unique look!
Equipment Needed
- Baking pan: A 9×13 inch pan works perfectly, but any similar size will do.
- Mixing bowls: Use one large bowl for wet ingredients and another for dry.
- Whisk: A whisk is great for mixing, but a fork can work in a pinch.
- Spatula: A rubber spatula helps in folding the batter smoothly.
- Cookie cutter: Optional, but fun for shaping the brownies into trees!
Variations
- Mint Chocolate: Add a teaspoon of peppermint extract to the batter for a refreshing twist.
- Nutty Delight: Fold in chopped nuts like walnuts or pecans for added texture and flavor.
- Gluten-Free: Substitute all-purpose flour with a gluten-free blend for a delicious alternative.
- Vegan Option: Use flax eggs and coconut oil instead of butter for a plant-based version.
- Chocolate Chip Brownies: Mix in chocolate chips for an extra chocolatey treat!
Serving Suggestions
- Pair your Christmas Tree Brownies with a scoop of vanilla ice cream for a delightful contrast.
- Serve with a warm cup of hot cocoa or spiced apple cider for a cozy treat.
- Present them on a festive platter, garnished with fresh mint leaves for a pop of color.
FAQs about Christmas Tree Brownies
Can I make these Christmas Tree Brownies ahead of time?
Absolutely! You can bake the brownies a day or two in advance. Just store them in an airtight container at room temperature. When you’re ready to serve, decorate them with icing and sprinkles for that fresh, festive touch!
What can I use instead of green icing?
If you don’t have green icing, you can use white icing tinted with green food coloring. Alternatively, melted chocolate or a simple glaze can also work beautifully for decorating your Christmas Tree Brownies.
How do I store leftover brownies?
Leftover brownies can be stored in an airtight container at room temperature for up to three days. If you want to keep them longer, freeze them for up to a month. Just thaw before serving!
Can I add other toppings to my brownies?
Definitely! Feel free to get creative with toppings. Chopped nuts, mini marshmallows, or even crushed candy canes can add a delightful twist to your Christmas Tree Brownies.
Are these brownies suitable for a gluten-free diet?
Yes! Simply substitute the all-purpose flour with a gluten-free flour blend. Your brownies will still be delicious and festive, perfect for everyone to enjoy!
Final Thoughts
Making Christmas Tree Brownies is more than just baking; it’s about creating joyful moments with family. The aroma of chocolate fills the air, and laughter echoes in the kitchen as we decorate our festive treats together. These brownies are a delightful way to celebrate the season, bringing smiles to faces young and old. Whether you’re sharing them at a holiday gathering or enjoying them during a cozy night in, these treats are sure to become a cherished tradition. So, roll up your sleeves, gather your loved ones, and let the holiday magic unfold with every delicious bite!
Print
Christmas Tree Brownies: Delightful Treats for the Holidays!
- Total Time: 50 minutes
- Yield: 24 brownies 1x
- Diet: Vegetarian
Description
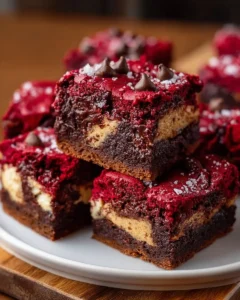
Christmas Tree Brownies are festive and delicious treats perfect for the holiday season, shaped like Christmas trees and decorated with colorful icing and sprinkles.
Ingredients
- 1 cup unsalted butter
- 2 cups granulated sugar
- 4 large eggs
- 1 teaspoon vanilla extract
- 1 cup all-purpose flour
- 1 cup cocoa powder
- 1/2 teaspoon salt
- 1/2 teaspoon baking powder
- Green icing for decoration
- Colorful sprinkles
Instructions
- Preheat the oven to 350°F (175°C) and grease a baking pan.
- In a large bowl, melt the butter and mix in the sugar until well combined.
- Add the eggs one at a time, mixing well after each addition, then stir in the vanilla extract.
- In another bowl, whisk together the flour, cocoa powder, salt, and baking powder.
- Gradually add the dry ingredients to the wet ingredients, mixing until just combined.
- Pour the brownie batter into the prepared baking pan and spread evenly.
- Bake for 25-30 minutes or until a toothpick inserted in the center comes out clean.
- Allow the brownies to cool completely before cutting them into tree shapes.
- Decorate the brownies with green icing and colorful sprinkles to resemble Christmas trees.
Notes
- For a richer flavor, consider adding chocolate chips to the batter.
- Store leftovers in an airtight container at room temperature for up to 3 days.
- These brownies can be frozen for up to a month; just thaw before serving.
- Prep Time: 20 minutes
- Cook Time: 30 minutes
- Category: Dessert
- Method: Baking
- Cuisine: American
Nutrition
- Serving Size: 1 brownie
- Calories: 200
- Sugar: 18g
- Sodium: 150mg
- Fat: 10g
- Saturated Fat: 6g
- Unsaturated Fat: 4g
- Trans Fat: 0g
- Carbohydrates: 25g
- Fiber: 2g
- Protein: 3g
- Cholesterol: 50mg
Keywords: Christmas Tree Brownies, holiday treats, festive desserts, brownies