Introduction to No-Bake Oreo Cheesecake Sushi Rolls
Hey there, fellow dessert lovers! If you’re like me, you know that life can get pretty hectic. Between juggling work, family, and everything in between, finding time to whip up a delightful treat can feel impossible. That’s where these No-Bake Oreo Cheesecake Sushi Rolls come in! They’re not just a feast for the eyes; they’re a quick solution for a busy day or a fun way to impress your loved ones. With creamy cheesecake and crunchy Oreos wrapped in a sushi roll format, this dessert is sure to bring smiles all around!
Why You’ll Love This No-Bake Oreo Cheesecake Sushi Rolls
These No-Bake Oreo Cheesecake Sushi Rolls are a game-changer for busy moms and professionals alike. They come together in just 20 minutes, making them a breeze to prepare. Plus, there’s no baking involved, so you can skip the oven and the mess! The combination of rich cheesecake and crunchy Oreos creates a flavor explosion that will have everyone asking for seconds. Trust me, they’re a hit at any gathering!
Ingredients for No-Bake Oreo Cheesecake Sushi Rolls
Let’s gather our ingredients for these delightful No-Bake Oreo Cheesecake Sushi Rolls. Each component plays a vital role in creating that creamy, dreamy dessert we all crave. Here’s what you’ll need:
- Oreo cookies: The star of the show! These chocolatey delights provide the perfect crunch and flavor.
- Cream cheese: This creamy base gives our cheesecake its rich texture. Make sure it’s softened for easy mixing.
- Powdered sugar: A touch of sweetness to balance the flavors. It dissolves easily, making it perfect for no-bake recipes.
- Vanilla extract: Just a splash adds depth and enhances the overall flavor of the cheesecake.
- Whipped cream: Light and airy, it gives the filling a fluffy texture. You can use store-bought or homemade!
- Chocolate syrup: For drizzling on top, this adds a decadent touch that complements the Oreos beautifully.
- Crushed Oreos: A sprinkle on top for garnish, adding that extra crunch and visual appeal.
For those looking to mix things up, feel free to experiment with different types of cookies or flavored extracts. The exact quantities for each ingredient are available at the bottom of the article for easy printing. Happy cooking!
How to Make No-Bake Oreo Cheesecake Sushi Rolls
Now that we have our ingredients ready, let’s dive into the fun part: making these No-Bake Oreo Cheesecake Sushi Rolls! Follow these simple steps, and you’ll have a delicious dessert that’s sure to impress.
Step 1: Crush the Oreo Cookies
First things first, let’s get those Oreo cookies crushed! You can use a food processor for a fine crumb, or place them in a zip-top bag and crush them with a rolling pin. Either way, you want them to resemble sand. This will be the base of our cheesecake filling, so make sure they’re nice and fine!
Step 2: Mix the Cheesecake Filling
In a mixing bowl, combine the crushed Oreos with softened cream cheese, powdered sugar, and vanilla extract. Use a hand mixer or a spatula to blend everything until it’s smooth and creamy. This is where the magic happens! The mixture should be thick and luscious, perfect for our sushi rolls.
Step 3: Fold in the Whipped Cream
Next, gently fold in the whipped cream. This step is crucial for achieving that light, airy texture. Use a spatula and be careful not to deflate the whipped cream too much. You want to keep that fluffiness, which will make your cheesecake filling irresistible!
Step 4: Form the Cheesecake Roll
Now, lay a sheet of plastic wrap on a flat surface. Spread the cheesecake mixture evenly over the wrap, forming a rectangle. The thickness should be about half an inch. Once it’s spread out, use the plastic wrap to help you roll it tightly into a log shape. This is where it starts to look like sushi!
Step 5: Chill the Roll
Time to chill! Place the rolled cheesecake in the refrigerator for at least 2 hours. This helps it set and makes slicing easier. If you’re in a hurry, you can pop it in the freezer for about 30 minutes, but keep an eye on it!
Step 6: Slice and Serve
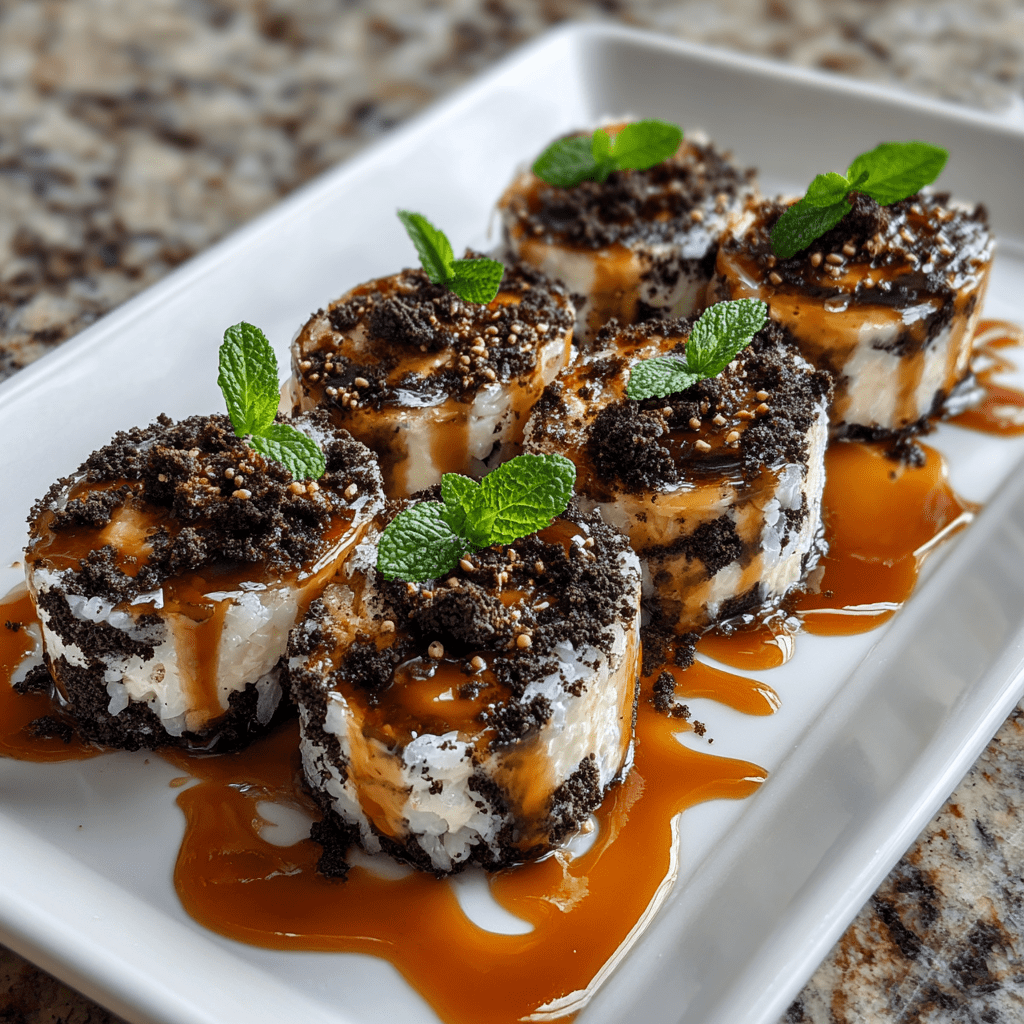
Once your cheesecake roll is set, carefully remove the plastic wrap. Use a sharp knife to slice it into sushi-like pieces. Drizzle with chocolate syrup and sprinkle with crushed Oreos for that extra flair. Serve these delightful No-Bake Oreo Cheesecake Sushi Rolls at your next gathering, and watch them disappear!
Tips for Success
- Make sure your cream cheese is at room temperature for easy mixing.
- Use a sharp knife to slice the rolls for clean edges.
- Chill the rolls longer if you prefer a firmer texture.
- Experiment with different toppings like sprinkles or fruit for a fun twist.
- Keep leftovers in an airtight container in the fridge for up to three days.
Equipment Needed
- Food processor: For crushing Oreos. A zip-top bag and rolling pin work too!
- Mixing bowl: Any large bowl will do for mixing the cheesecake filling.
- Spatula: Perfect for folding in whipped cream and spreading the mixture.
- Plastic wrap: Essential for rolling the cheesecake. Parchment paper can be a substitute.
- Sharp knife: For slicing the rolls into perfect pieces.
Variations
- Cookie Swap: Try using different cookies like chocolate chip or peanut butter for a unique flavor twist.
- Fruit Additions: Incorporate fresh fruit like strawberries or bananas into the filling for a refreshing touch.
- Nutty Crunch: Add chopped nuts like almonds or walnuts for an extra crunch and flavor depth.
- Gluten-Free Option: Use gluten-free cookies to make this dessert suitable for those with dietary restrictions.
- Vegan Version: Substitute cream cheese with a vegan alternative and use coconut whipped cream for a dairy-free treat.
Serving Suggestions
- Pair with a scoop of vanilla ice cream for an indulgent treat.
- Serve alongside fresh berries for a pop of color and freshness.
- Drizzle extra chocolate syrup on the plate for a beautiful presentation.
- Offer a selection of drinks like coffee or milk to complement the dessert.
- Garnish with mint leaves for a touch of elegance.
FAQs about No-Bake Oreo Cheesecake Sushi Rolls
As you embark on your journey to create these delightful No-Bake Oreo Cheesecake Sushi Rolls, you might have a few questions. Here are some common queries I’ve encountered, along with helpful answers to guide you!
Can I make these sushi rolls ahead of time?
Absolutely! These rolls can be made a day in advance. Just store them in the refrigerator, and they’ll be ready to impress your guests when you need them.
What if I don’t have a food processor?
No worries! You can place the Oreo cookies in a zip-top bag and crush them with a rolling pin. It’s a fun way to get the kids involved, too!
Can I use different types of cookies?
Yes! Feel free to experiment with different cookies. Chocolate chip or even graham crackers can add a unique twist to your No-Bake Oreo Cheesecake Sushi Rolls.
How should I store leftovers?
Keep any leftovers in an airtight container in the fridge. They’ll stay fresh for up to three days, but I doubt they’ll last that long!
Can I freeze these rolls?
Yes, you can freeze them! Just wrap them tightly in plastic wrap and store in a freezer-safe container. Thaw in the fridge before serving for the best texture.
Final Thoughts
Creating these No-Bake Oreo Cheesecake Sushi Rolls is more than just whipping up a dessert; it’s about bringing joy to your kitchen and smiles to your loved ones. The blend of creamy cheesecake and crunchy Oreos wrapped in a fun sushi format makes for a delightful treat that’s perfect for any occasion. Whether you’re celebrating a special moment or just need a sweet escape from a busy day, these rolls are sure to satisfy. So roll up your sleeves, gather your ingredients, and let the deliciousness unfold. Happy cooking!
Print
No-Bake Oreo Cheesecake Sushi Rolls: A Delicious Twist!
- Total Time: 2 hours 20 minutes
- Yield: 12 sushi rolls 1x
- Diet: Vegetarian
Description
No-Bake Oreo Cheesecake Sushi Rolls are a fun and creative dessert that combines the flavors of cheesecake and Oreos in a sushi roll format, perfect for parties or a sweet treat.
Ingredients
- 1 package of Oreo cookies (about 36 cookies)
- 8 oz cream cheese, softened
- 1/4 cup powdered sugar
- 1 tsp vanilla extract
- 1/2 cup whipped cream
- 1/2 cup chocolate syrup (for drizzling)
- 1/4 cup crushed Oreos (for garnish)
Instructions
- Crush the Oreo cookies into fine crumbs using a food processor.
- In a mixing bowl, combine the crushed Oreos, softened cream cheese, powdered sugar, and vanilla extract. Mix until smooth.
- Fold in the whipped cream gently until well combined.
- Lay a sheet of plastic wrap on a flat surface and spread the cheesecake mixture evenly over it, forming a rectangle.
- Using the plastic wrap, roll the cheesecake mixture tightly into a log shape.
- Chill the rolled cheesecake in the refrigerator for at least 2 hours to set.
- Once set, remove the plastic wrap and slice the roll into sushi-like pieces.
- Drizzle with chocolate syrup and sprinkle with crushed Oreos before serving.
Notes
- For a different flavor, try using different types of cookies.
- Make sure the cream cheese is softened for easier mixing.
- These can be made a day in advance and stored in the refrigerator.
- Prep Time: 20 minutes
- Cook Time: 0 minutes
- Category: Dessert
- Method: No-Bake
- Cuisine: American
Nutrition
- Serving Size: 1 roll
- Calories: 150
- Sugar: 10g
- Sodium: 100mg
- Fat: 8g
- Saturated Fat: 4g
- Unsaturated Fat: 2g
- Trans Fat: 0g
- Carbohydrates: 18g
- Fiber: 1g
- Protein: 2g
- Cholesterol: 20mg
Keywords: No-Bake Oreo Cheesecake Sushi Rolls, dessert, cheesecake, Oreo, sushi rolls