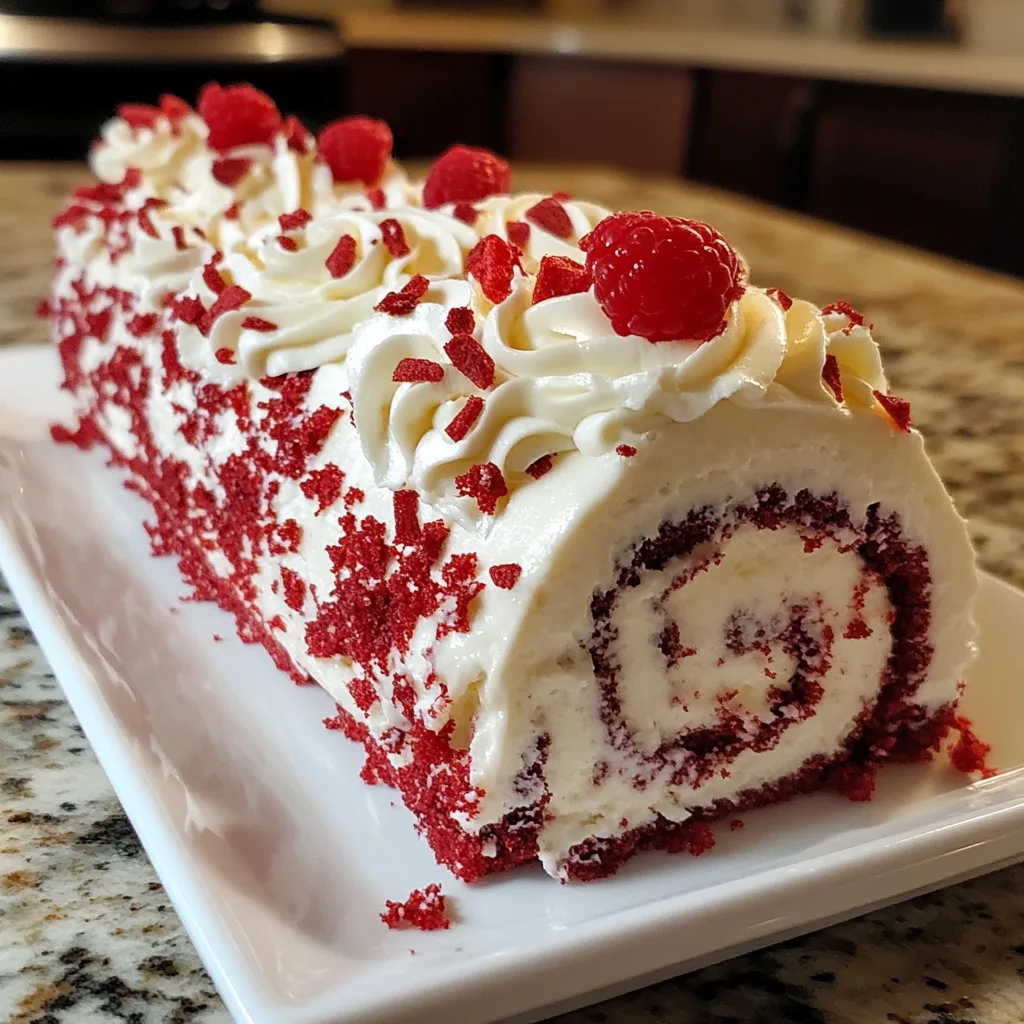
Introduction to Red Velvet Cake Roll with Cream Cheese Filling
As a busy mom, I know how precious time can be, especially when it comes to whipping up something special for my family. That’s why I absolutely adore this Red Velvet Cake Roll with Cream Cheese Filling. It’s not just a dessert; it’s a showstopper that brings smiles to faces and warmth to hearts. Imagine a soft, velvety cake rolled up with a luscious cream cheese filling, perfect for any occasion. Whether it’s a birthday, holiday, or just a sweet treat after dinner, this recipe is a delightful way to impress your loved ones without spending hours in the kitchen.
Why You’ll Love This Red Velvet Cake Roll with Cream Cheese Filling
This Red Velvet Cake Roll with Cream Cheese Filling is a dream come true for busy cooks like us. It’s quick to prepare, taking just about an hour from start to finish. The rich, chocolatey flavor combined with the creamy filling is simply irresistible. Plus, it’s visually stunning, making it perfect for impressing guests or celebrating special moments. You’ll find that this dessert is as delightful to make as it is to eat!
Ingredients for Red Velvet Cake Roll with Cream Cheese Filling
Gathering the right ingredients is the first step to creating this stunning Red Velvet Cake Roll with Cream Cheese Filling. Here’s what you’ll need:
- All-purpose flour: This is the backbone of your cake, providing structure and texture.
- Granulated sugar: Sweetness is key! It balances the cocoa and enhances the cake’s flavor.
- Unsweetened cocoa powder: Adds a rich chocolate flavor, making the cake even more decadent.
- Baking powder: This leavening agent helps the cake rise, giving it that light, fluffy texture.
- Baking soda: Works alongside the baking powder to ensure your cake is perfectly airy.
- Salt: Just a pinch enhances all the flavors, making them pop!
- Vegetable oil: Keeps the cake moist and tender, ensuring every bite is delicious.
- Buttermilk: This adds a tangy flavor and helps create a soft crumb.
- Large eggs: They bind the ingredients together and add richness to the cake.
- Red food coloring: The star of the show! It gives the cake its signature vibrant hue.
- Vanilla extract: A splash of this adds warmth and depth to the flavor.
- White vinegar: This reacts with the baking soda, helping the cake rise beautifully.
- Cream cheese: The creamy filling that takes this cake to the next level of indulgence.
- Powdered sugar: Sweetens the cream cheese filling, making it smooth and delightful.
- Vanilla extract (for filling): Just like in the cake, it adds a lovely flavor to the filling.
For exact measurements, check the bottom of the article where you can find everything listed for easy printing. Happy baking!
How to Make Red Velvet Cake Roll with Cream Cheese Filling
Step 1: Preheat and Prepare
First things first, let’s get that oven preheating to 350°F (175°C). While it warms up, grab a jelly roll pan and line it with parchment paper. This step is crucial! The parchment will help the cake release easily after baking. Trust me, you don’t want to wrestle with a stuck cake. Make sure the paper hangs over the edges a bit; it’ll make rolling the cake later a breeze. Now, let’s get ready to mix those dry ingredients!
Step 2: Mix Dry Ingredients
In a large mixing bowl, combine the all-purpose flour, granulated sugar, cocoa powder, baking powder, baking soda, and salt. Whisk them together until they’re well blended. This is where the magic begins! The dry ingredients need to be evenly mixed to ensure your cake rises perfectly. I like to use a whisk for this; it helps break up any lumps and gives a nice airy texture. Once mixed, set this bowl aside while we tackle the wet ingredients.
Step 3: Combine Wet Ingredients
In another bowl, whisk together the vegetable oil, buttermilk, eggs, red food coloring, vanilla extract, and white vinegar. This mixture is where the flavor and moisture come from! The vibrant red color will make your cake pop. Make sure everything is well combined; you want a smooth, uniform mixture. I find that using a hand whisk works wonders here, but a stand mixer can do the job too. Once it’s all mixed, it’s time to bring the wet and dry ingredients together!
Step 4: Combine Wet and Dry Mixtures
Now, pour the wet mixture into the bowl of dry ingredients. Gently fold them together using a spatula or wooden spoon. Be careful not to overmix; we want a tender cake, not a tough one! Just mix until you see no dry flour. The batter will be thick and luscious, and you might even want to sneak a taste. But hold off! We still have some baking to do. Let’s get that batter into the pan!
Step 5: Bake the Cake
Pour the batter into your prepared jelly roll pan, spreading it evenly with a spatula. This ensures that it bakes uniformly. Pop it into the preheated oven and bake for 15-20 minutes. Keep an eye on it! You’ll know it’s done when a toothpick inserted in the center comes out clean. The aroma will fill your kitchen, making it hard to resist. Once baked, it’s time to let it cool a bit before we roll it up!
Step 6: Cool the Cake
After removing the cake from the oven, let it cool in the pan for about 5 minutes. This short cooling time helps it firm up a bit, making it easier to roll. Then, carefully lift the cake out using the parchment paper and place it on a wire rack. Cooling is essential! If you skip this step, the cake might crack when you roll it. Patience is key here, my friends!
Step 7: Prepare the Cream Cheese Filling
While the cake cools, let’s whip up that dreamy cream cheese filling. In a mixing bowl, combine the softened cream cheese, powdered sugar, and vanilla extract. Beat them together until smooth and creamy. This filling is the heart of our cake roll! It should be thick yet spreadable. If it’s too thick, you can add a splash of milk to loosen it up. Once it’s ready, set it aside until the cake is cool enough to handle.
Step 8: Roll the Cake
Now comes the fun part! Once the cake is cool, carefully roll it up with the parchment paper still attached. Start from one end and roll it tightly, but not too tight! The parchment helps prevent sticking and makes this process easier. This initial roll creates the shape of your cake roll. After rolling, let it sit for a few minutes to hold its shape. It’s like giving your cake a little hug!
Step 9: Fill and Roll Again
Unroll the cake gently, removing the parchment paper. Spread the cream cheese filling evenly over the surface of the cake. Make sure to leave a small border around the edges. This way, the filling won’t ooze out when you roll it back up. Once spread, roll the cake back up without the parchment. It’s like wrapping a present, and trust me, it’s going to be a delicious one!
Step 10: Chill and Serve
Finally, wrap the rolled cake in plastic wrap and chill it in the refrigerator for at least an hour. This step helps the flavors meld and makes slicing easier. When you’re ready to serve, take it out, slice it into beautiful rounds, and watch the smiles appear! You can dust it with powdered sugar or cocoa for an extra touch. Enjoy every bite of this delightful Red Velvet Cake Roll with Cream Cheese Filling!
Tips for Success
- Make sure your cream cheese is softened for easy mixing.
- Don’t skip the cooling step; it prevents cracking when rolling.
- Use a spatula to spread the filling evenly for a beautiful finish.
- Chill the cake roll before slicing for cleaner cuts.
- Experiment with different fillings like chocolate ganache or fruit preserves!
Equipment Needed
- Jelly roll pan: A standard baking sheet works too, but a jelly roll pan is ideal for the right thickness.
- Parchment paper: If you don’t have this, greasing the pan well can work as an alternative.
- Mixing bowls: Use any size, but a large bowl is best for mixing the batter.
- Whisk: A hand whisk is perfect, but an electric mixer can save time.
- Spatula: Essential for spreading the batter and filling evenly.
Variations
- Gluten-Free: Substitute all-purpose flour with a gluten-free blend to make this cake roll suitable for gluten-sensitive friends.
- Chocolate Lovers: Add chocolate chips to the batter for an extra chocolatey twist that will delight any chocoholic.
- Nutty Addition: Fold in some chopped walnuts or pecans into the cream cheese filling for a delightful crunch.
- Fruit Infusion: Mix in some crushed raspberries or strawberries into the cream cheese filling for a fruity flavor boost.
- Vegan Option: Use a plant-based cream cheese and substitute eggs with flaxseed meal or applesauce for a vegan-friendly version.
Serving Suggestions
- Pair with a scoop of vanilla ice cream for a delightful contrast in temperature and texture.
- Serve alongside fresh berries to add a pop of color and freshness.
- Drizzle with chocolate or caramel sauce for an extra indulgent touch.
- Garnish with mint leaves for a refreshing finish.
- Present on a beautiful platter, dusted with powdered sugar for an elegant look.
FAQs about Red Velvet Cake Roll with Cream Cheese Filling
Can I make the Red Velvet Cake Roll ahead of time?
Absolutely! This cake roll can be made a day in advance. Just store it in the refrigerator after rolling it up. It actually tastes even better after chilling, as the flavors meld beautifully.
What can I substitute for buttermilk?
If you don’t have buttermilk on hand, you can easily make a substitute. Just mix one cup of milk with a tablespoon of vinegar or lemon juice. Let it sit for about 5 minutes, and you’ll have a perfect buttermilk replacement!
How do I store leftovers?
To keep your Red Velvet Cake Roll fresh, wrap it tightly in plastic wrap and store it in the refrigerator. It should last for about 3-4 days. Just remember to slice it right before serving for the best presentation!
Can I freeze the cake roll?
Yes, you can freeze the cake roll! Wrap it tightly in plastic wrap and then in aluminum foil. It can be frozen for up to 2 months. When you’re ready to enjoy it, just thaw it in the refrigerator overnight.
What other fillings can I use?
While the cream cheese filling is a classic, feel free to get creative! You can try chocolate ganache, whipped cream, or even fruit preserves for a fun twist. The possibilities are endless!
Final Thoughts
Creating this Red Velvet Cake Roll with Cream Cheese Filling is more than just baking; it’s about sharing joy and love with those around you. Each slice reveals a beautiful swirl of vibrant red and creamy filling, making it a feast for the eyes as well as the taste buds. I cherish the moments spent in the kitchen, knowing that this delightful dessert will bring smiles to my family’s faces. Whether it’s a special occasion or a simple weeknight treat, this cake roll is sure to become a cherished recipe in your home, just as it has in mine.
Print
Red Velvet Cake Roll with Cream Cheese Filling: A Must-Try Delight!
- Total Time: 1 hour 50 minutes
- Yield: 8 servings 1x
- Diet: Vegetarian
Description
A delicious and visually stunning red velvet cake roll filled with creamy cheese filling, perfect for any occasion.
Ingredients
- 1 cup all-purpose flour
- 1 cup granulated sugar
- 1/2 cup unsweetened cocoa powder
- 1 teaspoon baking powder
- 1/2 teaspoon baking soda
- 1/2 teaspoon salt
- 1 cup vegetable oil
- 1 cup buttermilk
- 2 large eggs
- 2 tablespoons red food coloring
- 1 teaspoon vanilla extract
- 1 teaspoon white vinegar
- 8 oz cream cheese, softened
- 1/2 cup powdered sugar
- 1 teaspoon vanilla extract (for filling)
Instructions
- Preheat the oven to 350°F (175°C) and line a jelly roll pan with parchment paper.
- In a large bowl, mix together the flour, sugar, cocoa powder, baking powder, baking soda, and salt.
- In another bowl, whisk together the oil, buttermilk, eggs, food coloring, vanilla extract, and vinegar.
- Combine the wet and dry ingredients until just mixed.
- Pour the batter into the prepared pan and spread evenly.
- Bake for 15-20 minutes or until a toothpick inserted comes out clean.
- Once baked, remove from the oven and let it cool for a few minutes.
- While cooling, prepare the cream cheese filling by mixing the softened cream cheese, powdered sugar, and vanilla extract until smooth.
- Once the cake is cool, carefully roll it up with the parchment paper and let it cool completely.
- Unroll the cake, spread the cream cheese filling evenly, and roll it back up without the parchment paper.
- Chill in the refrigerator for at least 1 hour before slicing and serving.
Notes
- Ensure the cake is completely cool before spreading the filling to prevent it from melting.
- For a festive touch, sprinkle some cocoa powder or powdered sugar on top before serving.
- This cake roll can be made a day in advance and stored in the refrigerator.
- Prep Time: 30 minutes
- Cook Time: 20 minutes
- Category: Dessert
- Method: Baking
- Cuisine: American
Nutrition
- Serving Size: 1 slice
- Calories: 250
- Sugar: 20g
- Sodium: 200mg
- Fat: 12g
- Saturated Fat: 4g
- Unsaturated Fat: 6g
- Trans Fat: 0g
- Carbohydrates: 32g
- Fiber: 1g
- Protein: 3g
- Cholesterol: 50mg
Keywords: Red Velvet Cake Roll, Cream Cheese Filling, Dessert, Baking