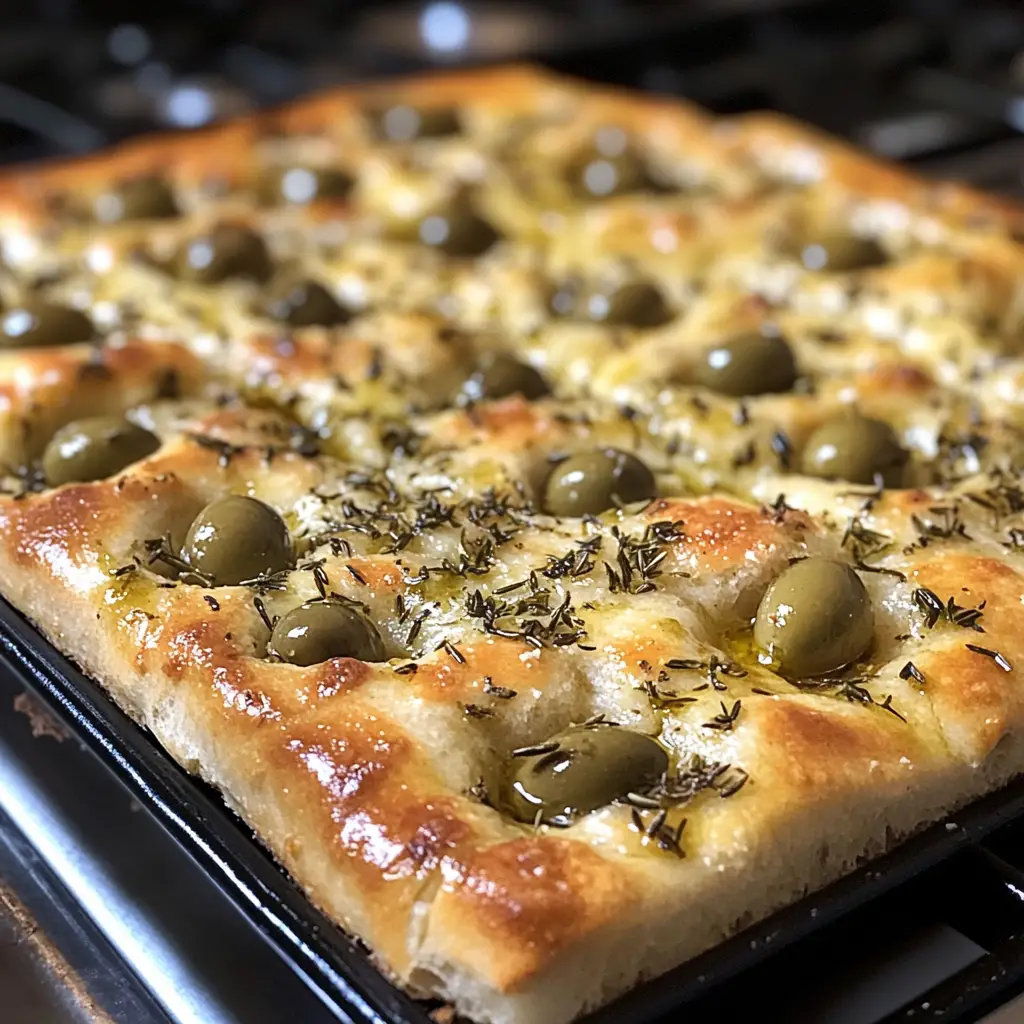
Introduction to Olive Focaccia
Welcome to the delightful world of Olive Focaccia! This Italian bread is not just a treat for the taste buds; it’s a warm hug for the soul. I remember the first time I made it—my kitchen filled with the aroma of freshly baked bread, and my family gathered around, eager to dig in. It’s the perfect solution for busy days when you want something quick yet impressive. Whether you’re hosting friends or simply enjoying a cozy night in, this Olive Focaccia will surely steal the show and warm hearts.
Why You’ll Love This Olive Focaccia
This Olive Focaccia is a game-changer for busy moms and professionals alike. It’s incredibly easy to make, requiring just a few simple ingredients. The best part? It bakes in under 30 minutes! The soft, pillowy texture paired with the rich flavor of olives creates a delightful experience. Plus, it’s versatile—perfect as a side dish, a snack, or even a base for sandwiches. You’ll find yourself making it again and again!
Ingredients for Olive Focaccia
Gathering the right ingredients is the first step to creating your Olive Focaccia masterpiece. Here’s what you’ll need:
- All-purpose flour: This is the backbone of your focaccia, giving it that lovely structure and chewiness.
- Salt: A crucial ingredient that enhances flavor and strengthens the dough. It’s like the secret handshake of baking!
- Active dry yeast: This little powerhouse helps your dough rise, creating that airy texture we all love.
- Warm water: It activates the yeast, so make sure it’s not too hot or too cold—think cozy bath temperature!
- Olive oil: Adds richness and flavor, making your focaccia moist and delicious. Plus, it helps with that golden crust.
- Olives: The star of the show! Pitted and sliced, they bring a briny punch that pairs beautifully with the bread.
- Fresh rosemary (optional): This herb adds a fragrant touch, elevating your focaccia to gourmet status. Feel free to swap it out for other herbs if you prefer.
For exact measurements, check the bottom of the article where you can find everything listed for easy printing. Happy baking!
How to Make Olive Focaccia
Now that you have your ingredients ready, let’s dive into the fun part—making your Olive Focaccia! Follow these simple steps, and you’ll be rewarded with a delicious loaf that will impress everyone.
Step 1: Prepare the Yeast Mixture
Start by combining warm water and active dry yeast in a large bowl. Give it a gentle stir and let it sit for about 5 minutes. You want to see it become frothy, like a bubbly potion. This means your yeast is alive and ready to work its magic!
Step 2: Mix the Dough
Once your yeast mixture is frothy, it’s time to add the all-purpose flour, salt, and olive oil. Mix everything together until a dough starts to form. I like to use a wooden spoon for this part. It’s like a workout for your arms, but trust me, it’s worth it!
Step 3: Knead the Dough
Now, sprinkle some flour on your countertop and turn the dough out onto it. Knead the dough for about 10 minutes. You want it to be smooth and elastic. Think of it as giving your dough a little massage. If it’s too sticky, add a bit more flour, but don’t overdo it!
Step 4: First Rise
Place your kneaded dough in a greased bowl, turning it to coat all sides with oil. Cover it with a clean kitchen towel and let it rise in a warm spot for about an hour. You’re looking for it to double in size. It’s like watching a balloon inflate—so satisfying!
Step 5: Preheat the Oven
While your dough is rising, preheat your oven to 425°F (220°C). This step is crucial! A hot oven ensures that your Olive Focaccia bakes evenly and develops that beautiful golden crust we all love.
Step 6: Shape the Dough
Once your dough has risen, it’s time to punch it down gently. This releases the air bubbles. Then, spread the dough onto a greased baking sheet. Use your fingers to stretch it out to your desired thickness. Don’t worry about making it perfect; rustic is charming!
Step 7: Add Toppings
Now comes the fun part—toppings! Press the sliced olives into the surface of the dough. If you’re using fresh rosemary, sprinkle it on top. This is where you can get creative! Feel free to add other toppings like sun-dried tomatoes or cheese if you’re feeling adventurous.
Step 8: Second Rise
Cover the dough again with a towel and let it rise for another 20-30 minutes. This second rise helps develop the texture. It’s like giving your focaccia a little extra love before it hits the oven!
Step 9: Bake the Focaccia
Once the dough has risen again, pop it in the preheated oven. Bake for 20-25 minutes or until it’s golden brown. Keep an eye on it! You’ll know it’s done when it sounds hollow when tapped on the bottom. That’s the sound of success!
Step 10: Cool and Serve
After baking, let your Olive Focaccia cool slightly on a wire rack. This helps maintain its texture. Once it’s cool enough to handle, slice it up and serve. Enjoy it warm, perhaps with a drizzle of olive oil or a sprinkle of sea salt. Your kitchen will smell heavenly!
Tips for Success
- Use room temperature ingredients for better mixing.
- Don’t rush the rising times; they’re crucial for texture.
- Experiment with different olives for unique flavors.
- For a crispier crust, place a pan of water in the oven while baking.
- Brush the focaccia with olive oil before baking for extra flavor.
Equipment Needed
- Large mixing bowl: A sturdy bowl for mixing your dough. A pot can work in a pinch!
- Wooden spoon: Perfect for mixing. A spatula or your hands can also do the trick.
- Baking sheet: A standard sheet works well. You can use a cast-iron skillet for a crispy crust.
- Kitchen towel: To cover the dough while it rises. A plastic wrap is a good alternative.
- Wire rack: For cooling your focaccia. A plate can suffice if you don’t have one.
Variations of Olive Focaccia
- Herb-Infused Focaccia: Add a mix of dried herbs like oregano, thyme, or basil to the dough for an aromatic twist.
- Cheesy Delight: Sprinkle shredded mozzarella or parmesan on top before baking for a cheesy crust that’s irresistible.
- Sun-Dried Tomato and Olive: Mix in chopped sun-dried tomatoes with the olives for a burst of flavor and color.
- Gluten-Free Option: Substitute all-purpose flour with a gluten-free flour blend to accommodate dietary needs.
- Spicy Kick: Add sliced jalapeños or crushed red pepper flakes to the dough for a spicy version that packs a punch.
Serving Suggestions for Olive Focaccia
- Pair with a salad: A fresh arugula or mixed greens salad complements the focaccia beautifully.
- Enjoy with dips: Serve with olive oil, balsamic vinegar, or hummus for a delightful appetizer.
- Perfect for sandwiches: Use slices as a base for delicious sandwiches or paninis.
- Wine pairing: A light white wine or a fruity red enhances the flavors of the focaccia.
- Presentation: Serve warm on a wooden board, garnished with fresh herbs for a rustic touch.
FAQs about Olive Focaccia
Can I use different types of olives for my Olive Focaccia?
Absolutely! Feel free to experiment with various olives like Kalamata, green olives, or even stuffed varieties. Each type will bring its unique flavor to your focaccia, making it a delightful surprise every time.
How do I store leftover Olive Focaccia?
To keep your focaccia fresh, store it in an airtight container at room temperature for up to three days. If you want to keep it longer, consider freezing it. Just wrap it tightly in plastic wrap and then in foil before placing it in the freezer.
Can I make Olive Focaccia ahead of time?
Yes! You can prepare the dough in advance and let it rise in the fridge overnight. Just remember to bring it back to room temperature before shaping and baking. This way, you can enjoy fresh focaccia with minimal effort on busy days!
What can I serve with Olive Focaccia?
Olive Focaccia pairs wonderfully with a variety of dishes. Consider serving it alongside a fresh salad, a charcuterie board, or even as a base for sandwiches. It’s versatile enough to complement any meal!
Is Olive Focaccia suitable for a vegetarian diet?
Yes, Olive Focaccia is entirely vegetarian! With its simple ingredients, it’s a great option for anyone looking to enjoy a delicious bread without any meat products. Feel free to add your favorite veggies or herbs for extra flavor!
Final Thoughts
Making Olive Focaccia is more than just baking; it’s about creating memories in the kitchen. The joy of watching the dough rise, the aroma wafting through your home, and the smiles on your loved ones’ faces as they take that first bite are priceless. This recipe is a reminder that even on the busiest days, you can whip up something special with just a few ingredients. So, roll up your sleeves, embrace the process, and let this Olive Focaccia bring warmth and happiness to your table. Trust me, it’s worth every moment spent in the kitchen!
Print
Olive Focaccia: Discover the Secret to Perfecting It!
- Total Time: 1 hour 40 minutes
- Yield: 12 servings 1x
- Diet: Vegetarian
Description
Olive Focaccia is a delicious Italian bread topped with olives, known for its soft texture and rich flavor.
Ingredients
- 4 cups all-purpose flour
- 2 teaspoons salt
- 1 packet (2 1/4 teaspoons) active dry yeast
- 1 1/2 cups warm water
- 1/4 cup olive oil
- 1 cup olives, pitted and sliced
- 1 tablespoon fresh rosemary (optional)
Instructions
- In a large bowl, combine warm water and yeast. Let it sit for about 5 minutes until frothy.
- Add flour, salt, and olive oil to the yeast mixture. Mix until a dough forms.
- Knead the dough on a floured surface for about 10 minutes until smooth.
- Place the dough in a greased bowl, cover, and let it rise in a warm place for 1 hour or until doubled in size.
- Preheat the oven to 425°F (220°C).
- Once risen, punch down the dough and spread it onto a greased baking sheet.
- Press the sliced olives into the surface of the dough and sprinkle with rosemary if using.
- Let the dough rise again for 20-30 minutes.
- Bake for 20-25 minutes or until golden brown.
- Allow to cool slightly before slicing and serving.
Notes
- For a more intense flavor, marinate the olives in herbs before using.
- Focaccia can be stored in an airtight container for up to 3 days.
- Experiment with different toppings like sun-dried tomatoes or cheese.
- Prep Time: 15 minutes
- Cook Time: 25 minutes
- Category: Bread
- Method: Baking
- Cuisine: Italian
Nutrition
- Serving Size: 1 slice
- Calories: 180
- Sugar: 0g
- Sodium: 300mg
- Fat: 7g
- Saturated Fat: 1g
- Unsaturated Fat: 6g
- Trans Fat: 0g
- Carbohydrates: 25g
- Fiber: 1g
- Protein: 4g
- Cholesterol: 0mg
Keywords: Olive Focaccia, Italian bread, homemade focaccia