Introduction to 4th of July Flag Cake Recipe
As the sun shines brightly and the scent of barbecues fills the air, the 4th of July brings a sense of joy and celebration. For me, this day is not just about fireworks and parades; it’s also about gathering with family and friends around a table filled with delicious food. One of my favorite traditions is baking a stunning 4th of July Flag Cake. This cake is not just a dessert; it’s a centerpiece that captures the spirit of the holiday.
When I first stumbled upon the idea of a flag cake, I was instantly drawn to its vibrant colors and festive design. The layers of fluffy cake, creamy frosting, and fresh berries come together to create a visual masterpiece that represents our nation’s colors. I remember the first time I made it; my kids were so excited to help decorate it. Their little hands carefully placed strawberries and blueberries, transforming our kitchen into a canvas of red, white, and blue.
This cake is perfect for any summer gathering, but it shines brightest on Independence Day. It’s a delightful way to celebrate our freedom while indulging in a sweet treat. Plus, it’s surprisingly easy to make! Whether you’re a seasoned baker or a novice in the kitchen, I promise you can create this show-stopping dessert.
In this article, I’ll share my cherished 4th of July Flag Cake Recipe, complete with tips and tricks that I’ve learned over the years. So, roll up your sleeves, and let’s get ready to bake a cake that will not only satisfy your sweet tooth but also bring smiles to everyone around the table!
Ingredients for 4th of July Flag Cake Recipe
Before we dive into the baking process, let’s gather our ingredients. Having everything ready makes the experience smoother and more enjoyable. I always find that when I have my ingredients prepped, it feels like I’m setting the stage for a delicious performance. Here’s what you’ll need to create this festive masterpiece!
Main Ingredients
- 2 cups all-purpose flour
- 1 ½ cups granulated sugar
- ½ cup unsalted butter, softened
- 1 cup milk
- 3 large eggs
- 2 ½ teaspoons baking powder
- 1 teaspoon vanilla extract
- ½ teaspoon salt
- 2 cups whipped cream (for frosting)
- 1 cup strawberries, hulled and sliced
- 1 cup blueberries
When it comes to the main ingredients, I always opt for high-quality butter and fresh berries. The butter adds richness, while fresh strawberries and blueberries burst with flavor. If you can, visit a local farmer’s market for the best produce. It makes a world of difference!
Optional Add-ons
- 1 tablespoon lemon zest (for a citrusy twist)
- Food coloring (to enhance the cake’s color)
- Mint leaves (for garnish)
- Chocolate shavings (for an extra touch of sweetness)
These optional add-ons can elevate your cake even further. I love adding a hint of lemon zest to the batter; it brightens the flavor and adds a refreshing note. If you’re feeling adventurous, a splash of food coloring can make your cake even more vibrant. And don’t forget the mint leaves for a pop of green; they add a lovely touch to the presentation!
Now that we have our ingredients ready, we can move on to the fun part—baking! But first, make sure you have everything on hand. Trust me, it’s much easier to bake when you’re not running around the kitchen looking for that missing ingredient!
How to Prepare 4th of July Flag Cake Recipe
Now that we have our ingredients ready, it’s time to roll up our sleeves and get baking! I find that the process of making this cake is just as enjoyable as eating it. Each step is like a little adventure, and I can’t wait to share it with you. Let’s dive into the steps to create this festive masterpiece!
Step 1: Bake the Cake
First things first, we need to bake the cake. Preheat your oven to 350°F (175°C). While it’s warming up, grease and flour two 9-inch round cake pans. This will help the cakes slide out easily once they’re baked.
In a large mixing bowl, combine the flour, sugar, baking powder, and salt. Then, add the softened butter, milk, eggs, and vanilla extract. Mix everything together until it’s smooth and creamy. I love using a hand mixer for this part; it makes the process quick and easy!
Once your batter is ready, pour it evenly into the prepared pans. Bake for about 25-30 minutes, or until a toothpick inserted in the center comes out clean. The smell of the cake baking will fill your kitchen with warmth and happiness!
Tips for Baking the Cake
- Make sure your ingredients are at room temperature for a better mix.
- Don’t open the oven door too early; it can cause the cake to sink.
- Let the cakes cool in the pans for about 10 minutes before transferring them to a wire rack.
Step 2: Prepare the Frosting
While the cakes are cooling, it’s time to whip up the frosting. In a mixing bowl, beat the whipped cream until it forms soft peaks. This is where the magic happens! The fluffy texture of the whipped cream will make your cake feel light and airy.
If you want to add a little sweetness, you can mix in a tablespoon of powdered sugar. Just be careful not to overbeat; we want it fluffy, not butter!
Tips for Making the Frosting
- Chill your mixing bowl and beaters for a few minutes before whipping the cream; it helps it whip up faster.
- Use heavy cream for the best results; it whips up beautifully!
- Feel free to add a splash of vanilla extract for extra flavor.
Step 3: Assemble the Cake
Now comes the fun part—assembling the cake! Place one cake layer on a serving platter. Spread a generous layer of whipped cream frosting on top. Then, carefully place the second layer on top. It’s like building a delicious tower!
Once the layers are stacked, spread more frosting over the top and sides of the cake. Don’t worry about making it perfect; a little rustic charm adds character!
Tips for Assembling the Cake
- Use a cake leveler or a serrated knife to trim the tops of the cakes if they’ve domed.
- Keep a bowl of warm water nearby to dip your spatula in; it helps smooth the frosting.
- Don’t be shy with the frosting; it’s what makes the cake so delicious!
Step 4: Decorate with Berries
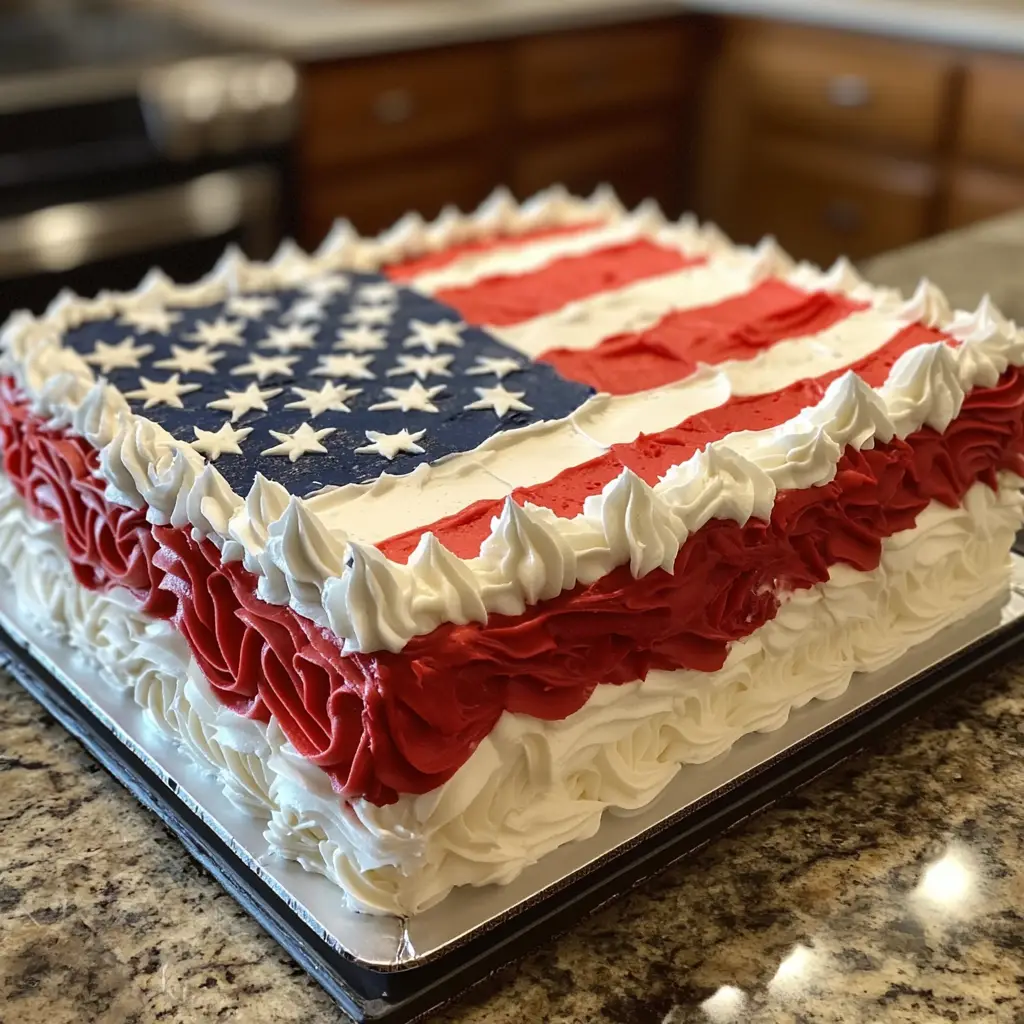
Finally, it’s time to decorate! This is where the cake transforms into a flag. Start by arranging the sliced strawberries in a rectangle on the top left corner to represent the stripes. Then, fill in the rest of the top with blueberries. The contrast of colors is simply stunning!
For an extra touch, you can sprinkle some mint leaves around the cake for a pop of green. It’s like adding a little bit of nature to your dessert!
Tips for Decorating
- Choose the ripest berries for the best flavor and appearance.
- Arrange the berries in a way that feels fun and festive; there’s no right or wrong!
- Consider adding a drizzle of chocolate or a sprinkle of powdered sugar for an extra special touch.
And there you have it! Your 4th of July Flag Cake is ready to shine at your celebration. I can already picture the smiles on everyone’s faces as they take a slice. Let’s move on to the next steps to ensure your cake is a hit!
Equipment Needed for 4th of July Flag Cake Recipe
Before we dive into the baking process, let’s make sure we have all the right tools at our fingertips. Having the right equipment can make a world of difference in your baking experience. I always find that being prepared helps me feel more confident in the kitchen. Here’s a list of the essential equipment you’ll need to create your stunning 4th of July Flag Cake!
- Mixing Bowls: A set of mixing bowls in various sizes is essential for combining ingredients. I love using glass bowls because I can see the mixture and they’re easy to clean!
- Measuring Cups and Spoons: Accurate measurements are key to baking success. A good set of measuring cups and spoons will ensure your ingredients are just right.
- Electric Mixer: Whether it’s a hand mixer or a stand mixer, this tool will make whipping the batter and frosting a breeze. If you don’t have one, a whisk will work, but it’ll take a bit more elbow grease!
- 9-inch Round Cake Pans: You’ll need two of these to bake your cake layers. If you don’t have round pans, you can use square ones; just adjust the decoration to fit!
- Cooling Rack: This is perfect for letting your cakes cool evenly. If you don’t have one, a plate or cutting board can work in a pinch.
- Spatula: A good spatula is essential for spreading frosting smoothly. I recommend a silicone spatula for easy cleanup and even spreading.
- Knife or Cake Leveler: This will help you trim the tops of your cakes if they’ve domed. A serrated knife works well if you don’t have a cake leveler.
With these tools in hand, you’ll be well-equipped to tackle your 4th of July Flag Cake. Remember, the right equipment can make the process smoother and more enjoyable. So, gather your tools, and let’s get ready to bake a cake that will wow your guests!
Variations of 4th of July Flag Cake Recipe
While the classic 4th of July Flag Cake is a showstopper on its own, I love to experiment with variations that add a personal twist. Each year, I try to surprise my family with something a little different, and it’s always a hit! Here are a few fun ideas to inspire your creativity:
- Chocolate Flag Cake: Swap out the vanilla cake for a rich chocolate cake. The deep, dark color pairs beautifully with the bright berries, creating a striking contrast.
- Gluten-Free Option: Use a gluten-free flour blend instead of all-purpose flour. It’s a great way to accommodate guests with dietary restrictions while still enjoying the festive flavors.
- Fruit-Infused Cake: Add pureed strawberries or blueberries to the cake batter for a fruity flavor. This not only enhances the taste but also gives the cake a lovely hue.
- Layered Flag Cake: Instead of two layers, bake three or four thinner layers. Alternate colors by adding food coloring to each layer, creating a rainbow effect beneath the frosting and berries.
- Ice Cream Flag Cake: For a refreshing twist, layer ice cream between the cake layers. Use vanilla and berry-flavored ice cream to keep with the theme, and serve it chilled!
These variations can make your 4th of July Flag Cake even more exciting. I encourage you to get creative and make it your own! After all, the best part of baking is sharing your unique creations with loved ones. So, which variation will you try this year?
Cooking Notes for 4th of July Flag Cake Recipe
As I’ve baked my fair share of 4th of July Flag Cakes, I’ve picked up a few cooking notes that can help you achieve the best results. These little tips can make a big difference in your baking journey, ensuring your cake turns out as delightful as you envision!
- Room Temperature Ingredients: Always use room temperature eggs and butter. This helps create a smoother batter and a fluffier cake. I like to take them out of the fridge about an hour before I start baking.
- Don’t Overmix: When combining your ingredients, mix just until everything is incorporated. Overmixing can lead to a dense cake, and we want it light and airy!
- Cooling Time: Allow your cakes to cool completely before frosting. If they’re even slightly warm, the frosting can melt and slide off. I usually let them cool for at least an hour.
- Frosting Consistency: If your whipped cream frosting is too soft, you can add a bit of powdered sugar to thicken it up. Just a tablespoon at a time will do the trick!
- Storage Tips: If you have leftovers, store the cake in the fridge. It’s best enjoyed within a few days, but I doubt it will last that long with all the smiles it brings!
These cooking notes are like little nuggets of wisdom I’ve gathered over the years. They help me create a cake that not only looks beautiful but tastes amazing too. So, keep these tips in mind as you embark on your baking adventure, and I’m sure your 4th of July Flag Cake will be a hit!
Serving Suggestions for 4th of July Flag Cake Recipe
When it comes to serving my 4th of July Flag Cake, I like to keep it simple yet festive. After all, this cake is a celebration in itself! Here are some delightful serving suggestions that will make your dessert shine even brighter at your gathering:
- Slice and Serve: Cut the cake into generous slices and serve on colorful plates. I love using red, white, and blue dishes to keep the theme going!
- Pair with Ice Cream: A scoop of vanilla or berry-flavored ice cream on the side adds a creamy contrast to the fluffy cake. It’s a match made in dessert heaven!
- Garnish with Fresh Mint: A sprig of fresh mint on each plate not only looks beautiful but also adds a refreshing touch. It’s like a little burst of summer!
- Serve with a Berry Compote: Drizzle some homemade berry compote over the cake for an extra layer of flavor. Just simmer some mixed berries with a bit of sugar until they’re soft and syrupy.
- Festive Drink Pairings: Complement your cake with refreshing drinks like lemonade, iced tea, or even a sparkling berry punch. The right drink can elevate the whole experience!
These serving suggestions are all about enhancing the joy of sharing this beautiful cake with loved ones. I can already imagine the laughter and chatter around the table as everyone enjoys a slice of this festive treat. So, gather your friends and family, and let the celebration begin!
Tips for Perfecting Your 4th of July Flag Cake Recipe
As I’ve baked my fair share of 4th of July Flag Cakes, I’ve learned a few tips that can truly elevate your baking experience. These little nuggets of wisdom can help you create a cake that not only looks stunning but tastes absolutely divine. Here are my top tips for perfecting your 4th of July Flag Cake:
- Prep Ahead: Take some time to prep your ingredients before you start baking. Measure out your flour, sugar, and other ingredients. This makes the process smoother and more enjoyable, like a well-rehearsed performance!
- Use Fresh Ingredients: Fresh berries and high-quality butter can make a world of difference in flavor. I always make a trip to the farmer’s market for the ripest strawberries and blueberries. They add a burst of freshness that’s hard to beat!
- Chill Your Tools: For the best whipped cream frosting, chill your mixing bowl and beaters before whipping. This helps the cream whip up faster and achieve that perfect fluffy texture.
- Layer with Love: When assembling your cake, take your time to spread the frosting evenly. A little patience goes a long way in creating a beautiful finish. Remember, it doesn’t have to be perfect; a little rustic charm adds character!
- Experiment with Flavors: Don’t be afraid to add your own twist! Whether it’s a hint of lemon zest or a splash of vanilla, these small additions can enhance the overall flavor and make the cake uniquely yours.
With these tips in your back pocket, you’ll be well on your way to creating a 4th of July Flag Cake that will impress your family and friends. Baking is all about joy and creativity, so have fun with it! I can’t wait to see how your cake turns out!
Breakdown of Time for 4th of July Flag Cake Recipe
When it comes to baking, timing is everything! I’ve learned that having a clear idea of how long each step takes can help you plan your day better. Here’s a quick breakdown of the time you’ll need to create your stunning 4th of July Flag Cake:
- Prep Time: Approximately 30 minutes. This includes gathering your ingredients, measuring them out, and preparing your baking pans. I always find that this time flies by when I’m excited to bake!
- Cooking Time: About 30 minutes. This is the time it takes for your cake layers to bake to perfection. The aroma wafting through your kitchen will make it feel like a celebration already!
- Cooling Time: 1 hour. Allowing your cakes to cool completely is crucial before frosting. I usually take this time to clean up my kitchen and get everything ready for the fun part!
- Assembly and Decorating Time: 30 minutes. This is where the magic happens! Layering the cake, frosting it, and decorating with berries is the most enjoyable part of the process.
Total Time: Approximately 2 hours. With a little planning, you can have this beautiful cake ready to impress your guests in no time!
Knowing the time breakdown helps me stay organized and makes the baking experience even more enjoyable. So, gather your ingredients, set your timer, and let’s get baking! I can’t wait for you to taste this delightful cake!
Nutritional Information for 4th of July Flag Cake Recipe
As a passionate home cook, I believe that enjoying a delicious dessert doesn’t have to come with guilt. While my 4th of July Flag Cake is a treat meant for celebration, it’s good to know what we’re indulging in. Here’s a general breakdown of the nutritional information per slice, assuming the cake is cut into 12 servings:
- Calories: Approximately 250
- Protein: 3g
- Carbohydrates: 35g
- Fat: 12g
- Saturated Fat: 7g
- Cholesterol: 50mg
- Sodium: 150mg
- Fiber: 1g
- Sugar: 20g
These values can vary based on the specific ingredients you use, especially if you opt for low-fat or sugar-free alternatives. I often find that using fresh, high-quality ingredients not only enhances the flavor but also makes me feel better about what I’m serving. Remember, moderation is key, and sharing this cake with loved ones makes it even sweeter!
So, as you prepare to bake this festive delight, keep in mind that it’s all about balance. Enjoying a slice of this beautiful cake while celebrating our nation’s independence is a wonderful way to create lasting memories. Happy baking!
Frequently Asked Questions about 4th of July Flag Cake Recipe
As I’ve shared my beloved 4th of July Flag Cake Recipe with friends and family, I’ve noticed a few common questions pop up. It’s always great to clarify any doubts and help fellow bakers feel more confident in the kitchen. Here are some frequently asked questions that might help you as you embark on your baking adventure!
Can I make the cake ahead of time?
Absolutely! You can bake the cake layers a day in advance. Just make sure to wrap them tightly in plastic wrap and store them in the fridge. This helps keep them fresh and moist. When you’re ready to assemble, simply let them come to room temperature before frosting.
What if I don’t have whipped cream for frosting?
If whipped cream isn’t available, you can use store-bought frosting or make a simple buttercream. Just beat together softened butter, powdered sugar, and a splash of milk until you reach your desired consistency. It’ll still taste delicious!
Can I use frozen berries instead of fresh ones?
While fresh berries are ideal for this cake, you can use frozen berries in a pinch. Just make sure to thaw and drain them well to avoid excess moisture. They may not look as vibrant, but they’ll still taste great!
How do I store leftovers?
To keep your cake fresh, store any leftovers in an airtight container in the fridge. It’s best enjoyed within a few days, but I doubt it will last that long with all the smiles it brings!
Can I customize the design of the flag cake?
Of course! The beauty of this cake is that you can get creative with the design. Feel free to arrange the berries in different patterns or even add other fruits. It’s all about making it your own and having fun with it!
These questions are just a few of the common inquiries I’ve encountered while sharing my 4th of July Flag Cake Recipe. I hope this section helps clear up any uncertainties you might have. Remember, baking is all about joy and creativity, so don’t hesitate to experiment and make this cake your own!
Conclusion on 4th of July Flag Cake Recipe
As we wrap up our journey through the delightful world of the 4th of July Flag Cake, I can’t help but feel a sense of pride in sharing this recipe with you. This cake is more than just a dessert; it’s a celebration of our nation’s colors and a symbol of togetherness. Each slice is a reminder of the joy that comes from gathering with loved ones, sharing laughter, and creating lasting memories.
The vibrant layers, fluffy frosting, and fresh berries come together to create a stunning centerpiece that will surely impress your guests. Plus, the ease of preparation makes it accessible for bakers of all skill levels. Whether you’re a seasoned pro or just starting out, this cake invites you to unleash your creativity and make it your own.
So, as you prepare to bake your own 4th of July Flag Cake, remember that it’s not just about the final product. It’s about the love and joy you put into each step of the process. I hope this recipe brings as much happiness to your table as it has to mine. Happy baking, and may your Independence Day be filled with sweet moments and delicious treats!